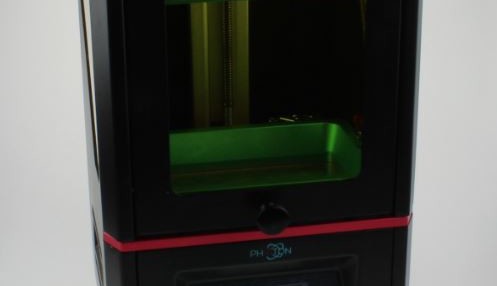
The Anycubic Photon is a DLP 3D-printer. UV light projects an image from underneath a transparent bath containing liquid resin, that then builds the object layer by layer. Elektor LABS has taken a closer look at this printer some time ago. Now there is a successor model - the Anycubic Photon S!
What we say about this printer after using it for a while in our Lab? In brief: we are enthusiastic about the quality and the ease of use. The so-called DLP printer (Digital Light Processing) is robustly constructed from aluminium, and prints very detailed objects just about plug & play. Now there is even a successor model that comes up with further advantages.
The Anycubic Photon is a DLP 3D-printer that prints objects using a liquid resin. UV light projects an image from underneath a transparent bath, containing a liquid resin, that then builds the object layer by layer while slowly raising the platform. Compared to the conventional FDM 3D-printer, using a hot nozzle to extrude plastic wire into a particular shape, this is actually a simple process without many moving parts (only the Z-axis moves up and down).
The printing is straightforward. You first load the object you made or an STL file into the supplied, complementary copy of the Photon slicer software and send it to the printer using a USB stick or directly from the PC. You then level the printer, set the print bed to the correct height, fill the bath for a quarter with resin and start the printer. When you return after a few hours, the printed object is ready.
Currently the Anycubic Photon is one of the cheapest DLP printers on the market. Certainly if you would like to print objects with a resolution of 25 to 100 µm. We are not quite ecstatic, but this is many times more accurate than ordinary FDM printers. However, you will have to take into account the additional cleaning required to remove the surplus resin from the liquid bath and from the printing platform.
Also, the adjustment of the the printing platform with respect to the LCD screen requires a bit of practice. But once you become familiar with the procedure we found no difficulties with it.
Resins
On the bottom of the platform sits a printed ring.
One disadvantage is that the resin is not cheap! You can find low-cost resins online, but not all resins are created equal. In our test we used the supplied Anycubic transparent green resin with a volume of 250 ml. This works very fast (8-10 seconds per layer) and maintains the details very well. For example, we printed a model of the Eiffel Tower with a framework of 0.3 mm. Also the printing of accurate circles and arcs is not a problem.
By the way, the resin is available in various colours. The leftover resin is also reusable, once you are finished with it you pour the resin back into the bottle, but only after you have filtered out any small pieces of dirt. The resin has a shelf life of about 12 months, provided it is stored in a cool dark place. It is important that you wear gloves during this process and avoid contact with the resin. Open the windows in the room where you are printing, because the liquid has a reasonably strong odour.
Once you have finished printing, the product has to be rinsed in alcohol to remove any resin residue. After that, the product has to cure for a while in daylight or optionally using a UV lamp.
Details are clearly visible in the printed objects.
Good to know
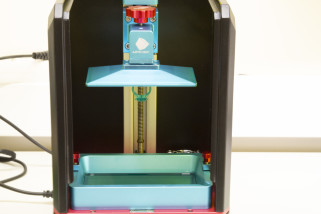
The liquid bath in the printer has to be level and the print platform has to be firmly in place. Because of the strong suction force between the bottom of the bath and the platform it can be pulled out of alignment during printing and therefore also distort the object.
The platform of the Photon is quite small, with a length of 115 mm, width of 65 mm and a height of 155 mm. As a consequence you will not be able to print larger object in one go, but if you design the object in parts then you can assemble it like a kit set.
It doesn't matter whether you have 20 separate copies of an object or only one, the build time remains the same. With an FDM printer that is not the case; the larger the number of items on the platform, the longer it takes to build them. It is therefore worthwhile to load the platform with as many objects as possible for each printing job.
The use of resins with different colours has a great influence on the time required by the printer. Clearer, more transparent resins require a shorter exposure time compared to darker, less transparent resins. So the printing time and also the final curing time of darker colours is therefore longer than that of transparent resins. You need to take these variables into account.
Advantages
- Very affordable compared to other DLP 3D printers
- Easy to use and adjust
- Produces prints of high quality with an impressive resolution of 25 to 100 µm
- Compact and efficient size
- Adequate instructions for assembly, cleaning, etc.
- Free slicer software that works quite well
Disadvantages
- Relatively small volume for objects to be printed (L, W, H: 115 mm, 65 mm, 155 mm)
- Use of sticky resin can make 3D printing messy
- Finishing off (rinsing and curing) of the objects requires much patience and additional time
- Cleaning of the printer is time consuming
- Personal safety equipment is essential, but that is also provided.
Final verdict
Everything considered we were pleasantly surprised how well the Anycubic Photon worked, both regarding print quality as well as ease of use. In a market where most alternatives are priced well above 1,000 euros, we found this machine an ideal introduction to DLP 3D printing for beginners as well as experienced makers. When we look at the price/quality ratio then this is certainly one of the better choices on the printer market.
Anycubic Photon S, what has changed compared to the Anycubic Photon model?
From the outside, both devices are similar. The improvements can be found inside.
Both machines have a 2560 * 1440 pixel resolution monochrome display for imaging, the maximum print speed of 20 mm/h is also identical.
However, the available volume of the Anycubic Photon S has been increased to 115 mm * 65 mm * 165 mm (the Anycubic Photon offers only 115 mm * 65 mm * 155 mm).
In the course of increasing the overall height, the internal mechanics were also reworked. The Z-axis has been strengthened by using a dual linear guide, allowing for smoother surfaces and a more detailed print.
One adjustment that would only be visible when disassembling the unit concerns the UV light transillumination of the display for printing. Whereas the Anycubic Photon still used a diffuser, a matrix arrangement of UV sources ensures more uniform illumination. This achieves an optimised print result.
The Anycubic Photon S uses active carbon filtration with two fans to reduce odours during operation. The operating noise has also been optimised compared to the Anycubic Photon.
Read full article
Hide full article
Add a rating to this article
★★★★★
★★★★★
Page 1 / 1
Login
No account yet?Register for free!
Forgot password?
Please enter your email address. Instructions for resetting the password will be emailed to you now.


Discussion (1 comment)