
Review: Experimenter's Briefcase for Raspberry Pi
on
The contents
The big question, of course, when unpacking the JoyPi experimenting briefcase is: “What's in there?” After opening the briefcase (Figure 1) a few remarkable features catch the eye. The lid contains a 7” IPS touch screen with a resolution of 1024x600 pixels; hiding above that is also a two-megapixel webcam.

The actual experimenting board with all the components is found in the other half of the briefcase; the top left corner has space for the Raspberry Pi, which naturally is the heart of every experiment. The first impression of this experimenting board gives a somewhat cheap appearance, but on closer inspection it is nevertheless well organised and sturdily built. The labelling of the various components is clear and leaves no room for misunderstandings.
A variety of components are to be found on the board. The displays are immediately obvious: in addition to the 7” display in the lid, the JoyPi has three other displays on board – an 8x8 LED matrix, a 2x16 LCDisplay and also a 4-digit 7-segment display.
Remarkable too are the 4x4 matrix keyboard and the 4 separate pushbuttons that are freely available for use. With these it is convenient that the address is printed next to the buttons – this makes their use much easier. And then there are also two 8-way DIP switches that are used to turn the modules on the board on and off. Finally, in the middle is a small breadboard where things like LEDs, resistors and such can be plugged in.
The briefcase not only contains displays and buttons but also a whole array of sensors that are a pleasure to experiment with (Figure 2):
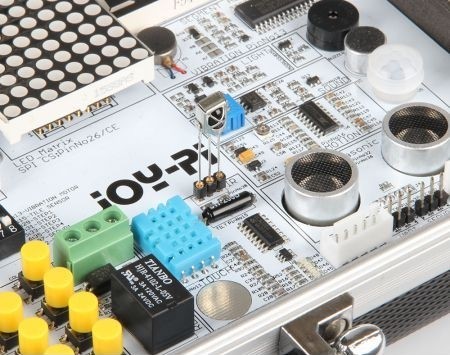
- light sensor (BH1750)
- sound sensor (i.e. a microphone)
- motion sensor (LH1778)
- ultrasonic sensor
- angle sensor (SW-200D, ‘tilt sensor’)
- infrared sensor (functions with the supplied IR remote control)
- touch sensor
- temperature and humidity sensor (DH11)
This is all fantastic, but that is not even the end of it. The case also contains a few modules, including a buzzer, relay and (very nice) an RFID/NFC module. Super-convenient are the GPIO LEDs that are used to check whether the sensors in an experiment are actually sending data to the Raspberry Pi. And finally there are also connections for a stepper motor, a servo motor and, of course, the power supply for everything.
The briefcase is also supplied with a number of accessories:
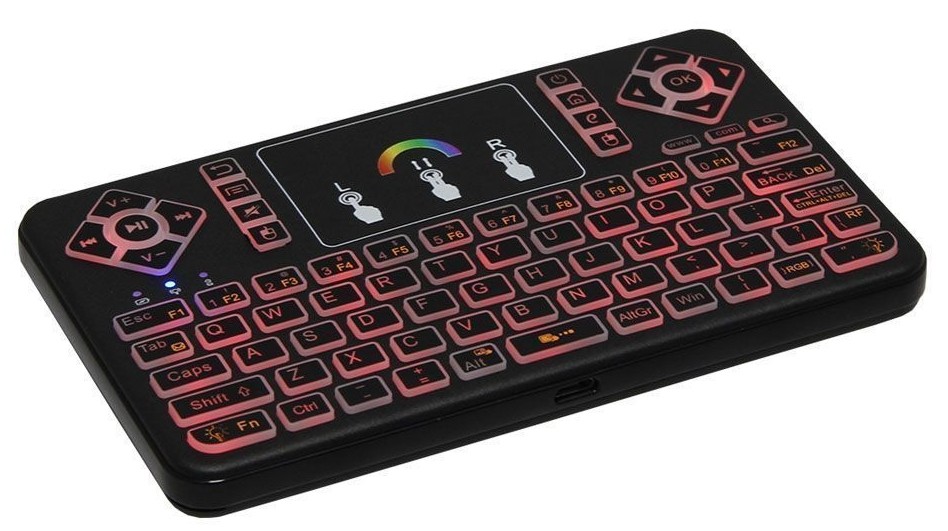
- wireless mini RGB keyboard (Figure 3)
- power supply (12 VDC, 2 A)
- GPIO cable
- microSD card (32 GB, with pre-installed operating system)
- servo motor
- stepping motor
- RFID key fob
- RFID card
- USB cable
- remote control
A quick-start manual is also included that gives a brief and succinct description of how to start using the briefcase, what the configuration options are for the DIP switches (and not unimportant: how you can contact Joy-iT, the manufacturer of the JoyPi experimenting briefcase).
And then now its practical use
After unpacking it I got started right away; I used a Raspberry Pi 3B+ for this (just to be clear: the JoyPi experimenting briefcase is not supplied with a Raspberry Pi and requires a Raspberry Pi 3B, 3B+ or 4B). The extensive manual with example code is a separate download from the Joy-Pi website [1]. The manual is in German; an English manual is being worked on at the time of writing.
The latest image for the Raspberry Pi 3B and 3B+ can also be downloaded from the website, as well as the most recent versions of the Python scripts.
After connecting the Raspberry, and with the manual in hand, I started with the tasks. A total of 21 examples are described in which each component in the briefcase is used at least once. It starts relatively easy with a simple script for using the buzzer. Each example is accompanied by a description, the Python script with comments and a description of how to activate the script. The Python scripts become gradually more complex and longer – and of course also the descriptions in the manual. However, a minor fault is that in one example LEDs have to be mounted on the breadboard – but these LEDs are not supplied. This is a pity, of course, because not everyone will have these on hand.
The wireless keyboard that is supplied with the experimenting briefcase is quite a nice gadget, but with extensive use a ‘normal’ keyboard and a real mouse will be a lot more comfortable to use. Fortunately these can be connected without any problems.
Conclusion
The JoyPi experimenting briefcase is a nice introduction to the world of Raspberry Pi and is certainly recommended for a beginning student or serious hobbyist. The examples can be used as building blocks for your own projects; this way you can achieve very nice results. The quality of the experimenting briefcase is good; you certainly obtain value for money.
Want more great Elektor content like this?
Then take out an Elektor membership today and never miss an article, project, or tutorial.
Discussion (1 comment)