
Review: PeakTech 1265 Digital Oscilloscope
on
Unpacking
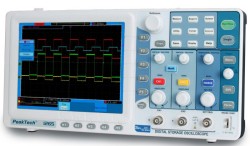 On taking it out of the box, I immediately noticed that the mains power supply is built in but nonetheless this PeakTech 1265 oscilloscope is very light… A good argument for taking it with you. The size of its large screen of 8 inches (20 cm) with a resolution of 800 x 600 pixels seems to have become the norm for this type of instrument, maybe soon it will not be worthy of mention. I found later that the contrast is very high and the available screen surface is very well used, but I’m getting ahead of myself.
Back to the box. In addition to the two probes supplied, I found two BNC-BNC cables, that’s the first time I have found accessories like that supplied as standard with an entry level scope! Nice.
Warnings
 The manufacturer warns us: don’t connect the oscilloscope to a PC (neither with USB nor Ethernet) if the signal you’re measuring is above 30 Vrms (42 V DC). Because in case of errors in settings (probe mistakenly left in the 1:1 position for example) your computer might let the smoke out. I would have put a red label on the front panel as a reminder…
The user manual mentions a bandwidth reduced to 5 MHz when the probe is in the 1:1 position. This type of information is rarely communicated, and it’s good to do so. On my side, and with the probes properly calibrated, I found a bandwidth of 17 MHz at –3 dB in the 1:1 position, and 42 MHz in the 1:10 position. Better than the specified values.
Starting up and first impressions
I switched the instrument on (with a real button that completely cuts off the supply) and to my surprise got a black screen and total silence. Had I been given a defective sample? No, just wait 3 seconds for the screen to show something. It’s then that I realized the silence was palpable. A modern oscilloscope without a fan, I’d forgotten that such things exist! Thank-you, PeakTech!
 After several relay clicks, two traces appear. Pretty much all the screen is put to use, the configuration parameters (vertical sensitivity, time, trigger threshold) are discreetly displayed at the bottom to leave maximum space for the traces. Which is good. The menus are in a language that I don’t understand and which I quickly modify. Utility button (control panel at right), Menu, Language (button H2 under the screen)… but no French for me. Happily there is English.
As I usually do, I press everything to get hands-on. The buttons need a firm push, which gives an impression of being robust. The knobs of the optical encoders for the vertical and horizontal scales are notched, the others not.
The vertical sensitivity goes down to 5 mV/div, with a noise floor of around1 mV without the probes connected. I’ve seen better, but this will do if the signals being measured are of sufficient amplitude (say greater than 20 mV).
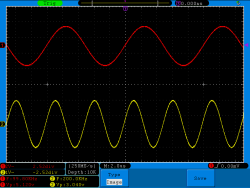
Channel 1 = various random signals
Channel 2 : Nothing.
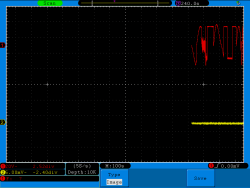
The time base can be set between 5 ns/div and 100 s/div. At this last setting, a slowly changing signal (representing a temperature for example) can be seen over a period of 25 minutes with a single screen, by reason of taking 5 measurements per second. Nice, but the 600 pixels of the screen size allow only 1500 samples to be shown (internal storage of all the samples is possible, however, in mode Wave). Above 100 ms/div, the display mode switches to 'roll' mode, new data is displayed at the right of the screen and moves towards the left. It’s a minimal guaranteed activity that leave the user in no doubt, even for high values of timebase.
Discussion (2 comments)