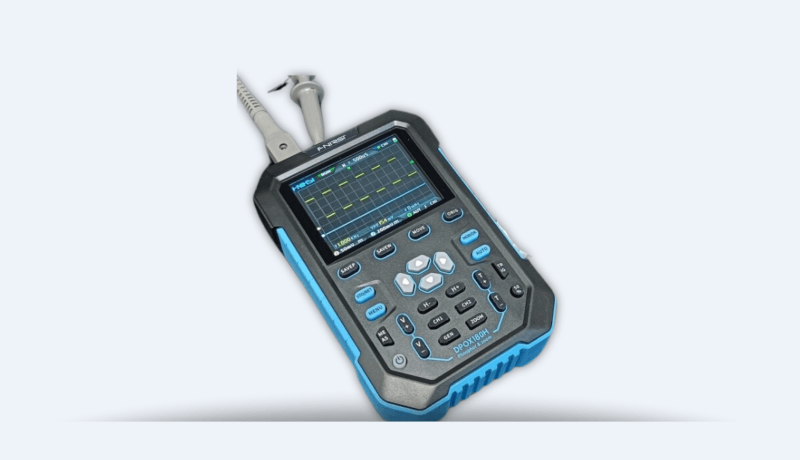
FNIRSI DPOX180H 2-in-1 Digital Phosphor Oscilloscope
The Fnirsi DPOX180H 2-channel handheld 180 MHz digital sampling oscilloscope fits in the pocket of your coat, weighs 285 g and retails for less than €150. It features all the functions you would expect from a basic scope and even includes a 20-MHz arbitrary waveform generator.
Oscilloscopes sure have made a lot of progress over the past two decades. Twenty years ago, I still used my single-beam analog 20 MHz CRT oscilloscope occasionally because it was relatively small and not so heavy to carry around when working in the field. I had bought it another twenty years earlier for almost €1000 (converted to today’s money). Today, I received the Fnirsi DPOX180H 2-channel 180 MHz digital sampling oscilloscope that fits in the pocket of my coat, weighs 285 g and retails for less than €150. It even includes a 20 MHz arbitrary waveform generator.
Plain Vanilla
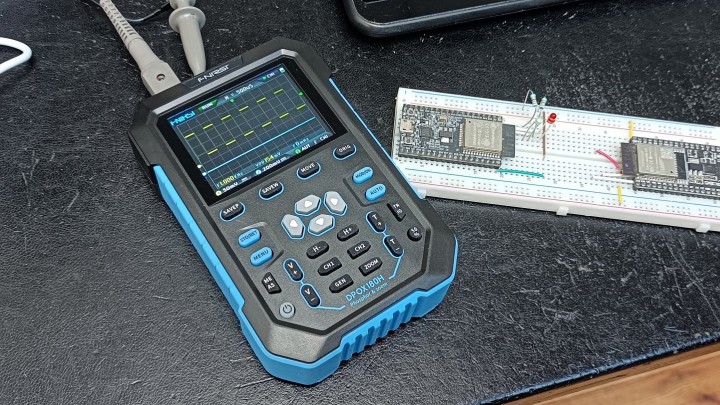
The DPOX180H is a handheld 2-channel oscilloscope measuring 142 mm × 92 mm × 39 mm. It features all the functions you would expect from a basic scope. It has a vertical range from 5 mV up to 10 V and a horizontal range from 5 ns up to 50 s (see below). Triggering options are limited to automatic, manual, and single with rising or falling edge, plus three HF rejection levels (four if you count off). The input channels have AC or DC coupling (no GND) and accept 1×, 10× and 100× probes. A hardware low-pass filter can be enabled to limit the analog bandwidth to 20 MHz. The only fancy option here is FFT display that overlays a real-time spectrum of the signal. The ‘Param measure’ menu offers some more automatic measurements, but again, nothing fancy.
The Fnirsi DPOX180H is perfect when desk space is tight.
Buttons and Knobs
Oscilloscopes need buttons and knobs. The DPOX180H has 26 pushbuttons – including an ‘Auto’ setup button – that greatly speed up navigating through its settings. A ‘Menu’ button provides access to everything (except for the signal generator), but if that had been the only way, the instrument would have been difficult to use. Therefore, the people at Fnirsi have provided shortcut buttons that open submenus directly. The trigger and channel menus have their own shortcut button, and so does the measurement menu. The signal generator too has its own button, which is quite practical.
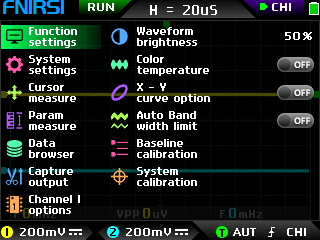
A colorful menu with many options.
Trace Control
Knobs are replaced by Up/Down buttons. There is a pair for the vertical scale and a pair for the horizontal scale, with a third pair for the trigger level. Furthermore, four arrow keys allow moving the traces up and down and left and right. The ’Mod/OK’ button determines which channel is controlled by the arrow buttons. The ‘Move’ button toggles the speed of these button pairs between slow and fast, again a feature to speed up parameter adjustments. Pressing the ‘Orig’ button moves the traces back to zero; a ‘50%’ button moves the trigger level to 50%. The ‘Zoom’ button lets you zoom in on a part of the signal. The ‘H+’ and ’H−’ buttons control the zoom level.
In normal operating mode, the ‘Sto/Ret’ button stops or starts the traces. In menu mode, it is a return button. The ‘Mod/OK’ button is the confirm/select button in menu mode.
Subscribe
Tag alert: Subscribe to the tag Test & Measurement and you will receive an e-mail as soon as a new item about it is published on our website!
Image and Waveform Capture
Finally, the ‘SaveP’ and ‘SaveW’ store screen (’P’icture) and data (’W’aveform) captures. The DPOX180H has space for plenty of captures. Screen capture also works in menu mode, so you can take pictures of your settings. This might be helpful as the scope does not save its settings on power down. It is possible to store a set of settings by going into the menu, but that is a bit tedious. A Data browser is available for managing and viewing captures.
Brilliant Display
The DPOX180H is marketed as a phosphor oscilloscope. Phosphor refers to its display. What exactly it adds to the display, I don’t know (leave a comment if you do), but the result is a display with a remarkable viewing angle and pleasantly bright colors. There are no dead angles, you can see what’s on the display at any angle below 180° and from every direction. Display updates are superfast.
Adjustable zoom function.
More Strong Points
The Fnirsi DPOX180H has a few more strong points than the ones mentioned so far:
The instrument powers up fast; it is ready for operation in about four seconds.
The user interface is quite intuitive; the pushbuttons are well-chosen. You don’t need the manual to understand how to use it. If you need to look something up, you can because a printed manual is included.
Color temperature option provides persistence.
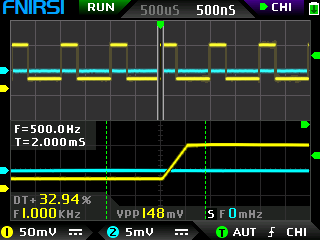
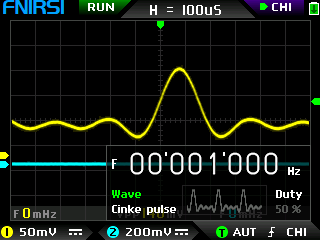
There is an interesting waveform capture and replay feature. You can capture a part of a trace and use the signal generator to replay it as a waveform. In the menu, this function is called ‘Capture output’, in the manual it is ‘Clipping wave’.
Excellent build quality and good mechanical design with the right dimensions, not too small, not too large and not too heavy.
Its price.
Did I mention the display? It is great.
Signal Generator Built In
The DPOX180H has a basic arbitrary waveform generator built in. It can generate sine waves up to 20 MHz and other waveforms up to 10 MHz. As mentioned above, it is also possible to load the signal generator with a waveform captured from a signal trace. Only the frequency of the output signal can be controlled, not the offset nor the amplitude (which is about 1.50 V peak-peak (centered around 1 VDC) and drops a bit for higher frequencies). The duty cycle is adjustable for square (rectangle/pulse) waves. The output is on two tabs between the probe connectors.
The signal generator menu.
Software Issues
Even though the DPOX180H has some impressive features, especially considering its price, it does have a few weak points. Most of these are software-related, and they may be addressed by future firmware updates. I ran my tests after upgrading the firmware to version V40.
On a few occasions, when playing around with the arrow keys, the device hung, and I had to switch it off and back on again to get it going again. This is not dramatic, except that the device doesn’t keep its settings over power cycles, meaning that you must readjust everything to get back to where you were before the hang-up. Note that hanging occurred only when the device was cold. It didn’t happen again during my six-hour test drive.
Display is Data Buffer?
Another issue with moving traces is that when you move one up, it clips against the top of the screen. The part that should become invisible becomes a horizontal line instead, and the user gets confused. That this is more than a just display issue is shown by the automatic measurements and FFT trace. These values appear to be calculated from what you see on the screen instead of from the real data. As an example, the peak-peak value of a trace becomes 0 when the trace is moved off the screen (and becomes a horizontal line at the top of the display). The spectrum of a signal also changes when parts of it fall off the screen. Therefore, for the automatic measurements to be correct, make sure the signal fits on the screen.
The trigger level moves along with the trace, but keeps going even when the trace has stopped moving up or down. Triggering is then lost, and you have to readjust it. Pressing ‘Orig’ moves both the trace and the trigger level to 0, again making you lose your trigger point.
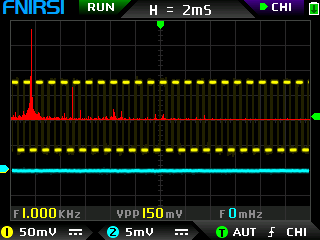
Real-time FFT.
Where is the 50 s/div Option?
The horizontal scale is specified to extend to 50 seconds per division. However, the ’H−’ button stops at 20 s/div. To get to 50 s/div, you must press it again, followed by a press of an arrow key. Related to this issue is the fact that the keyboard becomes unresponsive starting at 20 s/div, and it is complicated to leave this mode. It appears that pressing the ‘H+’ key once or several times followed by an arrow key after a few seconds does the trick; sometimes it is easier to switch the device off and on again. The problem seems to be that most of the keys are only read after a complete sweep has been done. At 50 s/div, this corresponds to 10 minutes before such a key press is processed…
No Timestamps
A minor issue is that the DPOX180H doesn’t seem to keep track of the time and date. Why would it? you may wonder, but the result is that captured files all have the same time and date (21/11/2021 12:00 in my case).
Unpractical Connector
A last thing that I would like to mention is the signal generator output connector, or rather tab. Instead of a BNC connector, it is on two testpoint-like tabs (signal and GND), like the probe calibration tabs found on many oscilloscopes. It is fine for calibrating a probe but connecting it to a circuit under test is a challenge.
Easter Eggs?
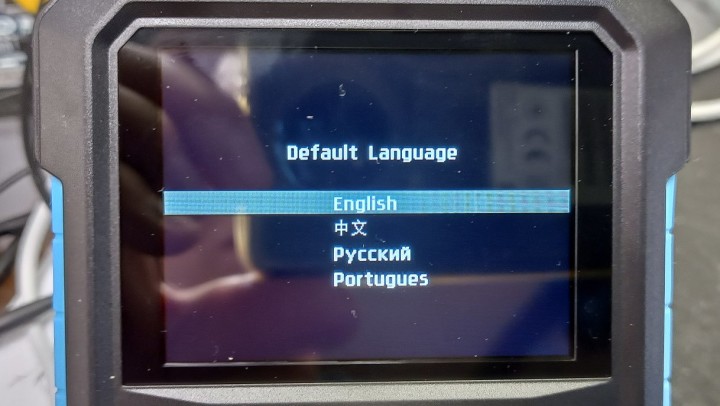
As a last note: the user interface is in English, but the device can be switched to either English, Chinese, Russian or Portuguese (the same languages as in the user manual). To do so, press the ‘Move’ button during power up. I don’t think this is mentioned in the user manual, at least I didn’t see it. Similarly, if you press the ‘Menu’ key during power up, the device will enter firmware update mode. This is a shortcut to put the device in USB thumb drive mode and access the files stored on it.
Press 'Move' during power up to enter language selection mode.
DPOX180H: A Great Value!
Even though the DPOX180H has a few weak spots (that could be corrected at least partly by a firmware update), they are outweighed by its strong points and especially its price. I may not be doing the DPOX180H justice, but I didn’t bother to check if the instrument goes all the way to its specifications. People working at almost 200 MHz probably want better triggering and more trace control options anyway. This scope is, however, a great tool for maintenance engineers, makers, and hobbyists tight on space and/or money. Its size is almost perfect, and it is easy to use. In short, great value for money. And I love the display.
Subscribe
Tag alert: Subscribe to the tag Review and you will receive an e-mail as soon as a new item about it is published on our website!
Elektor Magazine has been one of the leading sources of information on electronics for engineers, designers, start-ups and companies for 65 years. Our magazine is powered by an active community of electronics engineers – from students to professionals – who are passionate about designing and sharing innovative ideas.
For them, we publish hundreds of items a year, in formats such as articles, videos, webinars, and other learning formats. Our mission is to share knowledge in every possible way and inspire readers with the latest developments within the electrical engineering sector.
Thank you for your vote!
Leave further comments in the fields below.
Thank you for your vote!
If you wish to leave a comment with your rating, please first use the login below. If not, just close this window.

Discussion (4 comments)