
Review: Elektor/Make: Sand Clock Kit
A small hitch
After the first powering up of the Arduino and the shield, and well before the final assembly, the servos are placed in the mid position by the program (sketch). The manual suggests to verify the servos individually before continuing. It’s an advice which I recommend to follow, you’ll see why after reading the following.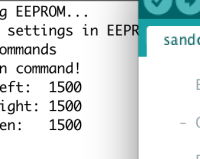 When the time comes to communicate with the Arduino via the serial monitor, this will give an error message (Invalid settings in EEPROM) which is not surprising, because the first time, there are no default values in the EEPROM. On this point also, the manual is clear.
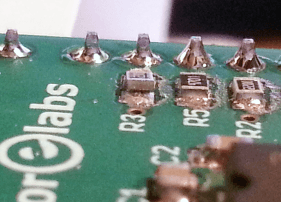
The problem was resolved with a touch of the soldering iron! So add a magnifying glass to your list of tools, even if the possibility of a misadventure like mine is very small.
In the course of repeated manipulations during the course of this faultfinding, I found that the USB cable was a little short. To facilitate my maneuvers, I found one which was longer. The cables to the vibrating motors were not long enough to comfortably rest the tray of sand flat (with the sand in it). One solution would be to lengthen these wires. I didn’t do it, because disassembly is an awful lot of work.
Conclusion
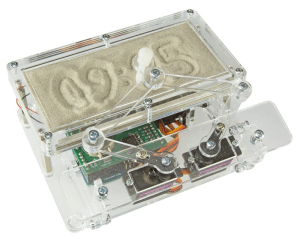 This kit is a beautiful project in every respect. The clock does exactly what it is supposed to do… and even a bit more, because in smoothing the sand it emits every minute an unmistakable sound! It’s a fascinating gadget for children and adults alike. The program (sketch) is not only richly commented, but offers in addition a number of commands for the pantograph and some drawing functions which have nothing to do with the sand clock. If you are not interested in those yourself, I’m sure you will find someone in your circle who will enjoy discovering these functions.
The fine-tuning of the servo calibration to control the stylus is an interesting exercise once the assembly is finished. One is easily drawn in to this and it’s as good a way as any to start programming with the Arduino. It seems to me that not the least of the merits of a gadget like the sand clock is to draw attention to these possibilities.
Realizing a happy marriage between clever mechanics, electronics and programming with the Arduino sauce, this amazing kit seems to me to offer an excellent support for beginners.
Read full article
Hide full article
Discussion (17 comments)