
Small Circuits Revival (38): Alcotest Alcohol Tester
on
Alcotest
Idea: Elex Team
A beer or two in the garden or on the balcony at the height of summer is an enjoyable conclusion to a busy week. But, with the sun shining, a cool breeze, and the smell of summer, it is all too easy to lose count. Therefore, it might be a good idea to build our Alcotest alcohol tester for use before attempting any complicated post-pint soldering.
A word of warning in advance - this is not a calibrated alcohol tester like our uniformed friends (’Allo ’allo ’allo, what’s going on here, then?) use to judge whether or not someone loses their driver's license. This is just a simple circuit that allows you to test how steady your hand is (still). We guarantee that, after the third beer, it is less steady than it was after the second...
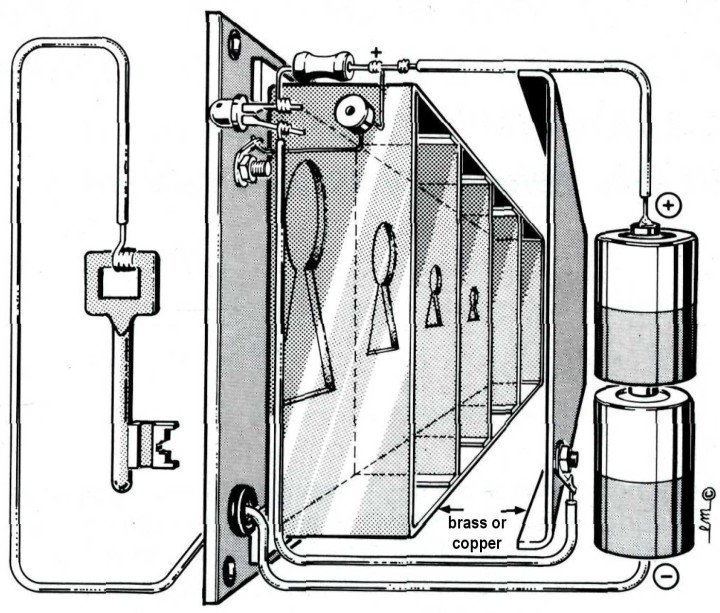
What you will need: a DC buzzer that makes a lot of noise at a voltage of about 3 V, a red LED and 68 Ω series resistor, two 1.5V batteries, some pieces of brass or (soft) copper, and a sprinkling of craftsmanship. The 'schematic' is drawn in Figure 1.
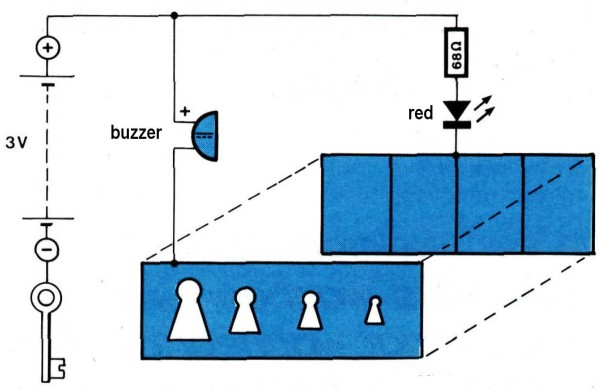
We don't have to spend a lot of time on the intended use. The goal is to put the (metal!) key through smaller and smaller keyholes in a row so that it touches the back plate. Current can then flow through the LED so that it lights up.
The 'trick' is of course that the key should not touch the edge of the keyhole as then the buzzer will sound. And, as the beer level rises, this becomes more and more difficult...
In Figure 2 we have a sketch of a possible construction approach; our older readers will immediately recognize the hand of the late Laurent Martin who (many years ago) provided Elektor and Elex magazines with the most beautiful constructional drawings.
One final remark: this application and circuit can, of course, be used at times other than beer-o'clock, making it highly suitable as a game at children's parties or anything like that!
Discussion (0 comments)