
Review: The Velleman CS400 Metal Detector
Firing it up
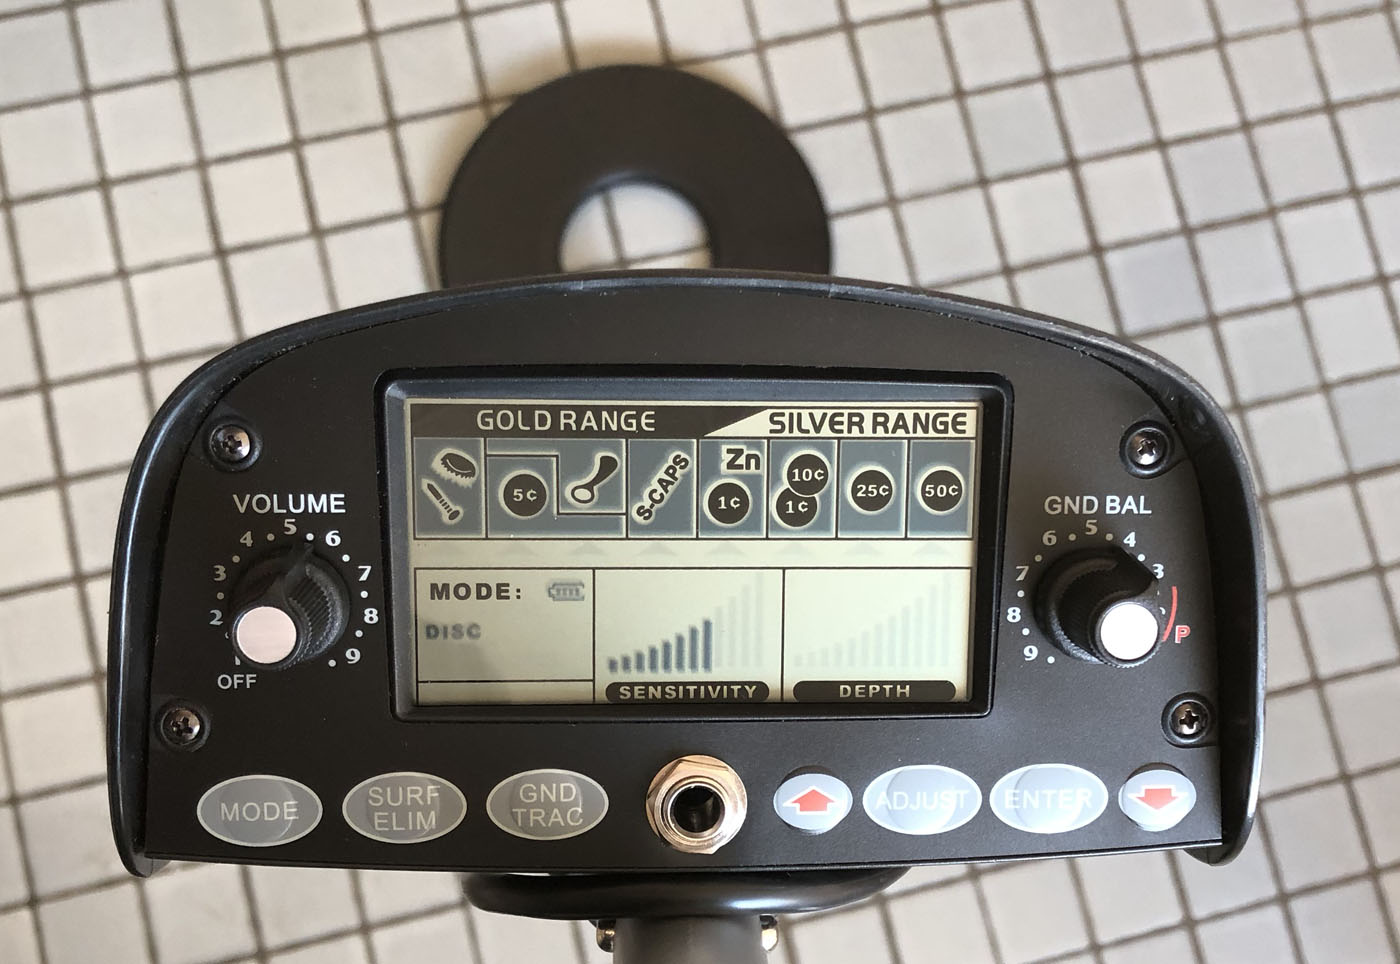
The time to assemble the complete kit took me less than 15 minutes. The volume control knob also incorporates the on/off switch so I adjusted the volume and heard a tone indicating that it was working. The unit powers up in a default setting giving medium sensitivity and standard mode. On the right of the display a scale labeled ‘Depth’ was showing zero, indicating that a metallic object was very close to the search coil. Looking down at the search coil resting on the thick carpet I thought this was a bit puzzling before it dawned on me that the floor beneath the carpet is actually made from concrete with a steel reinforcement mesh.With any new piece of equipment it’s natural to want to twiddle all the knobs switches without recourse to the manual. Unless you are a seasoned detectorist you will probably not be able to make the necessary adjustments to get the best performance from the detector.
Read full article
Hide full article
Discussion (0 comments)