


Assembling the Elektor 3D Circular Christmas Tree
December 20, 2023
on
on
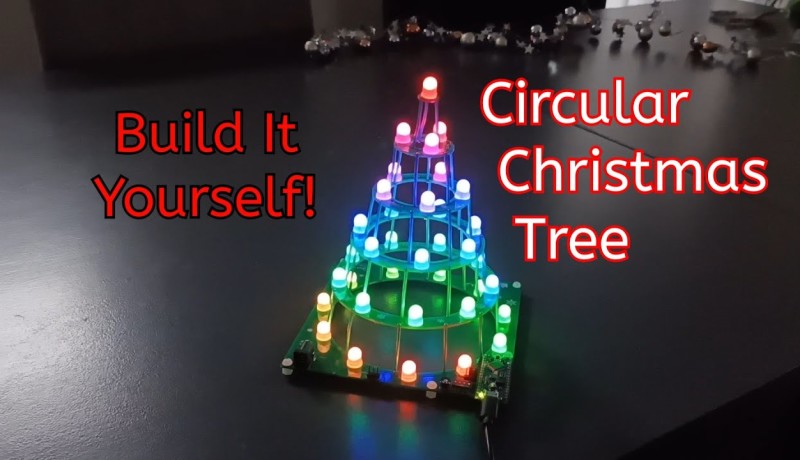
Every year, Elektor is committed to bringing you fun and educational kits and products. This year, we're thrilled to introduce the new Elektor Christmas Tree, now in a 3D format and equipped with WS2812 RGB LEDs! You can find the full story in our latest Elektor Guest Edition, co-edited with Espressif, on page 84.
This companion video offers an engaging and informative 12-minute guide on how to assemble a unique, DIY illuminated Christmas decoration. This tutorial is not just about creating a festive ornament but also about enjoying the process of building a nice electronic kit.
The tree is made of six circuit boards – five for the tree and one as the base. The highlight of the assembly is the placement and soldering of 36 RGB LEDs, which can be individually controlled to create a vibrant display of colors. Throughout the video, viewers are taken through each step of the assembly process, from preparing the PCBs, to soldering the components, and finally, to testing. Although there are quite a few SMD resistors and capacitors, you'll find that they're surprisingly easy to assemble.
Additionally, the kit allows for customization in terms of control. Viewers are shown how they can use their own Arduino board, ESP32 board, or Raspberry Pi to personalize the tree's light patterns and colors.
We hope you've had a good year, and as winter approaches, we think this Christmas tree will add great colors and joy to your home. Wishing you a happy end to the year!
This companion video offers an engaging and informative 12-minute guide on how to assemble a unique, DIY illuminated Christmas decoration. This tutorial is not just about creating a festive ornament but also about enjoying the process of building a nice electronic kit.
The tree is made of six circuit boards – five for the tree and one as the base. The highlight of the assembly is the placement and soldering of 36 RGB LEDs, which can be individually controlled to create a vibrant display of colors. Throughout the video, viewers are taken through each step of the assembly process, from preparing the PCBs, to soldering the components, and finally, to testing. Although there are quite a few SMD resistors and capacitors, you'll find that they're surprisingly easy to assemble.
Additionally, the kit allows for customization in terms of control. Viewers are shown how they can use their own Arduino board, ESP32 board, or Raspberry Pi to personalize the tree's light patterns and colors.
We hope you've had a good year, and as winter approaches, we think this Christmas tree will add great colors and joy to your home. Wishing you a happy end to the year!
Explore Further!
View other great educational videos and tap into the knowledge of experts by checking out our additional content on our Elektor YouTube channel and our Elektor Industry Youtube channel.Stay Informed
Subscribe to our Elektor newsletter to receive a consistent flow of expert tech knowledge and interesting perspectives.Read full article
Hide full article
Discussion (0 comments)