
How-To: Integrate Your Doorbell in Home Assistant Using ESPHome
How to use ESPHome and NodeMCU for detecting doorbell rings in Home Assistant.
In this video I showed how I discovered the open source home automation projects ESPHome and Home Assistant and my first steps into this world. I have learned a lot since and now I am ready to present my automated doorbell project that I already mentioned in that video. The goal is to detect doorbell rings in Home Assistant so that they can be relayed to places where the doorbell cannot be heard.
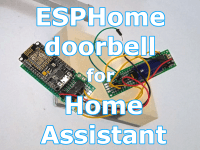
I replaced my doorbell many years ago by a wireless one, but the old ding-dong and its wires, including the power supply, were left in place. The doorbell interface described here was built to fit inside the old doorbell and to be powered from it.
The button of the wireless doorbell is now also connected to the interface using the old, existing wiring. Because the pushbutton is outside and exposed to the elements, I protected the connection with series resistors, a filter capacitor and clamping diodes.
The wireless pushbutton cannot control the ding-dong’s solenoid directly as it needs about one ampere, which is way too much for the tiny tactile pushbutton, but with a relay or power transistor it can be done. I used a small 5-volt relay controlled by the MCU and a transistor.
The ding-dong solenoid is a heavy load for the transformer, and a large reservoir capacitor is used to filter out the dips in the output voltage caused by the solenoid. The 5-volt regulator is a small 7805-compatible switch-mode regulator to avoid heat dissipation problems.
A power indicator was added too because the NodeMCU board doesn’t have one and it turned out to be practical to have.
I compile the ESPHome-based firmware on the Raspberry Pi that runs my Home Assistant. That way, the device’s YAML file is already in the system, making over-the-air (OTA) updates very easy.
The relay is an internal (so Home Assistant can’t see it) ‘switch’ connected to GPIO14.
The pushbutton is a ‘binary_sensor’ on pin GPIO13, active low. An automation triggered by ‘on_press’ produces a 200 ms pulse on the relay output. This way the ding-dong will sound when somebody presses the button, even when the network is down.
The wireless doorbell’s battery voltage input is a ‘sensor’ on A0. A multiplier is required to convert the output to volts.
The NodeMCU module also has a Flash button (GPIO0, use as ‘binary_sensor’) and an LED (GPIO16, use as ‘switch’ or, maybe better as ‘light’) that can be used. The Flash button can be used e.g. as a test button; the LED provides a visual indication that someone has rung the doorbell.
You may want to create a card for the LED in the Home Assistant main user interface. With this automation the LED must be switched off manually in Home Assistant. You do this simply by clicking on the card.
Short reminder
- ESPHome: firmware for an ESP8266- or ESP32-based remote device like a sensor or a switch (and much more).
- Home Assistant: home automation hub that controls and interconnects remote devices like sensors and switches (and much more).
Doorbell interface
For the doorbell interface, I chose an ESP8266-based NodeMCU board because it has an analog input that I wanted to use. Also, it does not need a USB-to-serial converter, so, besides a soldering iron, no special tools are needed for this project.I replaced my doorbell many years ago by a wireless one, but the old ding-dong and its wires, including the power supply, were left in place. The doorbell interface described here was built to fit inside the old doorbell and to be powered from it.
The button of the wireless doorbell is now also connected to the interface using the old, existing wiring. Because the pushbutton is outside and exposed to the elements, I protected the connection with series resistors, a filter capacitor and clamping diodes.
The wireless pushbutton cannot control the ding-dong’s solenoid directly as it needs about one ampere, which is way too much for the tiny tactile pushbutton, but with a relay or power transistor it can be done. I used a small 5-volt relay controlled by the MCU and a transistor.
Monitor Battery Voltage
The wire to the wireless pushbutton connects directly to the cold side of its pushbutton’s pull-up resistor, so when idle, it carries the battery voltage. Because of this, I connected it not only to a GPIO pin of the MCU but also to its analog input. This allows Home Assistant to keep an eye on the wireless doorbell’s battery level as well as relaying doorbell ring messages.Power Supply
The power supply required some attention as the ding-dong only has a 12-volt transformer while I needed 5-volt DC for the relay and the NodeMCU board.The ding-dong solenoid is a heavy load for the transformer, and a large reservoir capacitor is used to filter out the dips in the output voltage caused by the solenoid. The 5-volt regulator is a small 7805-compatible switch-mode regulator to avoid heat dissipation problems.
A power indicator was added too because the NodeMCU board doesn’t have one and it turned out to be practical to have.
ESPHome Firmware Configuration
The YAML configuration file for ESPHome can be downloaded below. Note that you will have to change the SSID and set password for your Wi-Fi network. You may also want to change the name of the device.I compile the ESPHome-based firmware on the Raspberry Pi that runs my Home Assistant. That way, the device’s YAML file is already in the system, making over-the-air (OTA) updates very easy.
The relay is an internal (so Home Assistant can’t see it) ‘switch’ connected to GPIO14.
The pushbutton is a ‘binary_sensor’ on pin GPIO13, active low. An automation triggered by ‘on_press’ produces a 200 ms pulse on the relay output. This way the ding-dong will sound when somebody presses the button, even when the network is down.
The wireless doorbell’s battery voltage input is a ‘sensor’ on A0. A multiplier is required to convert the output to volts.
The NodeMCU module also has a Flash button (GPIO0, use as ‘binary_sensor’) and an LED (GPIO16, use as ‘switch’ or, maybe better as ‘light’) that can be used. The Flash button can be used e.g. as a test button; the LED provides a visual indication that someone has rung the doorbell.
Automation in Home Assistant
To make the LED work with the attached YAML file an automation in Home Assistant is required. Choose the Button pressed trigger event for this, no conditions, and as action turning on the LED.You may want to create a card for the LED in the Home Assistant main user interface. With this automation the LED must be switched off manually in Home Assistant. You do this simply by clicking on the card.
First Steps With ESPHome and Home Assistant
Want to build a project?
Bring your design to life with the Elektor PCB Service, powered by Eurocircuits. Upload the project files and order professionally manufactured PCBs or assembled boards through a proven European production platform.
Supporting KiCad, Eagle, Gerber, and ODB++ formats, the service is suitable for everything from prototypes and validation builds to series production and volume manufacturing.
Made in Europe. Fast. Reliable. Professional.
Discussion (0 comments)