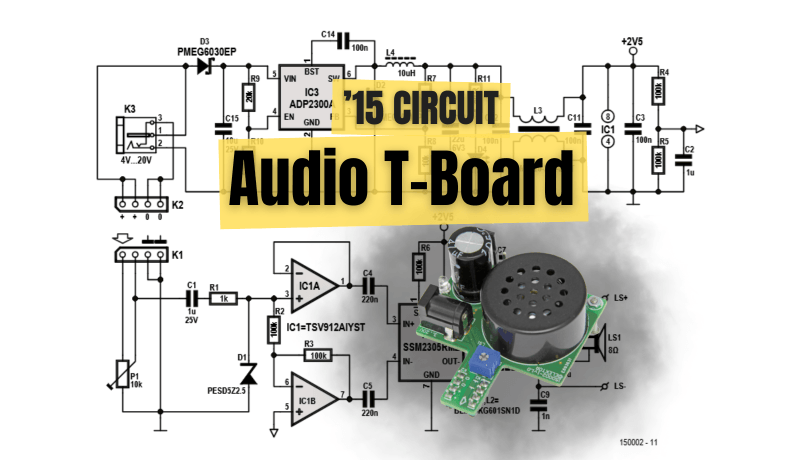
Make your analog breadboard experiments instantly audible with Elektor’s first analog T-board, featuring a compact class-D amplifier, DC/DC converter, and built-in speaker. Simply plug in the Audio T-Board and listen. No extra circuitry or external speakers required.
Would you like to hear audio signals right away without building a separate amplifier or connecting external speakers? Make your analog breadboard experiments instantly audible with Elektor’s first analog T-board, featuring a compact class-D amplifier, DC/DC converter, and built-in speaker. Simply plug it in and listen. No extra circuitry or external speakers required.
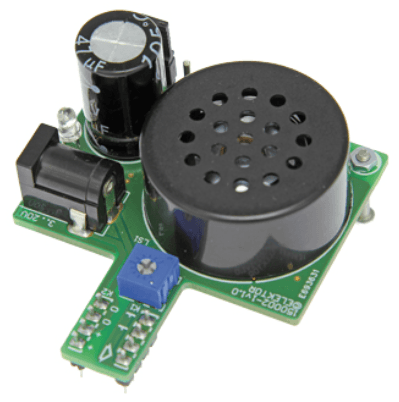
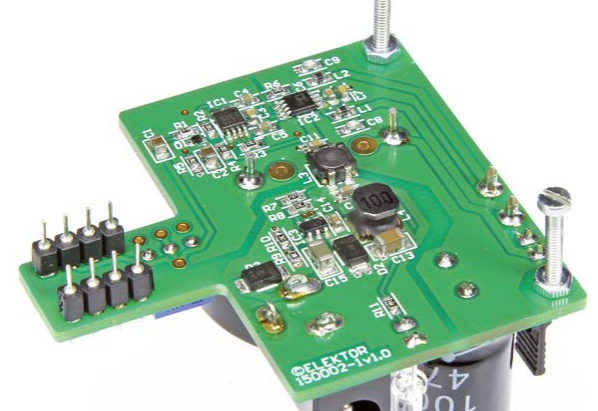
The small circuit board accommodates a class-D amplifier,
a DC/DC converter, and a small loudspeaker
The Circuit
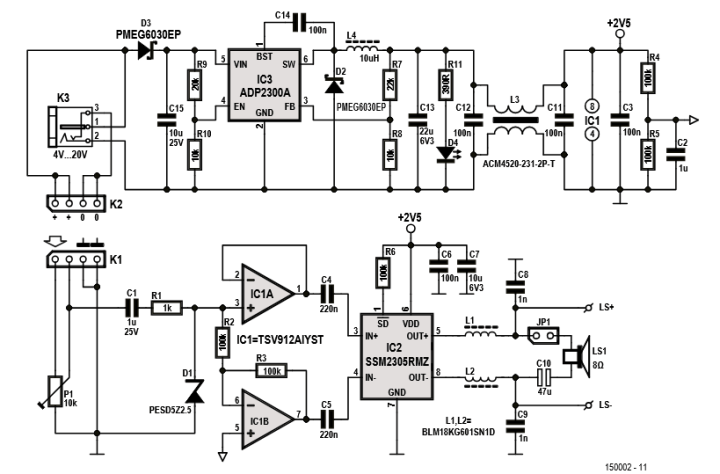
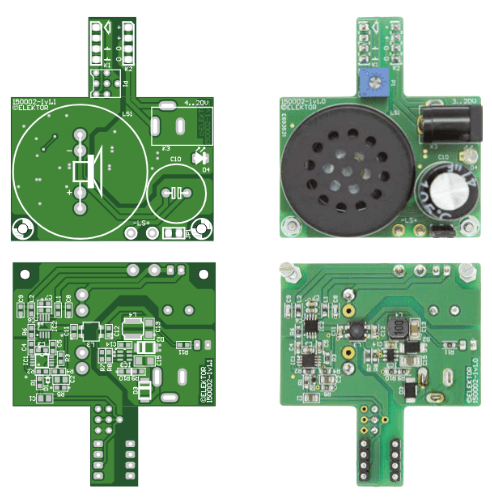
The circuit board for the Audio T-Board — first presented by Ton Giesberts in July/August 2015 — is double-sided, both the layout and the mounted components. As you can see, the circuit is built around a class-D amplifier IC and a DC/DC converter.
The circuit features a class-D amplifier IC and a DC/DC converter.
“All the leaded components are on the top side, only the connectors K1 and K2 are on the underside (you plug these into the breadboard later),” Giesberts noted. “All the SMD components are on the bottom. The sizes of the SMD components are such that they are still relatively easy to solder by hand.”
For the Audio T-Board project, Giesberts focused on making the circuit as efficient as possible, both in the audio amplifier and the power supply, and verified this with practical measurements. Efficiency was tested using a simple resistor and a more realistic “speaker-like” load that included an inductor, which slightly improved efficiency and reduced high-frequency switching noise. The results showed that efficiency is highest at lower supply voltages (around 5 V) and drops at higher voltages due to the DC/DC converter, while using a 4-Ω speaker reduces efficiency further because of higher currents and increased losses in the circuit.
The double-sided circuit board contains components on both sides.
Refer to the nearby figure to see how the SMD components fit on the bottom of the Audio T-Board. In the two mounting holes, M2 bolts (length = 15 mm) are fastened with nuts. The bolts provide support when the circuit board is plugged into a breadboard.
Two M2 bolts ensure that the T-board remains connected when using the breadboard.
The Audio T-Board Project
The original article, “Audio T-Board,” appeared in Elektor July/August 2015. You can read the article for free during the two-week period following the publication of this post. Enjoy!
Editor's Note: This article first appeared in a 2015 edition of Elektor. Given the project’s age, the components might not be available. Nevertheless, we think the design will inspire you to start a project of your own.
Subscribe
Tag alert: Subscribe to the tag Audio and you will receive an e-mail as soon as a new item about it is published on our website!
Elektor Magazine has been one of the leading sources of information on electronics for engineers, designers, start-ups and companies for 65 years. Our magazine is powered by an active community of electronics engineers – from students to professionals – who are passionate about designing and sharing innovative ideas.
For them, we publish hundreds of items a year, in formats such as articles, videos, webinars, and other learning formats. Our mission is to share knowledge in every possible way and inspire readers with the latest developments within the electrical engineering sector.
Thank you for your vote!
Leave further comments in the fields below.
Thank you for your vote!
If you wish to leave a comment with your rating, please first use the login below. If not, just close this window.


Discussion (0 comments)