
Elektor Lab Notes 28: Soldering, ESP32 Audio Projects, Edge Impulse and More
on

Welcome back to Elektor Lab Notes! Every few weeks, our engineers and busy editors at Elektor post a few lab notes and updates about new DIY electronics projects, tech industry news, and helpful engineering tips. In this edition of Lab Notes, we talk about upcoming articles, soldering, radar sensors, Edge Impulse, and more. Please share your thoughts in the Discussion section at the bottom of this page. Feel free to post your own lab notes and let us know what you are working on at your electronics workbench!
Jean-François Simon (Engineer, Elektor)
Soldering, soldering and soldering again: It remains a fundamental skill in electronics, and with new tools and techniques constantly emerging, it’s worth revisiting what’s out there once again, after many Elektor articles on the topic. In an upcoming article I’m working on, I take a hands-on look at the wide range of soldering equipment available in 2025, from traditional irons to high-end cartridge systems, including inductive/RF-based tools. Whether you're just getting started or looking to upgrade, choosing the right station can make all the difference in terms of comfort and heating power. My goal is to offer advice on what to look for depending on your needs and budget.
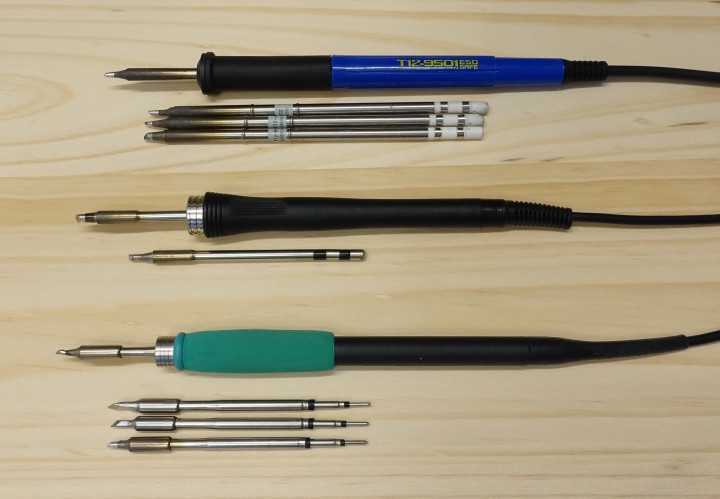
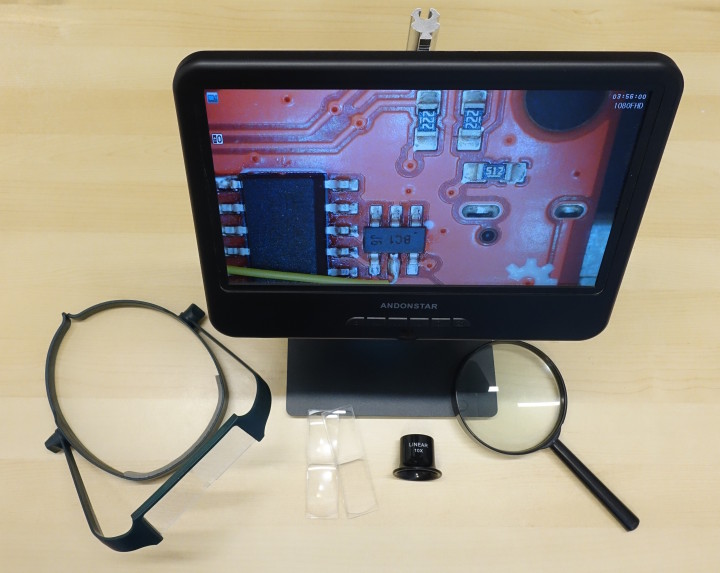
Beyond the soldering tool itself, the article will be filled with practical tips and pointers to handy optional tools and accessories like magnifiers, PCB holders, solder paste and flux types that I like to use. And for those tackling more ambitious projects, I cover hot-air soldering stations, stencils, the basics of surface-mount assembly, desoldering tricks, cleaning techniques and more!
The world of soldering is broader than ever, and there’s plenty left to explore and new tools to try. Whether it’s experimenting with affordable BGA reballing in a home lab, trying out low-temperature alloys for desoldering, or making use of affordable PCB Assembly (PCBA) services, there's always something new to try. The full article will be available in an upcoming issue of Elektor Magazine. Until then, happy soldering!
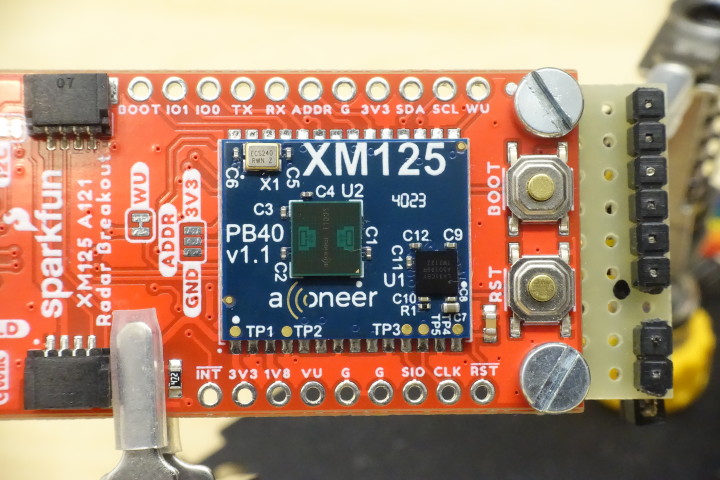
Tracking Truth with Radar Sensors: Back in a previous project, I explored Edge Impulse on the Arduino Nano ESP32 for simple voice recognition. This time, I'm taking a different route, using Edge Impulse not for audio, but for radar data. I’m using the A121 radar sensor from Acconeer, which you’ve perhaps read about recently in Elektor Magazine. It’s mounted on an XM125 module from the same manufacturer, itself soldered to a breakout board from Sparkfun to make the connections easier. The idea is to aim the sensor at a person’s chest, and detect tiny chest movements or subtle breathing variations. I’ll see if the high-resolution distance data can be used to spot physiological cues linked to deception. Essentially, a radar-powered “lie detector!” It's a long shot and definitely experimental, but fascinating. Early steps involve setting up the data pipeline and understanding how to feed IQ data into Edge Impulse.
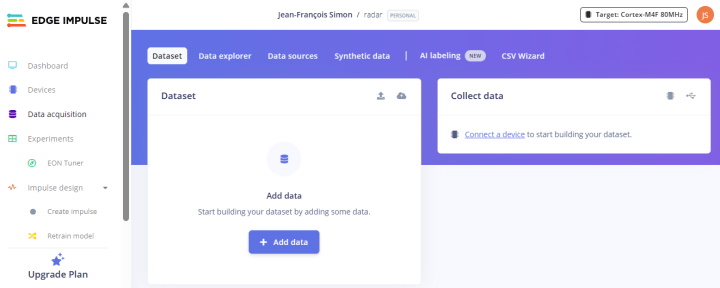
However, both Edge Impulse and the A121 sensor are complex tools that take a fair bit of time to learn. The setup is finicky, and sampling training data takes a long time. I’m starting with simple data acquisition and labelling, hoping to create a dataset rich enough for a machine learning model to chew on. It’s early days, and I don’t expect instant success, but the process itself is insightful. I’ll share later whether this approach has real potential, or not! Stay tuned.
Jens Nickel (Editor-in-Chief, Elektor)
ESP32 Audio Transceiver Board: In Lab Notes 25, I already showed our new ESP32-based Audio Transceiver Board developed by my colleague Saad and me. It can sample (and output) audio on one hand and send (and receive) an audio stream via a Nordic nRF24 radio module on the other hand. In a few days, you will hold our Circuit Special 2025 in your hands, where we report on the circuit, the board, and the plug-on modules. In parallel, I have already written the second article about the board, which will be published in the September edition. I will demonstrate that it is fairly easy to transmit a continuous stream of audio wirelessly, but you will also read about the issues. The demo software for the article is a wireless connection based on two Audio Transceiver Boards. At the time of writing, I had established a good connection for 32 kHz/16-bit audio, but in mono. However, while this article was with the graphics team, I made progress with the project. First, I managed to connect two Nordic nRF24 modules to one ESP32 on the receiver side, and if you have two senders transmitting the same audio signal on two different radio channels, you can select the audio packet that arrived in time. The switching can be done seamlessly, which is a plus for reliability and range. Only a few days later, I was able to enhance the data rate to allow 32 kHz/16-bit audio in stereo, and the day after, I managed to receive this on two radio channels with one ESP32. All in all, 8000 data packets per second now arrive at the receiver side! This forced me to drastically simplify the receiving loop, and the effect was that some sound artifacts vanished as well. Keep it simple, stupid! However, there are still issues I want and need to solve, so I am not at the end, just at a new milestone. You will most likely read something in the November edition and also here in future installments of Lab Notes.
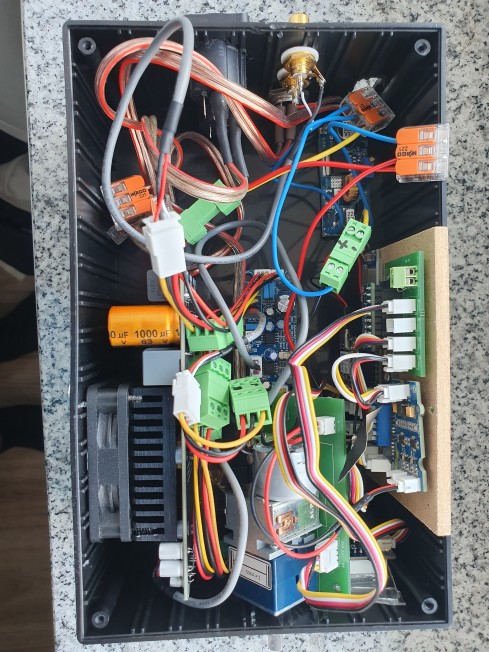
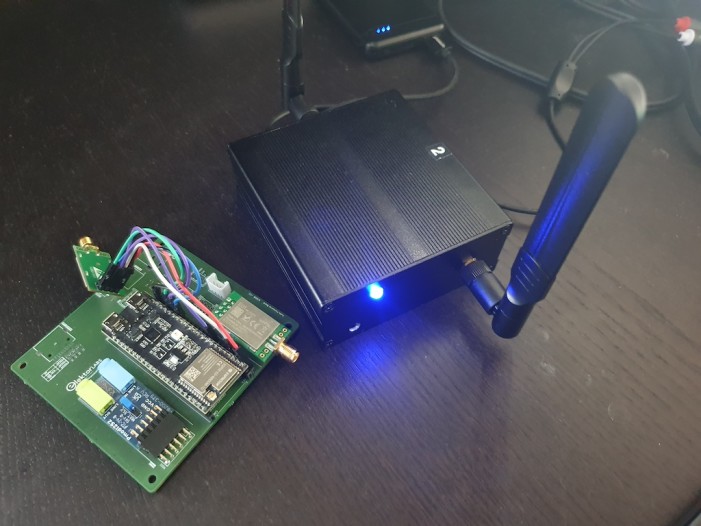
Amplifier Stations: I regularly reported on my pet project I'm working on with a friend: independent loudspeaker stations with a built-in battery, amplifier, wireless audio receiver, and remote volume control. In the meantime, we switched (back) to separate boxes for the battery, the pre-amp/amp/volume control, and the sound source, as this gives us more flexibility in the field. Because we are no longer integrating the battery into the amplifier boxes, they could be reduced in size and are now 3D-printable. My friend Marco did a great job creating the 3D model, and currently we are equipping the first boxes with the power amplifier module, the pre-amp for top speaker or subwoofer, the motor potentiometer, and its Wi-Fi-based remote control. Depicted is still a prototype with a standard housing and drilled holes. As you can see, we tried our best to make it repair-friendly: the power lines are connected with Wago clamps, and for the other connections, we opted for pluggable screw clamp connectors. For example, we can now easily swap a normal pre-amp with a subwoofer pre-amp if needed. In short, I will be able to show you a 3D-printed enclosure and also a better PCB for the remote control electronics, which is currently in the making.

Discussion (1 comment)