Review: PaPiRus ePaper Screen HAT for Raspberry Pi
The objective of the PaPiRus ePaper Screen HAT for Raspberry Pi is to make ePaper technology available to anyone, which is why it is a fully open source product with schematics and source code at GitHub. Besides the ePaper display, the HAT also has four pushbuttons, a real-time clock (RTC) and a temperature sensor.
The objective of the PaPiRus ePaper Screen HAT for Raspberry Pi is to make ePaper (e-paper) technology available to anyone, which is why it is a fully open source product with schematics and source code at GitHub. Besides the ePaper display, the HAT also has four pushbuttons, a real-time clock (RTC) and a temperature sensor.
This review is about PCB revision v1.9 with a 2.7” (Large) display, a version for the Pi Zero exists too.
What’s in the PaPiRus kit?
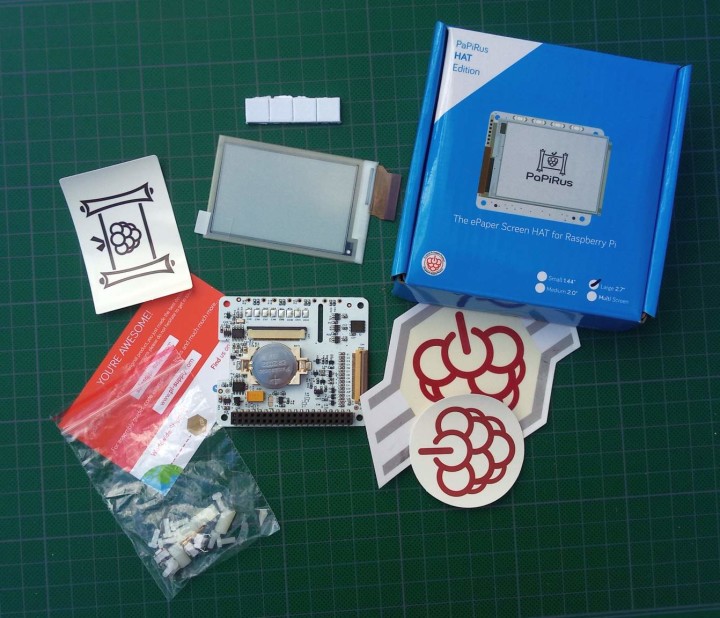
Inside the box we find:
Assembled circuit board with button cell;
Thin ePaper display in an anti-static bag;
4 sticky spacers (bi-adhesive pads);
A small bag containing 8 nylon bolts, 4 stand-offs, 4 pushbuttons and, most importantly, a pogo pin:
Stickers;
A card with some information.
The contents of the PaPiRus ePaper Screen HAT for Raspberry Pi kit.
Since there are no further explanations or assembly instructions, we have to go to the website of the manufacturer to discover how to continue.
Assembly of the PaPiRus ePaper Screen HAT
Because it is a kit you will have to do a few things before you can use the PaPiRus. If you want to try the example programs, you will need to solder the pushbuttons. They can also come in handy as user controls for your own applications, but are not required for operating the display. When you mount the pushbuttons push them as much to the board edge as possible, otherwise the screen will not fit well.
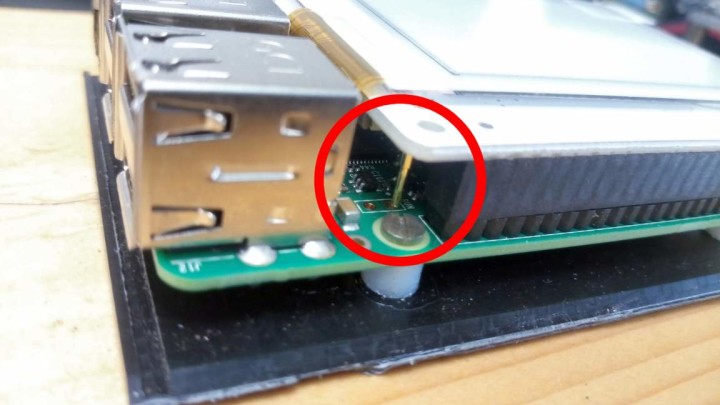
Pogo pin
The pogo pin — a spring contact commonly used in f.i. electronics test beds — has to be soldered by the user because its position depends on the revision of the Pi that will interact with it. It is supposed to mate with the square pad of the RUN jumper on the Pi. PaPiRus pogo pin position on a Raspberry Pi 3.
Studying the schematic of the PaPiRus reveals that the pogo pin is connected to the RTC’s multi-function pin (MFP). According to the internet the Pi’s RUN pin can be used to restart the Pi, f.i. after a shutdown command, so it seems that this pin adds a kind of watchdog/reboot function to the Pi. This also means that you don’t have to solder it if you don’t need this.
Elektor Magazine has been one of the leading sources of information on electronics for engineers, designers, start-ups and companies for 65 years. Our magazine is powered by an active community of electronics engineers – from students to professionals – who are passionate about designing and sharing innovative ideas.
For them, we publish hundreds of items a year, in formats such as articles, videos, webinars, and other learning formats. Our mission is to share knowledge in every possible way and inspire readers with the latest developments within the electrical engineering sector.
Thank you for your vote!
Leave further comments in the fields below.
Thank you for your vote!
If you wish to leave a comment with your rating, please first use the login below. If not, just close this window.

Discussion (0 comments)