
Raspberry Pi as a Stand-Alone Alexa Device
March 23, 2023
on
on

Amazon Echo devices first appeared in 2015, and since then, Alexa skills and voice-controlled smart home devices are in many home devices and available for a reasonable cost. My book, Programming Voice-controlled IoT Applications with Alexa and Raspberry Pi (Elektor 2023), describes how to both write Alexa skills and to design your own smart home devices using a Raspberry Pi.
Use the fastest Pi you can find. I used a Raspberry Pi 4 running Raspbian GNU/Linux 11 (bullseye). My Pi only had 1G and 8G is preferred, so I had to increase the swap size. You will also need a microphone and speakers or headphones. (I used a simple USB microphone and 3.5 mm jack headphones)
Start with a fresh build using Raspberry Pi Imager and Bullseye OS. If you don’t know how to do that, start with this project to set up your Raspberry Pi. I use PuTTY to initially connect to my Pi. Update the software and restart your Pi as follows:
You can find out your CPU info using cat /proc/cpuinfo and your memory with cat /proc/meminfo or your Pi using cat /sys/firmware/devicetree/base/model
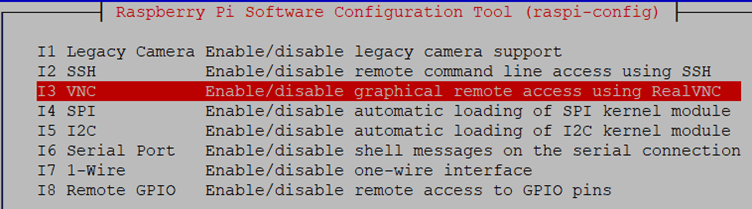
Furthermore, if you want to use VNC as I do, run sudo raspi-config command. Next, choose Interfaces, enable VNC and use Tab to Finish.
Increase memory swap size
If your Pi doesn’t have 8 Mbytes of memory, you will have to increase your memory swap size as follows:
Set up your microphone and headphones/speakers
I plugged my microphone into the top left-hand USB port, which used device 0,0:
Find out its connection, type arecord -l (that’s a little ‘L’) and in this case is 0,0.
Edit your /home/pi/.asoundrc to suit your sound set up, mine is:
Test your recording (terminate with control-C)
arecord --format=S16_LE --rate=16000 --file-type=wav out.wav
and playback
aplay out.wav
If your recording and speakers don’t work, refer to the troubleshooting section in the references.
Create the folders for your SDK
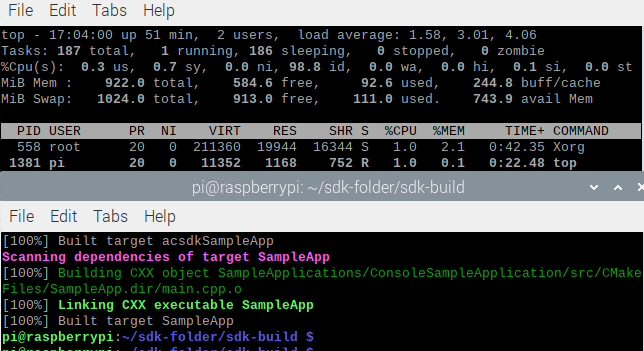
Start two terminal sessions. In one run top, so that you can check for progress, errors or lack of memory. In the other, set up your file structure. Execute the following commands:
PORTAUDIO_LIB_PATH=$(find -P /usr/lib -name libportaudio.so)
Add the PortAudio and gStreamer:
And make the sample app:
make SampleApp
You can try make -j2 SampleApp or make -j4 SampleApp, which use 2 or 4 CPUs. Don’t worry, if it hangs at 93%, it will come alive again.
You should eventually get “Built target SampleApp”. It took about 40 minutes on my Raspberry Pi 4 running one CPU. Now we need to register our PI with Amazon.

Select MANAGE YOUR PRODUCTS from the next screen:

And then ADD NEW PRODUCT:
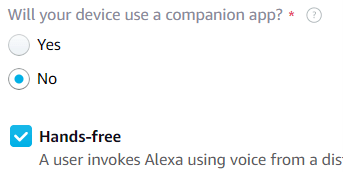
In the next step, add the information about your device. The Product name is shown to end users in the Alexa App, and the Product ID is used to identify the device during authorisation. Choose them (I used Raspberry2 and Raspberry2), for the Product type choose Device with an Alexa Built-in, No to companion app, and Other for Product category. Enter something for the description (e.g., prototype), and Hands-free for the interaction.
Ignore Upload an image and say No to the rest of the questions. Finally, click Next.
Click Create a new profile and add a Profile Name and Description.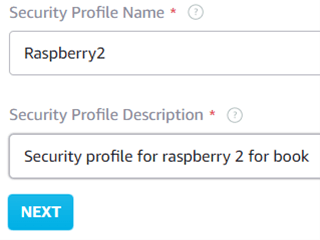
When you click NEXT you’re provided with a Security Profile ID. It's advised to copy that and remember it. It looks like this:
amzn1.application.8ebda94958345678881551dca2e15bc1
Select Other devices and platforms.
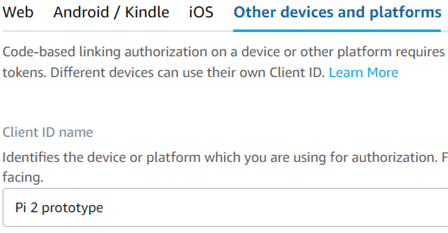
Click Generate ID and copy the Client ID, e.g:
amzn1.application-oa2-client.049c89d3584a4a4f83b5f23cd4c54321
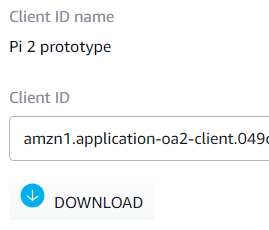
Click DOWNLOAD to obtain the config.json file that we’ll need for our Pi. This simply contains the clientId and productId: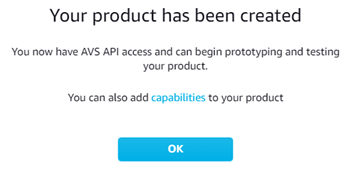 We now have our device registered, and we need to install Alexa Voice Service on the Pi.
$HOME/sdk-folder/sdk-source/avs-device-sdk/tools/Install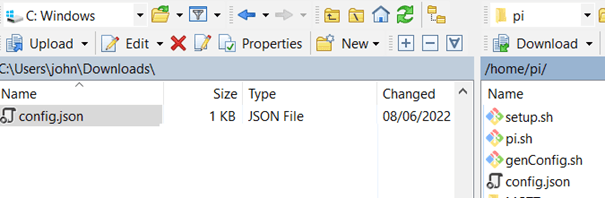
Make a backup copy up your existing configuration file AlexaClientSDKConfig.json. Don’t just rename it. This is found in the folder:
/home/pi/sdk-folder/sdk-source/avs-device-sdk/Integration.
You can use the terminal command:
cp AlexaClientSDKConfig.json AlexaClientSDKConfigBAK.json
Run
$HOME/sdk-folder/sdk-source/avs-device-sdk/tools/Install
Run these commands, including the parameters:
You should get a Completed generation message:

You will have to authorize your Pi the first time you run the App. Type in:
You will get a warning:
But soon you will get a Registration Complete message:
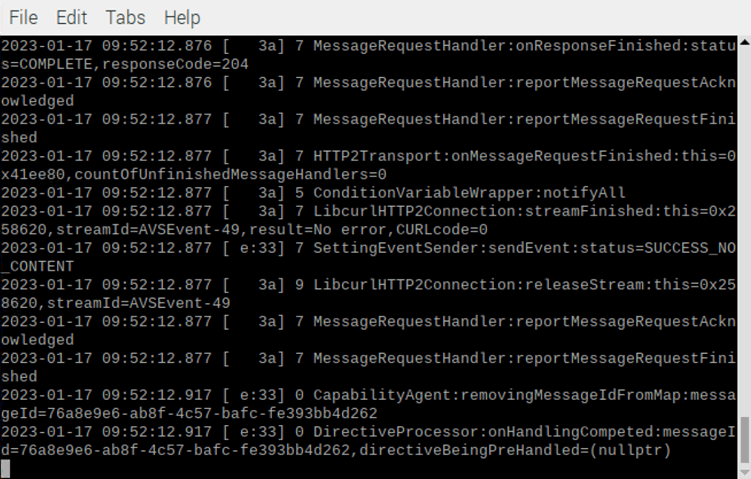
On the PI, wait for the program to authorize, and Alexa is waiting for you.
You don’t get any prompts, only messages.
Type ‘t’, press enter, and speak to your Pi as an Alexa device. You don’t say “Alexa …”. However, try “Tell me a joke”. Music and Audio playback are not supported.
I hope you enjoy running your Pi as an Alexa device.
Set Up the AVS Device SDK on Raspberry Pi for Voice-Only Devices Documentation.
Sound checks: Using a Microphone with a Raspberry Pi
GitHub: /avs-device-sdk
Having trouble with the Alexa Voice Service (AVS) Device SDK? Troubleshooting
Introduction
In this article, we’ll see how to turn our Raspberry Pi into a stand-alone Alexa device. We’ll install the Alexa Amazon Voice Service (AVS) on the Raspberry Pi. There are three main parts:- Set up your Raspberry Pi and build the AVS Device SDK
- Register your AVS device with Amazon
- Run, authorize and use the sample app
1. Set up your Raspberry Pi and install the AVS SDK
PrerequisitesUse the fastest Pi you can find. I used a Raspberry Pi 4 running Raspbian GNU/Linux 11 (bullseye). My Pi only had 1G and 8G is preferred, so I had to increase the swap size. You will also need a microphone and speakers or headphones. (I used a simple USB microphone and 3.5 mm jack headphones)
Start with a fresh build using Raspberry Pi Imager and Bullseye OS. If you don’t know how to do that, start with this project to set up your Raspberry Pi. I use PuTTY to initially connect to my Pi. Update the software and restart your Pi as follows:
- Update the repository packages: sudo apt update
- Run the update command: sudo apt dist-upgrade
- Remove unwanted files: sudo apt clean
- And restart your device: sudo reboot
You can find out your CPU info using cat /proc/cpuinfo and your memory with cat /proc/meminfo or your Pi using cat /sys/firmware/devicetree/base/model
Furthermore, if you want to use VNC as I do, run sudo raspi-config command. Next, choose Interfaces, enable VNC and use Tab to Finish.
Increase memory swap size
If your Pi doesn’t have 8 Mbytes of memory, you will have to increase your memory swap size as follows:
- Stop using swap files: sudo dphys-swapfile swapoff
- Use your editor (nano) to change the swap configuration file: sudo nano /etc/dphys-swapfile
- Replace CONF_SWAPSIZE say to 1024 (Mbytes) and save the file: CONF_SWAPSIZE=1024
- Re-initialize the Raspberry Pi’s swap file: sudo dphys-swapfile setup
- Turn swap files usage back on: sudo dphys-swapfile swapon
- Restart your Pi : sudo reboot
Set up your microphone and headphones/speakers
I plugged my microphone into the top left-hand USB port, which used device 0,0:
Find out its connection, type arecord -l (that’s a little ‘L’) and in this case is 0,0.
**** List of CAPTURE Hardware Devices ****
card 3: Device [USB PnP Sound Device], device 0: USB Audio [USB Audio]
Subdevices: 1/1
Subdevice #0: subdevice #0
card 3: Device [USB PnP Sound Device], device 0: USB Audio [USB Audio]
Subdevices: 1/1
Subdevice #0: subdevice #0
Edit your /home/pi/.asoundrc to suit your sound set up, mine is:
pcm.!default {
type asym
capture.pcm "mic"
}
pcm.mic {
type plug
slave {
pcm "hw:0,0"
}
}
type asym
capture.pcm "mic"
}
pcm.mic {
type plug
slave {
pcm "hw:0,0"
}
}
Test your recording (terminate with control-C)
arecord --format=S16_LE --rate=16000 --file-type=wav out.wav
and playback
aplay out.wav
If your recording and speakers don’t work, refer to the troubleshooting section in the references.
Create the folders for your SDK
Start two terminal sessions. In one run top, so that you can check for progress, errors or lack of memory. In the other, set up your file structure. Execute the following commands:
cd $HOME
mkdir sdk-folder
cd sdk-folder
mkdir sdk-build sdk-source sdk-install db
Install the SDK dependencies:
mkdir sdk-folder
cd sdk-folder
mkdir sdk-build sdk-source sdk-install db
sudo apt-get -y install \
git gcc cmake build-essential libsqlite3-dev libcurl4-openssl-dev libfaad-dev \
libgtest-dev libssl-dev libsoup2.4-dev libgcrypt20-dev libgstreamer-plugins-bad1.0-dev \
libnghttp2-dev nghttp2 gstreamer1.0-plugins-good libasound2-dev doxygen portaudio19-dev
Clone the SDK code into the sdk-source folder from GitHub:
git gcc cmake build-essential libsqlite3-dev libcurl4-openssl-dev libfaad-dev \
libgtest-dev libssl-dev libsoup2.4-dev libgcrypt20-dev libgstreamer-plugins-bad1.0-dev \
libnghttp2-dev nghttp2 gstreamer1.0-plugins-good libasound2-dev doxygen portaudio19-dev
cd $HOME/sdk-folder/sdk-source
git clone --single-branch https://github.com/alexa/avs-device-sdk.git
PortAudio is used for the recording and playback. Add the path for it:git clone --single-branch https://github.com/alexa/avs-device-sdk.git
PORTAUDIO_LIB_PATH=$(find -P /usr/lib -name libportaudio.so)
Add the PortAudio and gStreamer:
cd $HOME/sdk-folder/sdk-build
cmake $HOME/sdk-folder/sdk-source/avs-device-sdk \
-DGSTREAMER_MEDIA_PLAYER=ON \
-DPORTAUDIO=ON \
-DPKCS11=OFF \
-DPORTAUDIO_LIB_PATH=$PORTAUDIO_LIB_PATH \
-DPORTAUDIO_INCLUDE_DIR=/usr/include \
-DCMAKE_BUILD_TYPE=DEBUG
cmake $HOME/sdk-folder/sdk-source/avs-device-sdk \
-DGSTREAMER_MEDIA_PLAYER=ON \
-DPORTAUDIO=ON \
-DPKCS11=OFF \
-DPORTAUDIO_LIB_PATH=$PORTAUDIO_LIB_PATH \
-DPORTAUDIO_INCLUDE_DIR=/usr/include \
-DCMAKE_BUILD_TYPE=DEBUG
And make the sample app:
make SampleApp
You can try make -j2 SampleApp or make -j4 SampleApp, which use 2 or 4 CPUs. Don’t worry, if it hangs at 93%, it will come alive again.
You should eventually get “Built target SampleApp”. It took about 40 minutes on my Raspberry Pi 4 running one CPU. Now we need to register our PI with Amazon.
2. Register your AVS device with Amazon and obtain a config.json file
- Create a free Amazon developer account at developer.amazon.com if you don’t have one.
- Register an AVS built-in device.
Select MANAGE YOUR PRODUCTS from the next screen:
And then ADD NEW PRODUCT:
In the next step, add the information about your device. The Product name is shown to end users in the Alexa App, and the Product ID is used to identify the device during authorisation. Choose them (I used Raspberry2 and Raspberry2), for the Product type choose Device with an Alexa Built-in, No to companion app, and Other for Product category. Enter something for the description (e.g., prototype), and Hands-free for the interaction.
Ignore Upload an image and say No to the rest of the questions. Finally, click Next.
- Set up your security profile.
Click Create a new profile and add a Profile Name and Description.
When you click NEXT you’re provided with a Security Profile ID. It's advised to copy that and remember it. It looks like this:
amzn1.application.8ebda94958345678881551dca2e15bc1
Select Other devices and platforms.
Click Generate ID and copy the Client ID, e.g:
amzn1.application-oa2-client.049c89d3584a4a4f83b5f23cd4c54321
Click DOWNLOAD to obtain the config.json file that we’ll need for our Pi. This simply contains the clientId and productId:
{
"deviceInfo": {
"clientId": "amzn1.application-oa2-client.049c89d3584…",
"productId": "Raspberry2"
}
}
Next, agree to the terms and finish. Finally, your product should be now created and listed in your products.
"deviceInfo": {
"clientId": "amzn1.application-oa2-client.049c89d3584…",
"productId": "Raspberry2"
}
}
3. Run, authorize and use the sample app
Transfer the config.json file you downloaded onto your Pi’s:$HOME/sdk-folder/sdk-source/avs-device-sdk/tools/Install
Make a backup copy up your existing configuration file AlexaClientSDKConfig.json. Don’t just rename it. This is found in the folder:
/home/pi/sdk-folder/sdk-source/avs-device-sdk/Integration.
You can use the terminal command:
cp AlexaClientSDKConfig.json AlexaClientSDKConfigBAK.json
Run
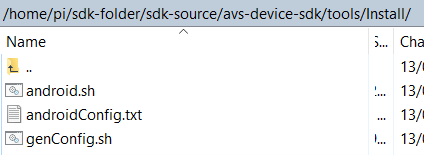
genConfig.sh script as follows to generate your config. This is found in the folder:$HOME/sdk-folder/sdk-source/avs-device-sdk/tools/Install
Run these commands, including the parameters:
cd $HOME/sdk-folder/sdk-source/avs-device-sdk/tools/Install
bash $HOME/sdk-folder/sdk-source/avs-device-sdk/tools/Install/genConfig.sh \
config.json \
12345 \
$HOME/sdk-folder/db \
$HOME/sdk-folder/sdk-source/avs-device-sdk \
$HOME/sdk-folder/sdk-build/Integration/AlexaClientSDKConfig.json \
-DSDK_CONFIG_MANUFACTURER_NAME="raspberrypi" \
-DSDK_CONFIG_DEVICE_DESCRIPTION="raspberrypi"
You should get a Completed generation message:
You will have to authorize your Pi the first time you run the App. Type in:
export PA_ALSA_PLUGHW=1
cd $HOME/sdk-folder/sdk-build/
./SampleApplications/ConsoleSampleApplication/src/SampleApp ./Integration/AlexaClientSDKConfig.json DEBUG9
cd $HOME/sdk-folder/sdk-build/
./SampleApplications/ConsoleSampleApplication/src/SampleApp ./Integration/AlexaClientSDKConfig.json DEBUG9
You will get a warning:
But soon you will get a Registration Complete message:
On the PI, wait for the program to authorize, and Alexa is waiting for you.
You don’t get any prompts, only messages.
Type ‘t’, press enter, and speak to your Pi as an Alexa device. You don’t say “Alexa …”. However, try “Tell me a joke”. Music and Audio playback are not supported.
I hope you enjoy running your Pi as an Alexa device.
References
Set up Raspberry Pi video on YouTube.Set Up the AVS Device SDK on Raspberry Pi for Voice-Only Devices Documentation.
Sound checks: Using a Microphone with a Raspberry Pi
GitHub: /avs-device-sdk
Having trouble with the Alexa Voice Service (AVS) Device SDK? Troubleshooting
About the Author
Dr. John Allwork has been interested in electronics and computing since school. He graduated from Sheffield University and gained his MSc at UMIST. After two years working for International Computers Ltd as a design engineer, he returned to UMIST where he graduated with a PhD in designing microprocessor systems. Having worked in technical support and as manager in distribution, working closely with Intel engineers, he returned to university, teaching electronics at Manchester Metropolitan University and is now retired. He keeps up his interest in electronics and programming along with his other occupations of travelling, walking, geocaching, art and spending time on his allotment.Read full article
Hide full article
Discussion (1 comment)