
Linux-flavored Snickerdoodles with Zynq
The snickerdoodle is an open-source powerful Linux-capable development board based on a Xilinx Zynq-7000 system on a chip (SoC) containing a dual-core 32-bit ARM Cortex-A9 processor and FPGA fabric.
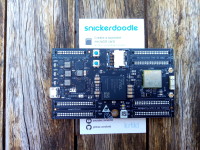
The snickerdoodle by krtkl is an open-source Linux-capable powerful development board based on a Xilinx Zynq-7000 system on a chip (SoC). Zynq-7000 devices integrate a dual-core ARM Cortex-A9 processor together with Artix-7- or Kintex-7-based programmable logic (FPGA).
The snickerdoodle comes in two flavours: One and Black, with the Black much more powerful than the One. Both have Wi-Fi and an microSD card connector. The Black also has Bluetooth.
The snickerdoodle can be mounted on a piSmasher break-out board to access its peripherals like USB host, HDMI, CAN and dual gigabit Ethernet.
This video introduces the snickerdoodle and shows how to setup the Xilinx Vivado 18.2 Webpack on Ubuntu 16.04 64-bit LTS to allow developing applications for the snickerdoodle.
In its documentation, snickerdoodle manufacturer krtkl uses Ubuntu 16.04 with Vivado 2016.4, but this is quite old. However, Vivado 2020.1 has not been tested with Ubuntu 20.04, adn suggests using an a previous version of Ubuntu. Vivado 2016.4 from the krtkl documentation is no longer supported by the Xilinx download manager. I therefore chose a solution in between: Vivado 2018.2 together with Ubuntu 16.04 LTS 64-bit.
On Ubuntu you must allow execution of the downloaded Vivado installerby ticking the box ‘Allow executing file as program’ on the Permissions tab.
Move the downloaded file to your Home folder, and then open a terminal to execute it. The download will now be unpacked, and the installer is started. This can take a while depending on your computer.
When asked for it, fill in your Xilinx account credentials, agree to everything, and make sure to select the Vivado WebPACK.
The Vivado WebPACK is big, some 8 GB, and it requires over 30 GB of disk space, so I set the harddisk for the virtual machine to 50 GB.
You can now update the path in /etc/environment file to simplify using the SDK. The path depends on the version of the SDK, here is what I added:
/opt/Xilinx/SDK/2018.2/bin
/opt/Xilinx/Vivado/2018.2/bin
/opt/Xilinx/DocNav
/opt/Xilinx/SDK/2018.2/gnu/armr5/lin/file
/opt/Xilinx/SDK/2018.2/gnu/armr5/lin/gcc-arm-none-eabi/bin
/opt/Xilinx/SDK/2018.2/gnu/microblaze/lin/bin
/opt/Xilinx/SDK/2018.2/gnu/microblaze/linux_toolchain/lin64_le/bin
/opt/Xilinx/SDK/2018.2/gnu/microblaze/linux_toolchain/lin32_le
Log out and log in again to apply the new path.
With the bash command 'which' check if the SDK is available and responding:
Launch the SDK with the command xsdk:
When the SDK is ready, create a little test project, a small hello-world application that will run on the snickerdoodle.
Create a new empty C project named 'hello-snickerdoodle' for OS platform 'linux' with processor type 'ps7_cortexa9'. Add a main.c file to the project and write a short 'Hello World' and build it:
Using the IP address you set before in 'config.txt', connect your computer to the access point provided by the snickerdoodle.
I use a little trick to make it easier to copy a file to the snickerdoodle (Linux purists, please close your eyes).
First, in one terminal, using SSH set the permissions of the usr/bin folder on the snickerdoodle to 777 (use the IP address you set before in 'config.txt').
Note: The first time you SSH into snickerdoodle you will be asked to change the password. The snickerdoodle SSH default password is 'snickerdoodle'.
Then, in a second terminal, use secure copy (SCP) to copy the executable to the snickerdoodle :
With SSH in terminal one you can now execute it:
This saves a lot of fiddling with the snickerdoodle’s SD card.
The development environment for your snickerdoodle is now up and running and you can start creating applications for it.
The snickerdoodle comes in two flavours: One and Black, with the Black much more powerful than the One. Both have Wi-Fi and an microSD card connector. The Black also has Bluetooth.
The snickerdoodle can be mounted on a piSmasher break-out board to access its peripherals like USB host, HDMI, CAN and dual gigabit Ethernet.
This video introduces the snickerdoodle and shows how to setup the Xilinx Vivado 18.2 Webpack on Ubuntu 16.04 64-bit LTS to allow developing applications for the snickerdoodle.
Prepare the snickerdoodle's microSD card
- Copy the Ubuntu image from the krtkl website to a microSD card.
- Finalize the microSD card by copying some files from the folder on the microSD card that corresponds to your hardware setup to the root of the microSD card. For instance, if you have a snickerdoodle Black, you must copy the files 'boot.bin' and 'devicetree.dtb' from the folder 'snickerdoodle-black' to the root.
- Edit the configuration file 'config.txt' to setup the network. The snickerdoodle needs network access to let you SSH into it. Configure at least the access point part. The network can be wired (e.g. with a piSmasher board) or wireless.
Install Xilinx Vivado (the Zynq SDK)
I did this in a virtual machine on Windows 10, running 64-bit Ubuntu 16.04 LTS adn with a 50 GB virtual harddisk. The Xilinx software does not run on a 32-bit version and needs more than 30 GB of disk space.In its documentation, snickerdoodle manufacturer krtkl uses Ubuntu 16.04 with Vivado 2016.4, but this is quite old. However, Vivado 2020.1 has not been tested with Ubuntu 20.04, adn suggests using an a previous version of Ubuntu. Vivado 2016.4 from the krtkl documentation is no longer supported by the Xilinx download manager. I therefore chose a solution in between: Vivado 2018.2 together with Ubuntu 16.04 LTS 64-bit.
On Ubuntu you must allow execution of the downloaded Vivado installerby ticking the box ‘Allow executing file as program’ on the Permissions tab.
Move the downloaded file to your Home folder, and then open a terminal to execute it. The download will now be unpacked, and the installer is started. This can take a while depending on your computer.
When asked for it, fill in your Xilinx account credentials, agree to everything, and make sure to select the Vivado WebPACK.
The Vivado WebPACK is big, some 8 GB, and it requires over 30 GB of disk space, so I set the harddisk for the virtual machine to 50 GB.
You can now update the path in /etc/environment file to simplify using the SDK. The path depends on the version of the SDK, here is what I added:
/opt/Xilinx/SDK/2018.2/bin
/opt/Xilinx/Vivado/2018.2/bin
/opt/Xilinx/DocNav
/opt/Xilinx/SDK/2018.2/gnu/armr5/lin/file
/opt/Xilinx/SDK/2018.2/gnu/armr5/lin/gcc-arm-none-eabi/bin
/opt/Xilinx/SDK/2018.2/gnu/microblaze/lin/bin
/opt/Xilinx/SDK/2018.2/gnu/microblaze/linux_toolchain/lin64_le/bin
/opt/Xilinx/SDK/2018.2/gnu/microblaze/linux_toolchain/lin32_le
Log out and log in again to apply the new path.
With the bash command 'which' check if the SDK is available and responding:
$ which xsdk
$ which vivado
$ which vivado
Launch the SDK with the command xsdk:
$ xsdk
When the SDK is ready, create a little test project, a small hello-world application that will run on the snickerdoodle.
Create a new empty C project named 'hello-snickerdoodle' for OS platform 'linux' with processor type 'ps7_cortexa9'. Add a main.c file to the project and write a short 'Hello World' and build it:
#include < stdio.h >
#include < stdlib.h >
int main(int argc, char *argv[])
{
printf("Hello snickerdoodle!\n");
return EXIT_SUCCESS;
}
#include < stdlib.h >
int main(int argc, char *argv[])
{
printf("Hello snickerdoodle!\n");
return EXIT_SUCCESS;
}
Using the IP address you set before in 'config.txt', connect your computer to the access point provided by the snickerdoodle.
I use a little trick to make it easier to copy a file to the snickerdoodle (Linux purists, please close your eyes).
First, in one terminal, using SSH set the permissions of the usr/bin folder on the snickerdoodle to 777 (use the IP address you set before in 'config.txt').
Note: The first time you SSH into snickerdoodle you will be asked to change the password. The snickerdoodle SSH default password is 'snickerdoodle'.
$ ssh admin@192.168.3.1 (password will be asked)
$ sudo chmod 777 /usr/bin
$ sudo chmod 777 /usr/bin
Then, in a second terminal, use secure copy (SCP) to copy the executable to the snickerdoodle :
$ scp workspace/hello-snickerdoodle/Debug/hello-snickerdoodle.elf admin@192.168.3.1:/usr/bin/hello-snickerdoodle
With SSH in terminal one you can now execute it:
$ hello-snickerdoodle
This saves a lot of fiddling with the snickerdoodle’s SD card.
The development environment for your snickerdoodle is now up and running and you can start creating applications for it.
Want to build a project?
Bring your design to life with the Elektor PCB Service, powered by Eurocircuits. Upload the project files and order professionally manufactured PCBs or assembled boards through a proven European production platform.
Supporting KiCad, Eagle, Gerber, and ODB++ formats, the service is suitable for everything from prototypes and validation builds to series production and volume manufacturing.
Made in Europe. Fast. Reliable. Professional.
Discussion (0 comments)