
Firing Up a Pokit Meter
on
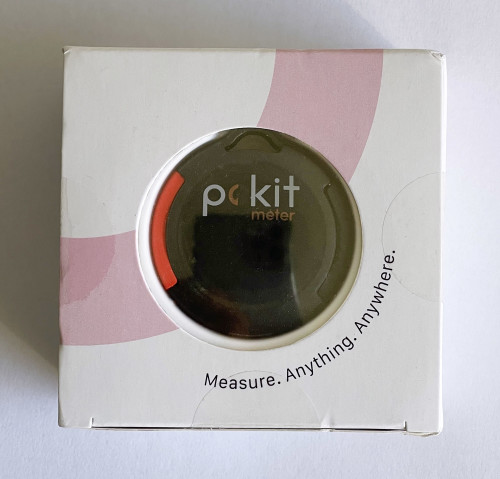
I have been looking for a fairly basic data logging device for some time now. When I read the spec for the Pokit Meter, it looked as if it might just fit the bill. The design looked rather unconventional and interesting. I didn’t have to wait long before the small cardboard box (Figure 1) was sitting on my bench.
Symbols on the outside of the box (Figure 2) indicate the functions of the device inside. On the right in Figure 2c, you can see what’s inside.
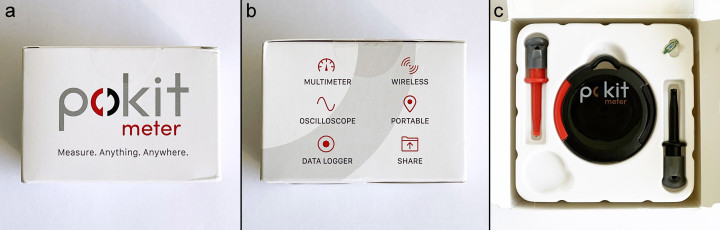
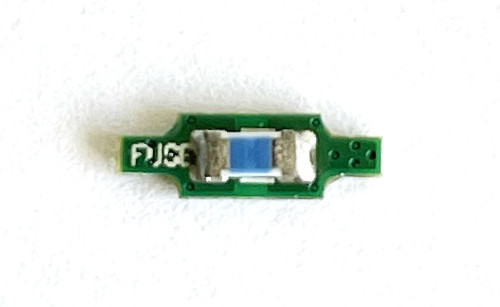
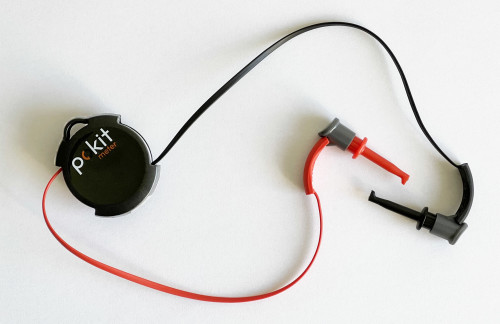
The 48 mm diameter 18 mm thick puck shown in Figure 1 is the Pokit Meter, which Elektor first reported on in 2019. Gripper probes in red and black are to the left and right and at the top right is a tiny spare fuse (Figure 3). This miniscule SMD component is a spare fuse on a tiny PCB. Some versions of the packaging include a pop out section which holds the fuse securely and allows it to be safely stowed into one of the pockets in the carry pouch. I took it out completely and taped it to the instruction sheet to ensure it doesn’t get lost.
Let’s Fire Up the Pokit Meter
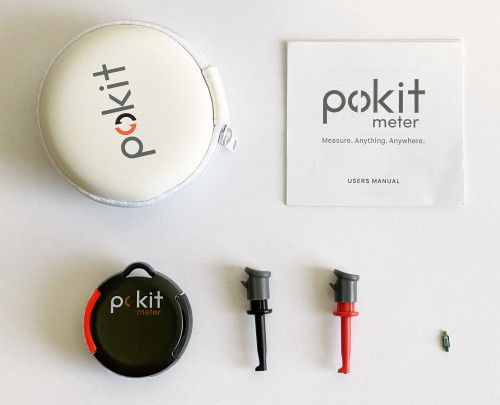
Figure 4 shows all the items spread out on the bench. A zip up carry pouch has space for the Pokit meter, spare fuse and gripper probes. The 8 x 22 cm information sheet lists the basic technical information for the device and lets us know that the corresponding ‘pokitMeter’ app is available to download for smart devices running Android or iOS from the play or app store. It also gives battery information and indicates that the fuse is situated underneath the battery. A link to the manufacturer or QR code would have been useful here. On the homepage of the manufacturer, Pokit Innovations, there is hardly any further information to be found; but there is a link to a forum. At least I know now that this measuring device was funded through a successful crowdfunding campaign and that I have the black version from a range of four coloured versions and that there will soon be a Pokit Pro version and a Smartwatch app.
The Pokit meter’s retractable leads are terminated in needle point probe tips which can be used directly for probing a circuit or can be plugged into one of the spring loaded grippers supplied. The leads extend (Figure 5) to a maximum reach between the gripper probes of around 56 cm. The button on the bottom of the puck retracts the leads just like the power cord stow feature of some vacuum cleaners. Overall, the construction of this unit has been very well thought-out.
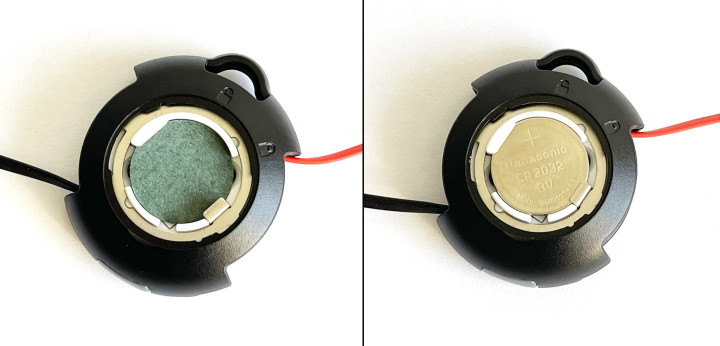
According to the instruction leaflet, we need to fit a CR2032 type lithium coin cell but mine came with one already installed. It was just necessary to pop it out and remove the thin green insulating disc of waxed paper underneath the cell (Figure 6).
With the battery replaced we can go to the Play Store or App store to locate and install the ‘pokitMeter’ app (Figure 7) on our smart device. Curiously the image displayed on the app page actually shows a sample measurement reading of ‘3.222 mV’ but the app will in fact only display a measurement resolved to two decimal places.

From now on there were no more big surprises. With the app running, we can pair with the Pokit meter and interact with it via the Bluetooth link. The first thing I noticed was that the display remains consistently in landscape format, no matter how you turn the phone. That makes sense for displaying waveforms, but for the multimeter option at least, I would prefer portrait format; it’s easier to hold a phone in that orientation with one hand, and it’s almost universal for conventional multimeters.
Flakiness Persists
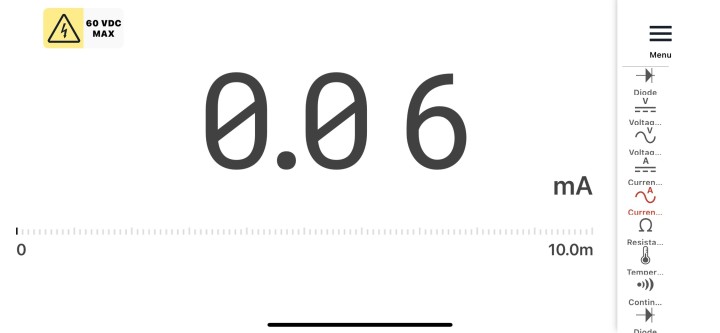
When trying it out for the first time, it was noticed that when operated as a multimeter, in some measuring ranges, neither open nor short-circuited terminals produce a clear reading of zero. Figure 8 shows the screen for measuring alternating current where the display is showing 60 µA with open terminals. It looks like the zero adjustment is a bit buggy when the measurement ranges are switched. The device does however measure other values correctly.
Regarding the measurement properties for this device: Pokit can record the ‘real RMS value’ of alternating voltages and alternating currents which is very commendable. After comparative measurements with calibrated multimeters, I can confirm that claim is in fact true!
A bit of playing around showed that when switching from ‘continuity test’ to another mode, the beep tone (when the terminals were short-circuited) was often not switched off. You had to select the other mode a second time, then it was quiet and everything was in perfect order. So not a major issue, just an annoying carelessness somewhere in the code.
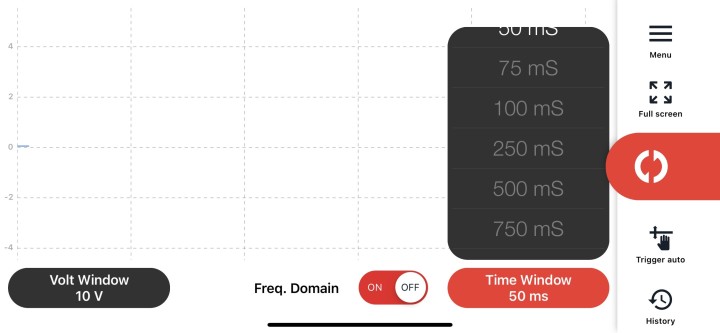
Autoranging is the default setting in multimeter mode but you can also select the measuring range manually. When in oscilloscope mode, the GUI occasionally suffers redraw errors. The view in Figure 9 shows that the selected time base indicator sometimes can hardly be read.
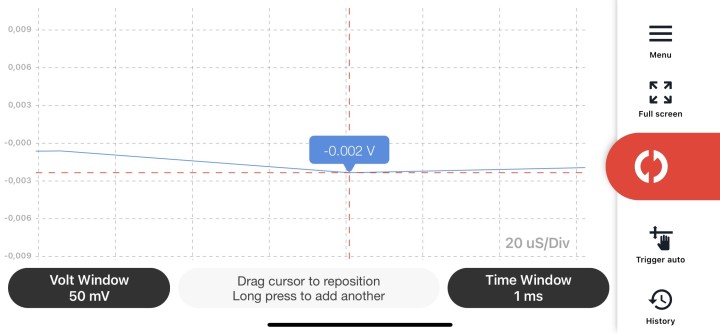
Unlike a conventional scope, the Pokit meter oscilloscope behaves like a single shot DSO triggered by tapping on the white button to the right of the screen. The trace does not free run and continuously overwrite the screen (or scroll horizontally). This mode of operation would be good as an option, but it is the only option and thus limits its usability as a scope. The more expensive Pokit Pro version is still under development but will be able to operate in conventional scope mode. Incidentally, you can set a cursor on the displayed waveform by tapping it (Figure 10) and the measured amplitude is displayed — interestingly enough, to a resolution of three decimal places. A second cursor can also be positioned. Both should be able to be moved horizontally with the finger on the waveform, but I could not get that to work. Another bug?
At this point, an update request popped up. Checking out my unit, I found I was using hardware version 1.6 running firmware version 1.2. The update offered firmware version 1.5 which I accepted. After updating, the redraw bug disappeared and the cursor could now be moved as intended. It was reassuring to know that software maintenance is ongoing. The newer version didn’t cure the beeping problem but the fault now seems to occur less often when switching between ranges.
Measurement Accuracy and Inconsistencies
Pokit should be able to measure voltages and currents to an accuracy of 1% — regardless of whether they are AC or DC levels. I can confirm this by making comparative measurements. At 1 V DC and 5 V DC the error was ≤0.2% in both cases and at 12 V DC it was even less than 0.1%. The currents readings also stayed at around 0.2% error. I measured the frequency response to AC signals. In the range up to 500 Hz, the error was less than 1%. At 5 kHz, on the other hand, it rose to around 5%. Measurements in the upper range of the audio frequency band cannot really be trusted, but this is not a special drawback of Pokit alone. You can only expect more consistant values from more professional measuring equipment beyond €1000. All in all, I was quite impressed by the Pokit’s measurement accuracy.
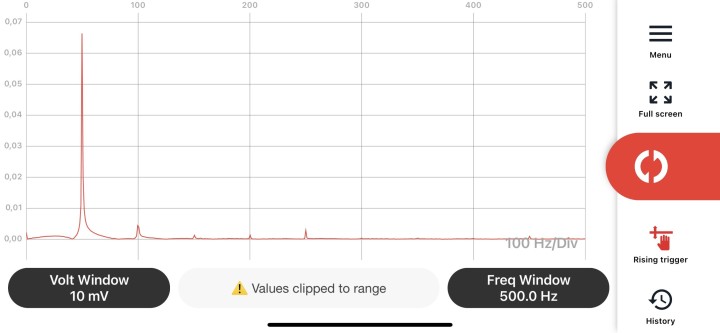
I can accept that the device lacks many of the features of a ‘real oscilloscope’ that could have been implemented in software at no extra cost. You can’t really expect more from a device in this price range. The function as a spectrum analyzer (Figure 11) is also rather rudimentary and an add-on.
As I mentioned, the function of particular interest to me is the data logger. The hardware technical specification indicates that 8,000 measurements can be recorded. That doesn’t sound too generous, but the measurement intervals can be set at: 1/2/3/4/5/10/30 s and 1/5/10 m and 1 h. Crunching the numbers, this results in a maximum time span ranging from 8,000 s = 2:13:20 h:m:s (at a one second sample rate) up to 8,000 h orjust over 333 d (i.e., about 11 months). The Pokit paperwork suggests that the span with a 1-s interval is shorter i.e. 103 m (= 6,180 s) and with a 1-h interval only 8 months (≈ 5,850 h). The technical spec on the website indicates operation ‘up to 6 months’ which is most likely a result of the 6 month maximum battery lifespan. It would certainly inspire more confidence if there were more consistency in the documentation.
Also in the Elektor Store, we correctly identify the A/D converter in the Pokit as 12 bit, the page integrated in the app under ‘TECH SPECS’ suggests it’s 14 bit — which it definetely isn’t. This page also contains a few other anomalies such as the data logger sample interval is selectable in the range from ‘1 s — 1 day’ and the maximum log time is ‘1 year (at 6 hours/sample)’ — none of which is correct. Anyway the six-month battery life would certainly put an early halt to proceedings.
The screenshot in Figure 12 shows the waveform of a 50 kHz sine wave at the fastest time base setting; you can see that at least the specified sample rate of 1 MS/s is correct. This means that the oscilloscope function is good to display signals in the entire audio spectrum. As a ‘real oscilloscope’ it would need to be at least 10 times faster and have a number of additional trigger capabilities; with the Pokit you do have at least a mini storage scope in your pocket and can monitor changes in voltages or currents in the sub-HF range far out in the field far away from any power supply. That’s the environment in which it really shines.

For the test I wanted to monitor the voltage level of my Prius directly on the 12 V battery every 1 s while the car is in motion. At my first attempt, Pokit was displaying incorrect values (battery voltage of 7.5 V). The remedy was to cancel and start recording again. The second attempt was successful. The logged values are again not shown in real time. Only at the end of the logging period we can see a waveform made up of the logged values. This again is less than optimal, a real time view would be more useful.
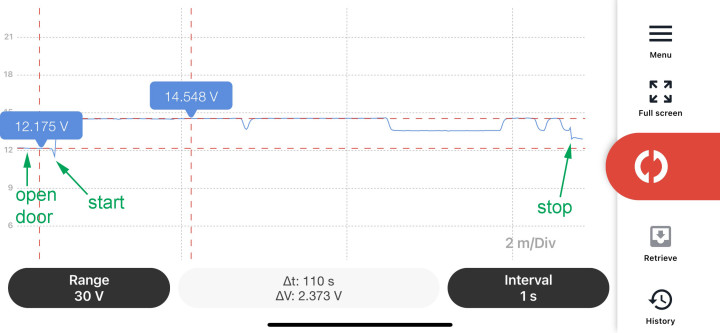
Figure 13 shows car’s battery voltage level during the seven-minute drive down a country lane. The voltage fluctuates between 11.7 V and 14.55 V. When first connecting Pokit, the on-board voltage was exactly 12.23 V. At the beginning you can see a slight drop to 12.175 V when getting into the car, as the hydraulic pump kicks in to build up brake pressure; it draws up to 15 A for a few seconds when the driver’s door is opened. When starting, the voltage goes briefly below 12 V when all the electrics are activated and then the battery receives a charge. When the battery is full, charging is terminated and the battery voltage drops to around 13.4 V. Even if the end-of-charge voltage is a bit high for my taste - the curve in Figure 13 is quite informative. The logger is very well suited to reveal such insights and is by far accurate enough.
Pokit Meter: A Handy Solution
With a few reservations about the GUI, I found the Pokit Meter to be quite usable and well worth the money — just under €100. Small inconsistencies in its operation are annoying, but you can live with them. Version 1.5 of the GUI is still a little flaky, but the overall concept is good, and the company is a relatively new upstart, so we can expect the product to improve as more updates arrive. I can’t understand why the bug with the beep has not been resolved, at least with the Apple version of the app; it should really have been noticed. And why is it not possible to set the oscilloscope time base down to a minimum of 20 µs/div? The end is there at 1 ms per screen = 200 µs/div. The 20 µs per horizontal division can only be achieved by zooming out using two-fingers. The hardware has the capability, but it cannot be configured in the firmware.
A lot of thought has gone into the physical layout of this unit to make it convenient to use. Its physical size is just about on the limits of what you would consider unobtrusive and pocketable when attached as a fob to a set of keys.
For me the data logger function is ideal, and I’m sure, as I use it more and more I will come to appreiciate its other capabilities. A little more storage space would be good, but on the whole I am happy with what it can do. I don’t necessarily need higher sample rates, as these would probably have a heavy impact on battery life. In my opinion, Pokit Innovations has done a lot of things right with the hardware, but I get the impression we are working with a beta version of the firmware.
Am I looking forward to the Pokit Pro version? Surprisingly, not so much even though it promises real-time scope capability and simultaneous operation of four units on one smart device. For me the concept of a discreet key fob that turns your smart device into a sophisticated piece of test equipment is very attractive.
I can see the Pokit Meter will find a place in my growing collection of test gear for use in the lab and especially in the field. For students and beginners, its capabilities are so wide ranging they may not need to buy any other measuring device at first for low voltage, low frequency measurement applications.
Questions or Comments?
Do you have any technical questions or comments prompted by this article? You can email the editor at editor@elektor.com.
Discussion (2 comments)