
Build your own 3D printer (3) — Hardware considerations: principles
on
When looking into our project, we have to make several decisions that determine the further course of the project. In order to print in 3D, we have to be able to move either our ‘printing head’, our printed object, or a combination of the two in three dimensions. We went for the combination of both a moving printing head and a moving object table. Here’s why.
A table moving in only one direction is not very hard to design, the same goes for a ‘printing head’ moving in two directions. Let’s show you how we did it.
A construction of aluminum profiles provides a solid base for our machine (figure 1, photo above). Figure 2 shows the profile: it’s quite sturdy and easy to interconnect (note the screws inside).
 Figure 2
Onto this base we mount a glider for our table and a stepper motor for moving it (figures 3 and 4). A belt is fixed to the table, which can now be moved along one axis. Let’s call this the y-axis. Movement along the second axis (let’s call this one the x-axis) is realized by moving the printing head.
 Figure 3
 Figure 4
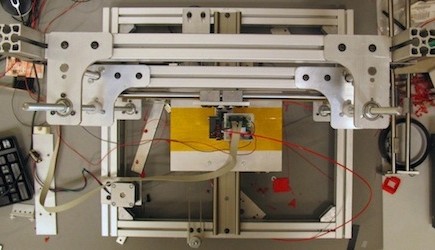
A little left off center in figure 5 you can see the stepper motor for adjusting the x-position. Again, a belt is used to move the head along the axis. Now we have to enable this whole assembly to be adjusted in height to complete the three dimensional movement. For this purpose we mounted a stepper motor to the base construction that drives two threaded rods via a belt (figure 5, in front). When these rods are rotated by the motor, the printing head carrier assembly is moved up or down, depending on the direction of rotation. The threads in two white delrin nuts (M8, seen left and right in the assembly) that Chris produced himself on our lab’s lathe take care of this. The two metal studs act as gliders along which the assembly can be moved.
These, in rudimentary form, are the basics of our mechanical assembly. The sizes and details will be worked out in an article to appear in Elektor magazine later this year.
 Figure 5
We close with a photo series of a nozzle construction (figure 6). The plastic we’re going to use for building our 3D objects comes in the form of a strand. So Chris came up with a way to feed this strand through a nozzle that’s heated to melt the plastic, so it can be ‘printed’ in the form and shape we want. The series shows one serious attempt to accomplish this.

 Figure 6
Photo's: Thijs Beckers
Discussion (4 comments)