
Making Coffee with the MAX78000 and Some AI (Part 1): Getting Started
on
Modern hardware can accelerate the use of convolutional neural networks (CNN), a kind of deep neural network, that are mostly used to analyze visual imagery or audio. For an application, this opens up a new way to process data and interact with its environment. The required data processing for a CNN is a lot for a single CPU and something that can be heavily paralyzing; therefore, an accelerator is included. For your PC, this can be done with the help of your graphics card or special accelerator units like the NVIDIA Tesla cards (or these accelerators are built into the system itself, as seen on the new Apple M1 processor). The Maxim Integrated MAX78000 MCU brings a CNN accelerator, a Cortex-M4F and a RISC-V core together, as you can read from the datasheet. Aimed at CNN processing while operating in low-power modes, this allows for new ways to integrate AI in embedded designs.
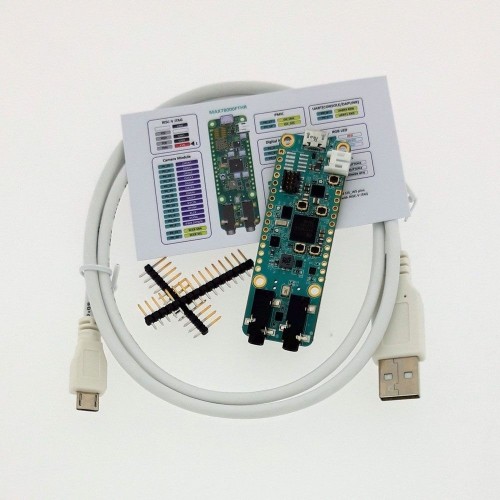
My colleagues at Elektor have already described the hardware in two other articles [2][3], so I will focus this article on the software involved with getting the MAX78000 up and running. Also, we will train a CNN to recognize some keywords and do some hardware interactions. The MAX78000FTHR board (Figure 1) that I use is available in the Elektor Store.
For a proof of concept, we will modify the keyword recognition example to create a voice-operated coffeemaker. With COVID-19 still going around the globe, shared office devices like a coffeemaker can act as hub for virus distribution. A coffeemaker that users can control without having to touch a button will be our demo for the software workflow used for the MAX78000. The provided SDK enables us to program in C or C++. Documentation can be found at the Maxim GitHub repository for the MAX78000.
Two Sides of the Same Coin
Doing AI on embedded devices requires a new set of skills, depending on the field from which you are coming. Those who are well trained to create neural networks will usually have a hard time entering the world of embedded development. If you are embedded developer and going into the field of AI,it can be rough. If you decide to use pretrained networks form the samples, your average development machine will be sufficient.
We will try to make a way through both fields and will start with the training of a neural network. To simplify things, we will modify an existing example rather than start from scratch. This will give you an idea about the tools that are used.
The embedded development, and therefore the implementation into the MAX78000 itself, will be a second step. It will be challenging if you are new to embedded devices. Therefore, we will address the key concepts in two articles. This first article focuses on AI. In the second article, we dive into MAX78000 development.
CUDA-Capable GPUs Recommended
If you have choose to get into neural networks and their creation, there is one thing you have to consider. To train neural networks for the MAX78000, it is strongly recommended that you use an NVIDIA CUDA-capable GPU inside your system. As AMD and Intel GPUs are lacking support on deep neural network training frameworks like Tensor Flow and PyTorch, Nvidia CUDA is the GPU of choice. And even if you have a NVIDIA CUDA capable GPU, those must be at least a Maxwell generation chip (NVIDIA GTX 9 Series) or a NVIDIA Tesla K80.
As I write this in early 2021, new GPUs are costly, which might be a factor for you to consider. You can get around this by just using your CPU to do all the calculations required for the neural networks, but doing so will increase the required time by at least a factor of 10.
Smart Coffeemaker with a MAX78000
Modifying a coffeemaker is something that most of us can imagine, maybe for many different reasons. Perhaps you’ve engineered modifications such as adding Wi-Fi and incorporating a new feature for brewing? Or maybe you’ve repaired a broken machine and added some enhancements? This proof of concept is far from perfect, but it shall provide the following features:
- The machine shall recognize “Happy” as its name.
- Ask if it shall brew a coffee.
- Ask if a cup is inserted.
- User feedback through LCD.
The hardware is quite simple. We need:
- MAX78000FTHR RevA board (Figure 1)
- Breadboard
- Jumper wire
- 2.2” TFT Screen from Elektor Store (Figure 2)
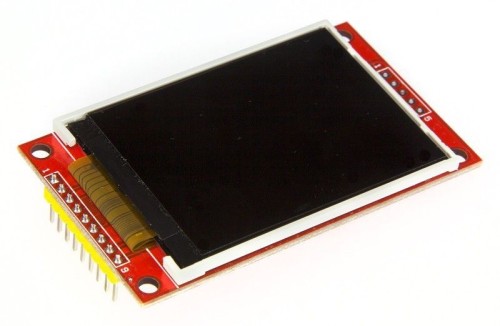
Figure 2: The LCD.
If you are missing the coffeemaker in this list, be assured, no working coffeemakers were harmed in making this presentation. As this is a proof of concept, this means the integration into a real coffeemaker is vendor dependent, and we use a virtual one here. It will show the basic principles.
Training and Synthesis
Maxim provides some examples to train the Convolutional Neural Networks used in their examples. You can find a guide to the required software at their GitHub page. Be aware that this is done with Linux and you should have an NVIDIA CUDA-capable graphics card. So, for the kws20_demo this took on a NVIDIA GeForce GTX 1050Ti and an AMD Ryzen 2700X about 3.5 hours with CUDA acceleration.
There are some experimental drivers that allow you to use the Windows Subsystem for Linux to access CUDA acceleration, but for stability, it is recommended to stick to a Debian Linux variant like Ubuntu. So, for this part, some instructions will be given on how to start with a fresh install of Ubuntu 20.04 and the Maxim provided tools.
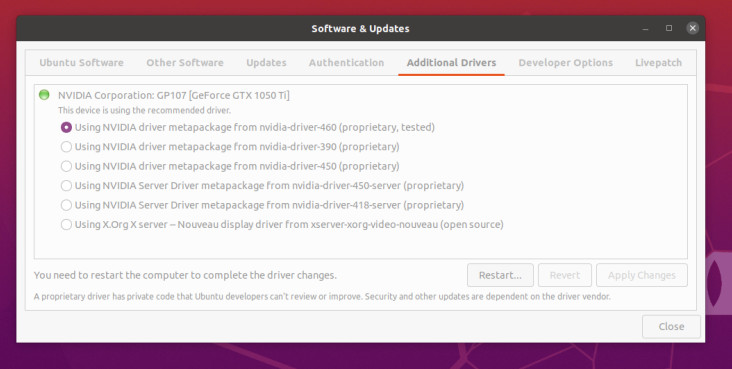
The first step after installation is to get the proprietary NVIDIA drivers installed to gain access to CUDA acceleration. On Ubuntu use Software and Updates and add for your card the appropriate drivers under the Additional Drivers tab. For the used GTX1050Ti you can see the required driver in Figure 3.
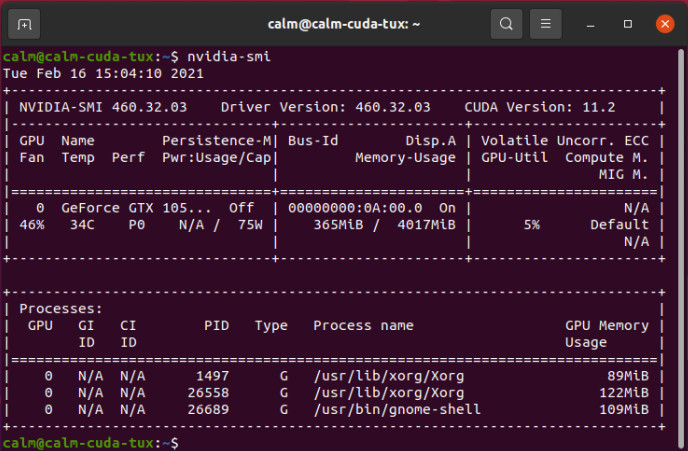
You will need to reboot your system, and if afterwards it still shows a display output, you got the NVIDIA driver working. You can verify it with the nvidia-smi tool using a console window, as show in Figure 4, as this will also show the used CUDA version (in this case 11.2).
For software installation follow the guide Maxim provides here. Following the path for Linux inside the manual will enable you to do the neural network training on your machine. The last step for the embedded software development kit allows for some shortcuts. The ARM compiler can be installed in Ubuntu using sudo apt install gcc-arm-none-eabi. In this case, the ARM compiler is not required to be added to the ~/.profiles file. For the RISC V compiler, the current release, as of the time of this writing, is 10.1, so grab a copy and extract the files to your home folder. Just add the following lines to your ~/.profiles file:
echo $PATH | grep -q -s "~/xpack-riscv-none-embed-gcc-10.1.0-1.1/bin"
if [ $? -eq 1 ] ; then
PATH=$PATH:~/xpack-riscv-none-embed-gcc-10.1.0-1.1/bin
export PATH
RISCVGCC_DIR=~/xpack-riscv-none-embed-gcc-10.1.0-1.1/
export RISCVGCC_DIR
fi
This will enable you to do the network trainings. The second part required is the synthesis. The synthesis is the step to convert a trained network to something the MAX78000 can use. For the synthesis you can find the installation manual here. As you already have installed the training part, skip to the Upstream Code section in the manual.
If you follow me so far, you will be able to train and synthesize models to be used with the MAX78000. This also mean you can alter the scripts to train new items to be recognized if they exist in the training data.
Modify and Train the Keyword Spotting Example
One of the examples included is keyword spotting. As already mentioned in the article from Clemens Valens, the demo listens to a set of 20 pretrained words. These words are “up, down, left, right, stop, go, yes, no, on, off, one, two, three, four, five, six, seven, eight, nine, zero” and are chosen out of a set of 31 words which can be trained by a user. The complete list of supported keywords is “backward, bed, bird, cat, dog, down, eight, five, follow, forward, four, go, happy, house, learn, left, marvin, nine, no, off, on, one, right, seven, sheila, six, stop, three, tree, two, up, visual, wow, yes, zero”.
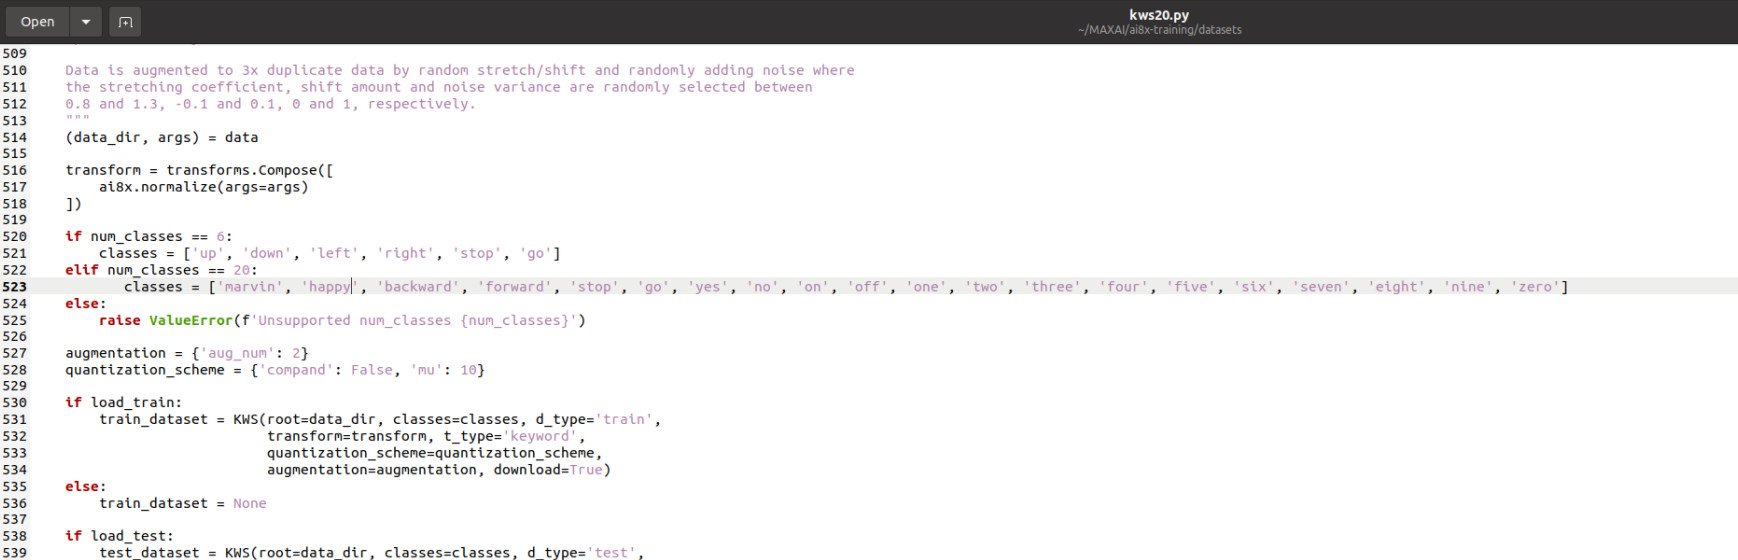
For our demo, we stick to the number of 20 keywords we would like to recognize, but we will use “marvin, happy, backward, forward, stop, go, yes, no, on, off, one, two, three, four, five, six, seven, eight, nine, zero”.
To modify the list, we navigate to our ai8x-training folder on the installed Ubuntu machine (see Figure 5).

Inside the folder we are going to change the ./datasets/kws20.py file, as seen in Figure 6.
From here we can open a terminal and navigate to the ai8x-training folder. To get the CNN with the new set keywords, we start the training with ./scripts/train_kws20_v3.sh.
At this point the training would start and consume a few hours or days, depending on your hardware. When the training ends, you will find in ./logs/ a new time and date encoded folder that contains your training results. This results now need to be synthesized to be used by the MAX78000.
Synthesis of the Data
After the training is done, the information needs to be brought into a form the MAX78000 will be able to load. We need to enter the ai8x-synthesis folder for file movement and deletion. To make sure no old data will be used, delete the content of the trained folder. Copy from the ai8x-training/logs/{start time}/ folder best-pth.tar into ai8x-synthesis/trained/ as we need both files for further processing. Start a terminal and go to your ai8x-synthesis folder.
Run source bin/activate to set up the Python environment. We can now do a quantization of our copied trained model with ./quantize.py trained/best.pth.tar trained/ai85-kws20-v3-qat8-q.pth.tar –device MAX78000 -v into a quantized file called ai85-kws20-v3-qat8-q.pth.tar inside the trained folder. After the quantization we can generate some code and the final usable files for the MAX78000.
The final step will be code generation for later use. Inside the still open terminal type ./ai8xize.py --verbose --log --test-dir ~/MAX78000/ --prefix kws20_v3 --checkpoint-file trained/ai85-kws20_v3-qat8-q.pth.tar --config-file networks/kws20-v3-hwc.yaml --softmax --device MAX78000 --compact-data --mexpress --timer 0 --display-checkpoint --board-name FTHR_RevA
This will generate a folder MAX78000 inside home directory that will hold a small basic application that tests itself against predefined test data inside the code. This application will be inside a kws20_v3 folder, as the files weights.h, cnn.h and cnn.c, holding the CNN and its functions. At this point the embedded development begins, as we should now have a CNN that will listen to our modified keywords.
Some Further Reading
Want to take another step into the world of CNNs? Start with the introduction here. Following the tutorial will help you understand a bit more about what the scripts and training parts do underneath. Also [12] will give you some basic ideas about what the math behind the CNN looks like and why you are using it. This will help smoothen your path into this field.
The Maxim-provided tools work with PyTorch and TensorFlow, which only offer full support for CUDA on NVIDIA GPUs. But if you are brave, you might want to look at ROCm by AMD. This is a modified version of PyTorch that allows acceleration on certain AMD GPUs. Experimental and officially not supported also some of those integrated into the AMD CPUs itself.
The MAX78000: Whats's Next?
As we are now able to train new CNNs for the MAX78000, we will move on to the embedded side of things. For development, we will use the tools provided by Maxim. The Eclipse-based IDE can be downloaded from Maxim’s website. For my development, these tools also worked well within a virtual machine. If something unexpected happens, or if you need to change your development machine, it's just a matter of moving some virtual machine files arround. As an added bonus, you can also take some snapshots of your development environment if needed. The development of our coffeemaker will be done in plain C for now. In the meantime, you can already a look at the MAX78000 documentation and the user guide for the MAX78000. Be aware that the documentation is still work in progress, so if you feel like anything is missing, you can leave a note as a GitHub issue or at www.elektormagazine.com/labs/MAX78000.
Questions or Comments?
Do you have technical questions or comments about this article? Email the author at mathias.claussen@elektor.com or contact Elektor at editor@elektor.com.

Discussion (2 comments)