
Red Pitaya: Not just a USB scope module
December 2, 2014
on
on
Red Pitaya is the first open-source instrumentation platform that can be configured for various measurement tasks. Ready-made apps are available on the Web for downloading, but you can also program your own specific measurement processes. Several potential measuring tasks and demo programs are described in this article.
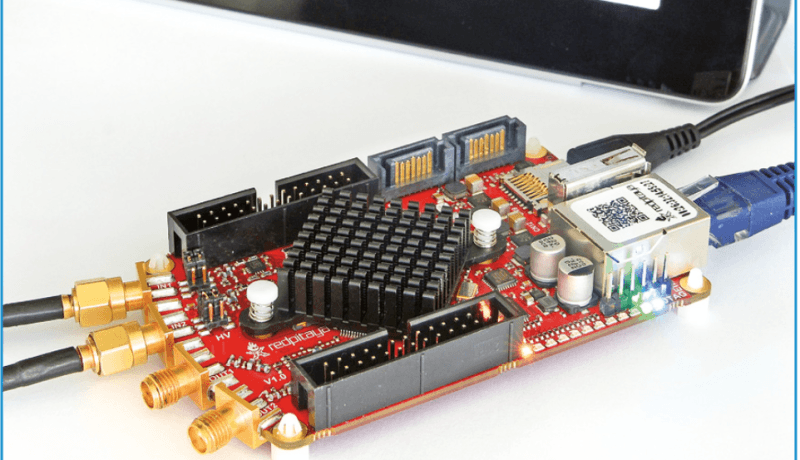
To get an idea of what the module (Figure 1) can do, have a look at the block diagram in Figure 2. The central component is a Xilinx ZC7Z010 system-on-chip (SoC) device. It contains a dual- core ARM9 processor clocked at 800 MHz, which hosts a Linux distribution on the Red Pitaya board. The SoC also contains an FPGA with 28k logic cells, a bunch of block RAM (BRAM), and several DSP slices. The FPGA can be used to implement functions, such as the functions used in digital signal processing, for extremely fast execution. The SoC is surrounded by a variety of peripheral devices and 512 MB of RAM.
Download this free full article as a iPad friendly PDF
There are two 14-bit A/D and D/A converters for measurement tasks, with a maximum sample rate of 125 MS/s. With those specs you can handle signal conversion for fairly demanding tasks, and the FPGA gives you the necessary processing speed. The board features an Ethernet port, a USB Host port and a USB Com port for easy communication with a PC over a serial interface. There is also a slot for an SD card, which the Linux OS used for mass storage instead of a hard disk drive. General purpose I/O, I2C, RS232 and additional relatively slow A/D and D/A converters can be accessed through extension connectors. In short, the module has everything you need for demanding measurement tasks and high- performance signal processing with relatively high-frequency signals. That’s exactly what Red Pitaya is supposed to be: a general-purpose instrumentation platform for signals up to 50 MHz.
Figure 2: Block diagram of the Red Pitaya module.

Getting started
Getting started does not present any problems because a good user guide is available on the website. Simply copy all the software and data that is supposed to be on the SD card to a MicroSD card and insert it in the card slot on the Red Pitaya board. Then connect the Red Pitaya to your LAN and switch on the power. The module boots up automatically, and you’re ready to go. You might want to monitor the boot process on your PC via the USB Com port, since that way you can see which IP address is assigned to the Red Pitaya. After the module has booted up, you can communicate with Linux directly over the USB Com port or you can use Ethernet for further communication. The latter is the preferred method.
Instruments from the Bazaar
One of the main objectives of the Red Pitaya project is to provide ready-made applications in the form of apps available online. You can find the apps in the Red Pitaya Bazaar. After you point your web browser to the Red Pitaya website, you can go to the Bazaar from the home page and select the application you want. The apps listed in Table 1 are currently available.

Table 1: Apps presently available in the RP Bazaar
To get an idea of what the module (Figure 1) can do, have a look at the block diagram in Figure 2. The central component is a Xilinx ZC7Z010 system-on-chip (SoC) device. It contains a dual- core ARM9 processor clocked at 800 MHz, which hosts a Linux distribution on the Red Pitaya board. The SoC also contains an FPGA with 28k logic cells, a bunch of block RAM (BRAM), and several DSP slices. The FPGA can be used to implement functions, such as the functions used in digital signal processing, for extremely fast execution. The SoC is surrounded by a variety of peripheral devices and 512 MB of RAM.
Download this free full article as a iPad friendly PDF
There are two 14-bit A/D and D/A converters for measurement tasks, with a maximum sample rate of 125 MS/s. With those specs you can handle signal conversion for fairly demanding tasks, and the FPGA gives you the necessary processing speed. The board features an Ethernet port, a USB Host port and a USB Com port for easy communication with a PC over a serial interface. There is also a slot for an SD card, which the Linux OS used for mass storage instead of a hard disk drive. General purpose I/O, I2C, RS232 and additional relatively slow A/D and D/A converters can be accessed through extension connectors. In short, the module has everything you need for demanding measurement tasks and high- performance signal processing with relatively high-frequency signals. That’s exactly what Red Pitaya is supposed to be: a general-purpose instrumentation platform for signals up to 50 MHz.
Figure 2: Block diagram of the Red Pitaya module.
Getting started
Getting started does not present any problems because a good user guide is available on the website. Simply copy all the software and data that is supposed to be on the SD card to a MicroSD card and insert it in the card slot on the Red Pitaya board. Then connect the Red Pitaya to your LAN and switch on the power. The module boots up automatically, and you’re ready to go. You might want to monitor the boot process on your PC via the USB Com port, since that way you can see which IP address is assigned to the Red Pitaya. After the module has booted up, you can communicate with Linux directly over the USB Com port or you can use Ethernet for further communication. The latter is the preferred method.
Instruments from the Bazaar
One of the main objectives of the Red Pitaya project is to provide ready-made applications in the form of apps available online. You can find the apps in the Red Pitaya Bazaar. After you point your web browser to the Red Pitaya website, you can go to the Bazaar from the home page and select the application you want. The apps listed in Table 1 are currently available.
Table 1: Apps presently available in the RP Bazaar
Read full article
Hide full article
Discussion (1 comment)