
Starting with Node-RED
on
In recent years there has been an increase in the development and use of block-based visual programming tools. The idea here is that the programmer is given a set of visual blocks and all that is required is to connect these building blocks in a logical way to create the required application program. Node-RED is an open source visual block-based programming tool that includes nodes for doing very complex tasks, including web access, Twitter, E-mail, HTTP, Bluetooth, MQTT, controlling the GPIO ports of popular computers such as the Raspberry Pi, Arduino, ESP32, etc. The nice thing about Node-RED is that the programmer does not need to learn to write complex programs. For example, an email can be sent by joining a few nodes together and writing only a few lines of simple code.
Installing the Node-RED
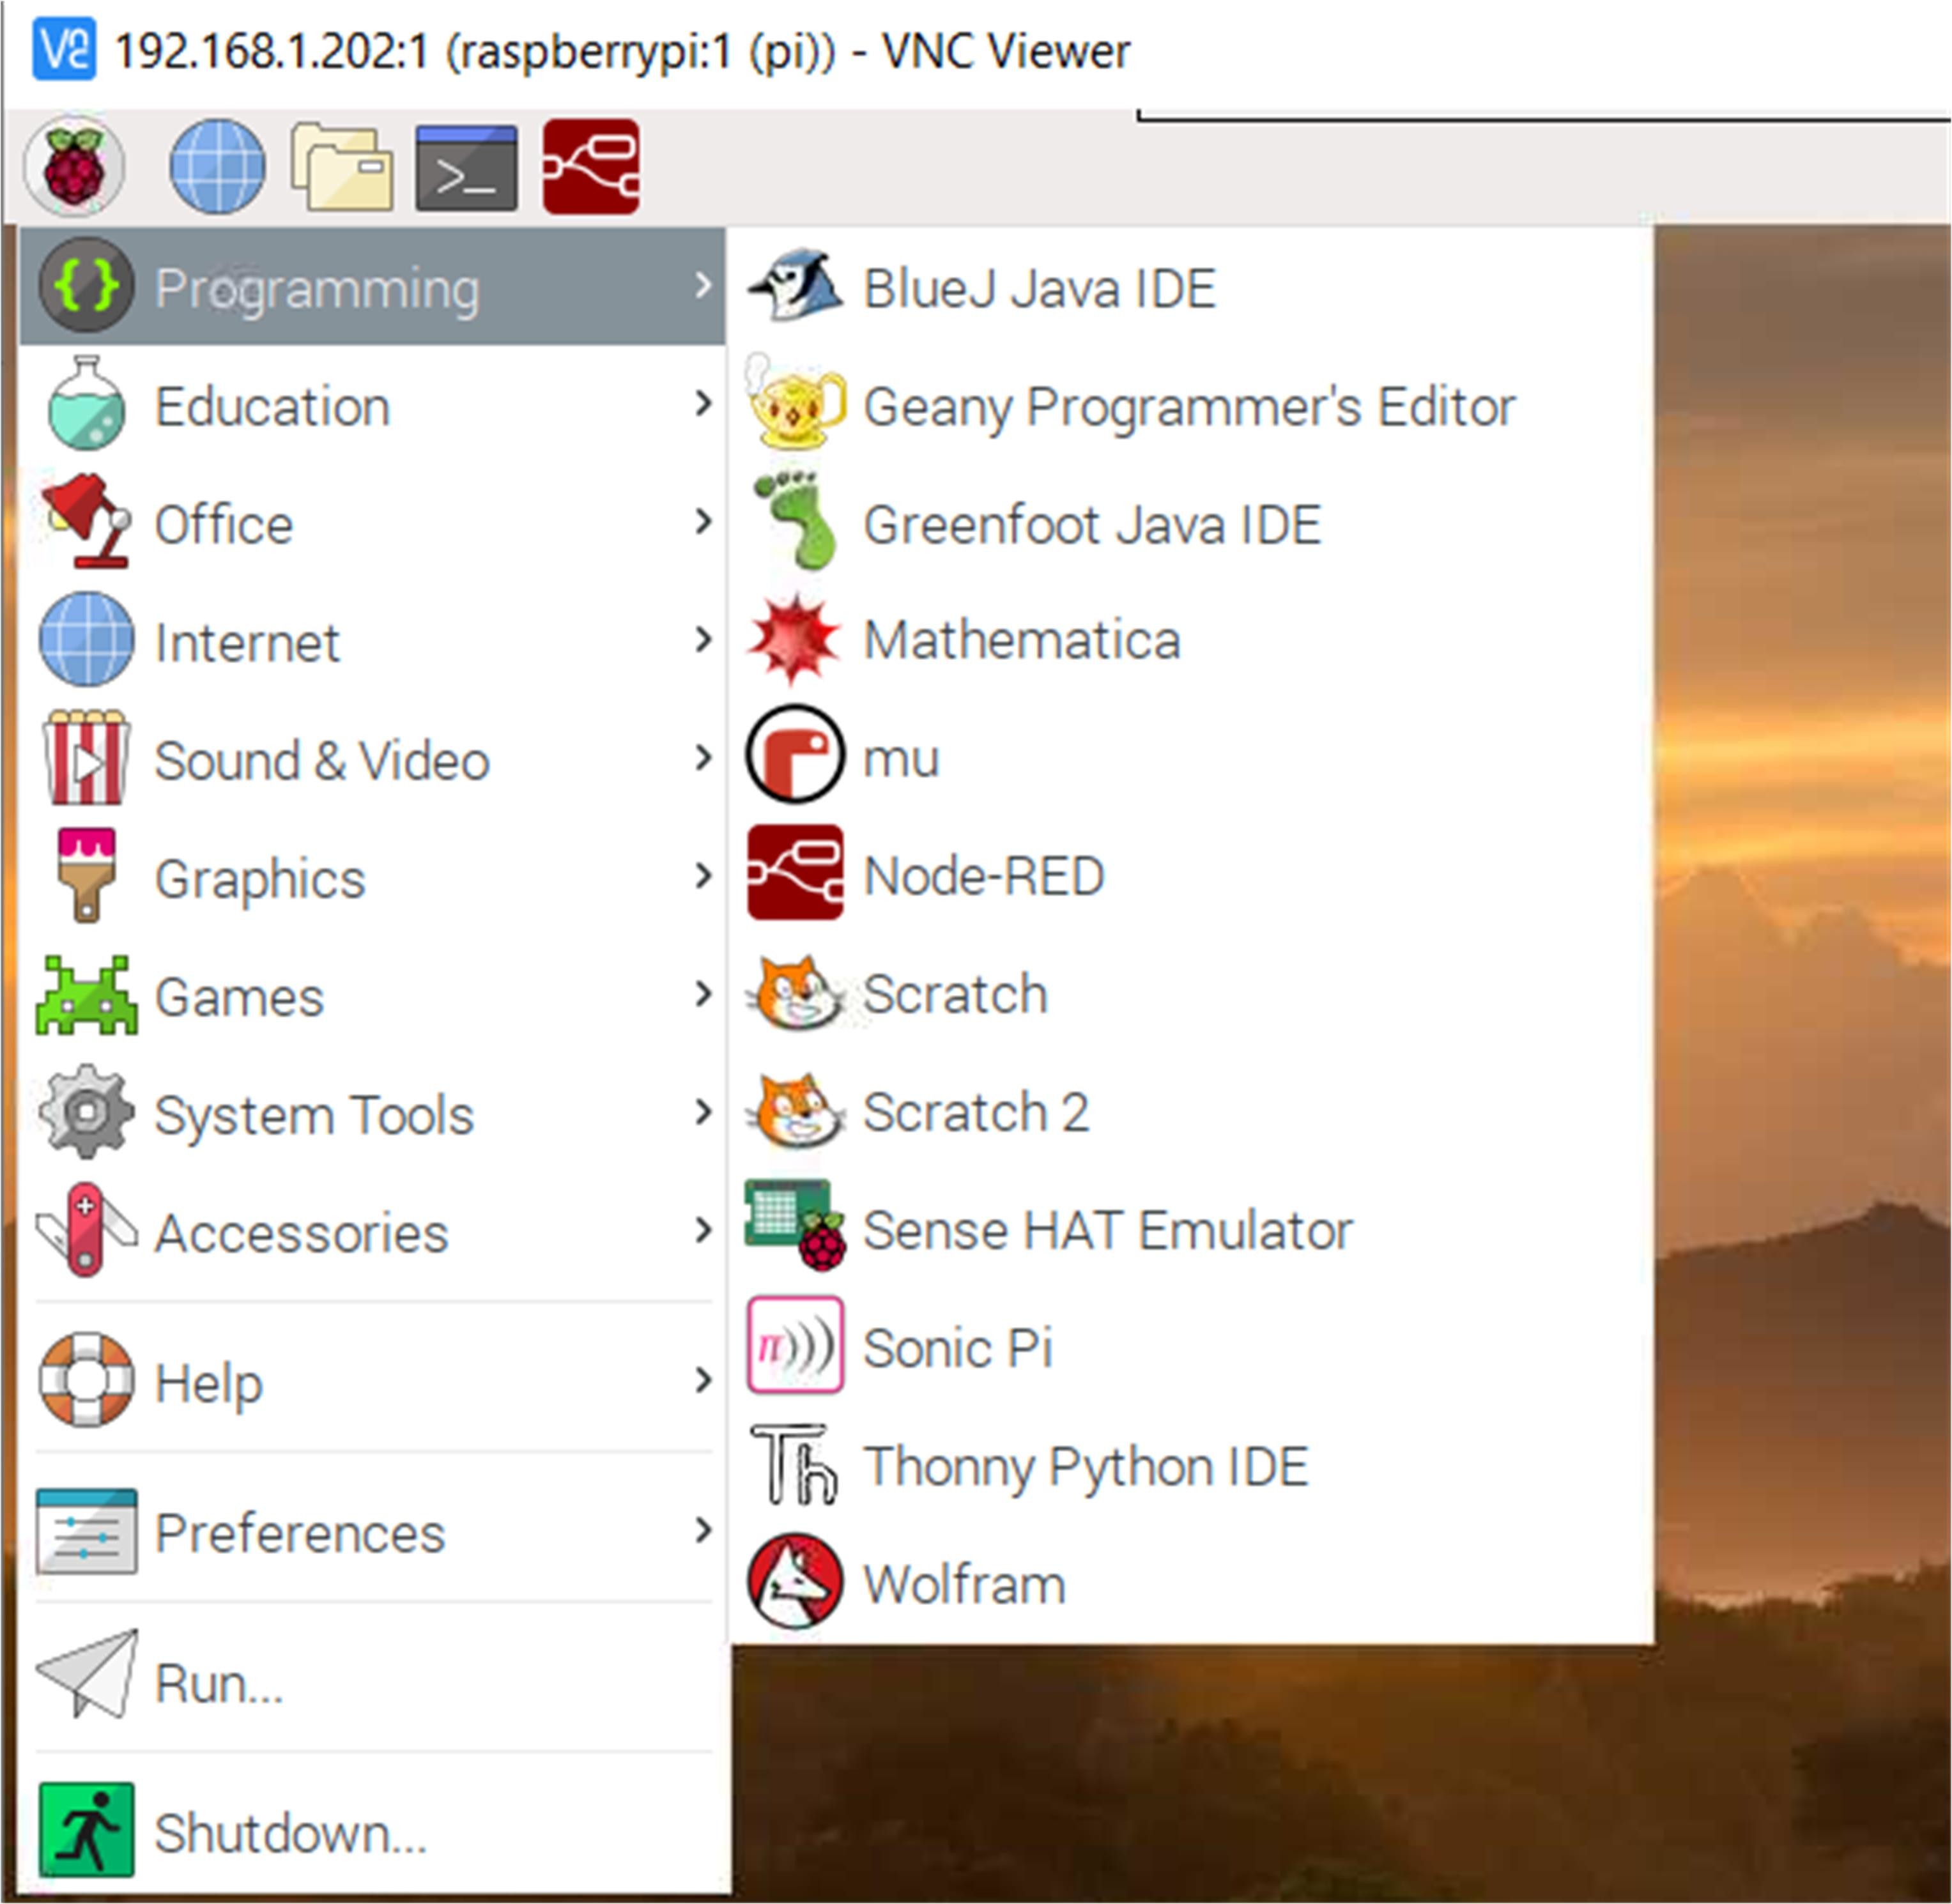
Node-RED is already installed on Raspberry Pi and can be started either from the Desktop (Figure 1) or by entering the following command from the command line (Figure 2):
pi@raspberrypi:~ $ node-red-start
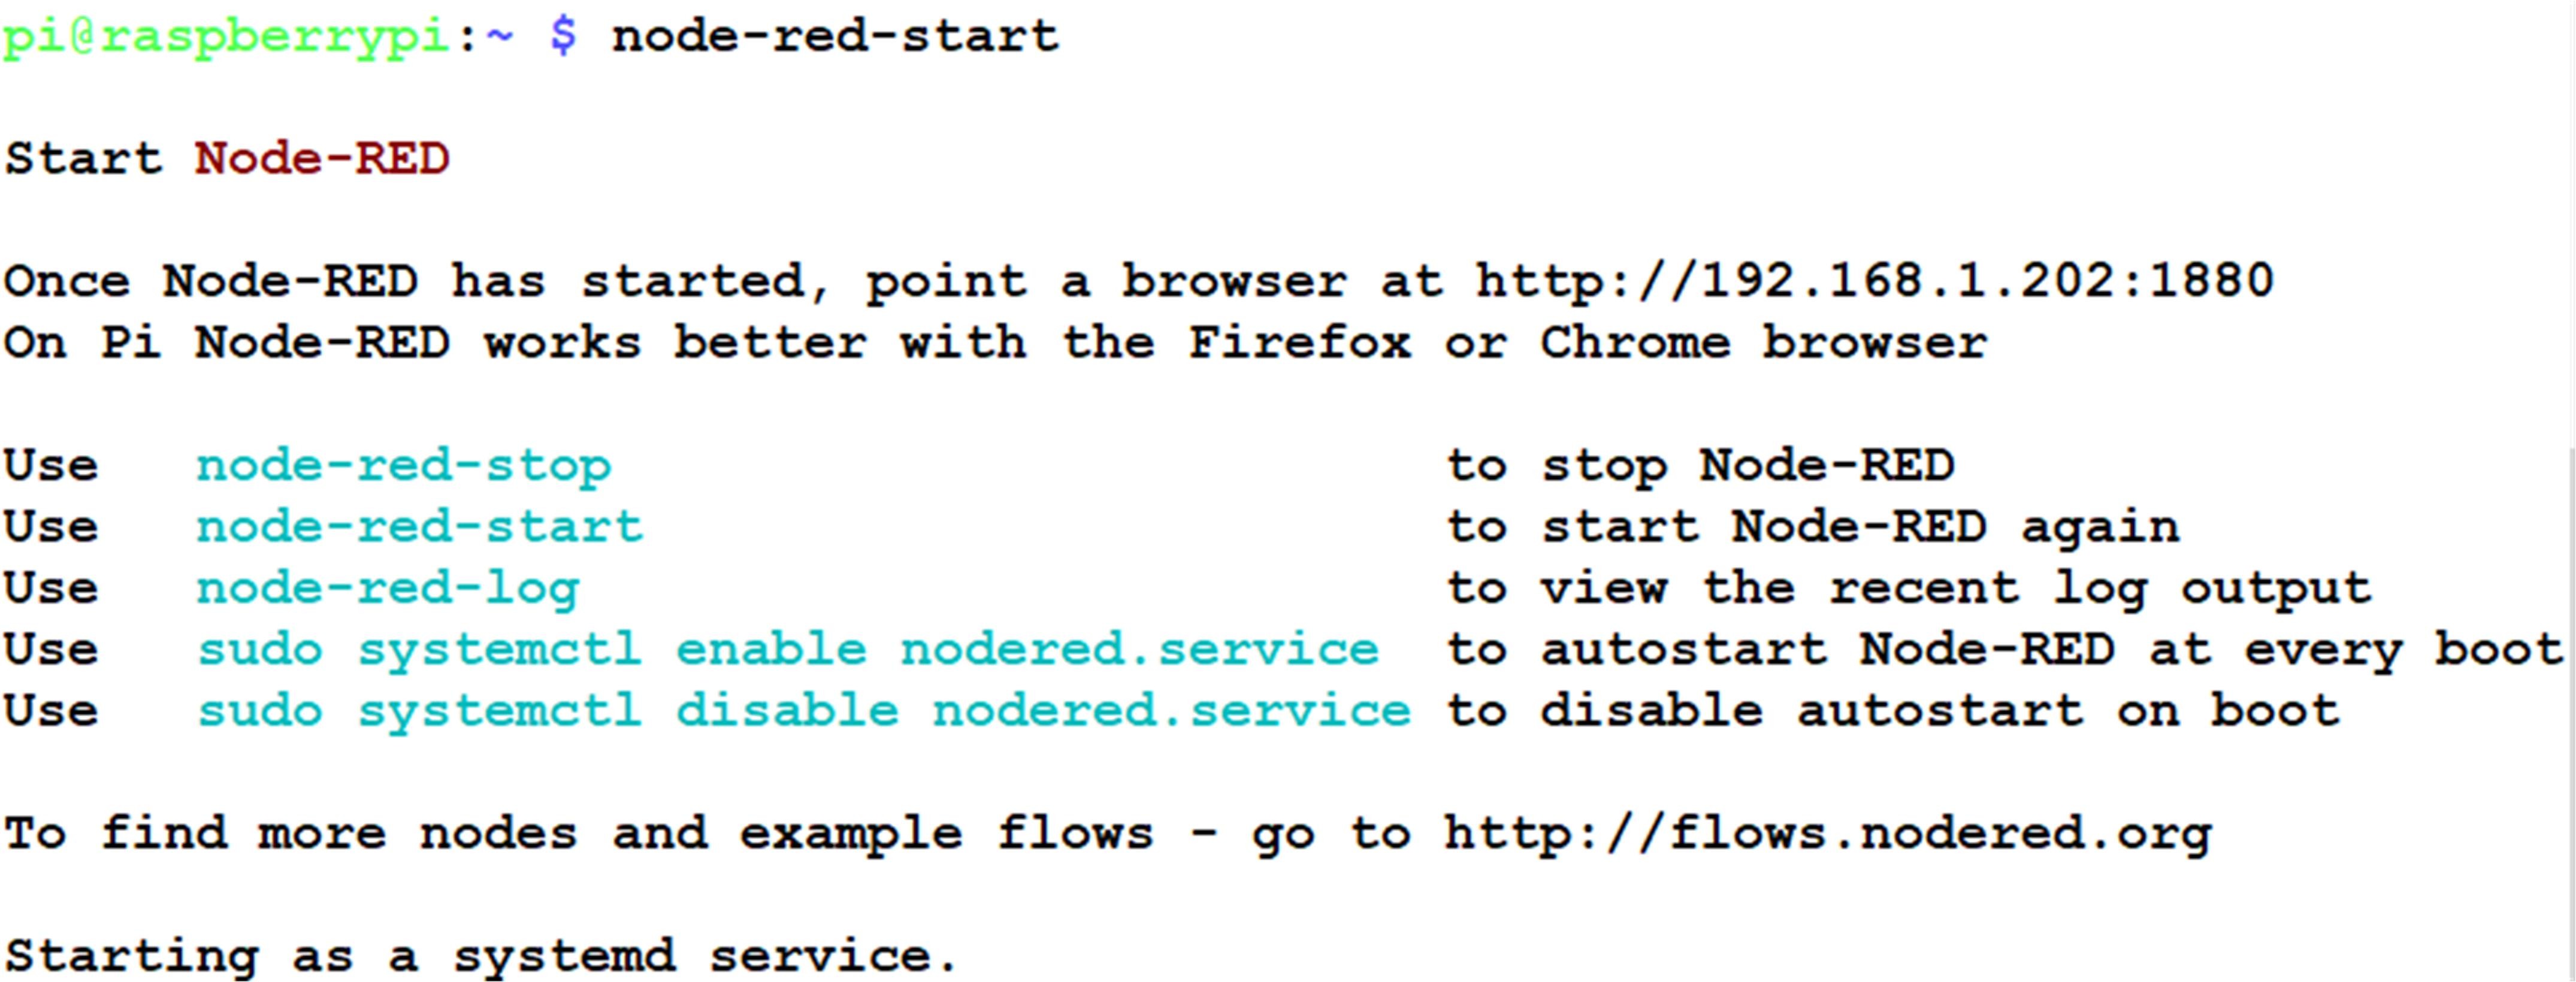
Node-RED is started as a service and a list of valid commands to start and stop it are displayed on the screen when started, as shown in Figure 2. Notice here that 192.1681.202 is the IP address of author’s Raspberry Pi. You can easily find the IP address of your Raspberry Pi by entering the command ifconfig from the command line and looking at the line starting with wlan0:.
At this point you should start your browser and enter the following link on your PC to start the Node-RED GUI on your screen:
https://<your IP address>:1880
For example, for author’s Raspberry Pi, this will be:
https://192.168.1.202:1880
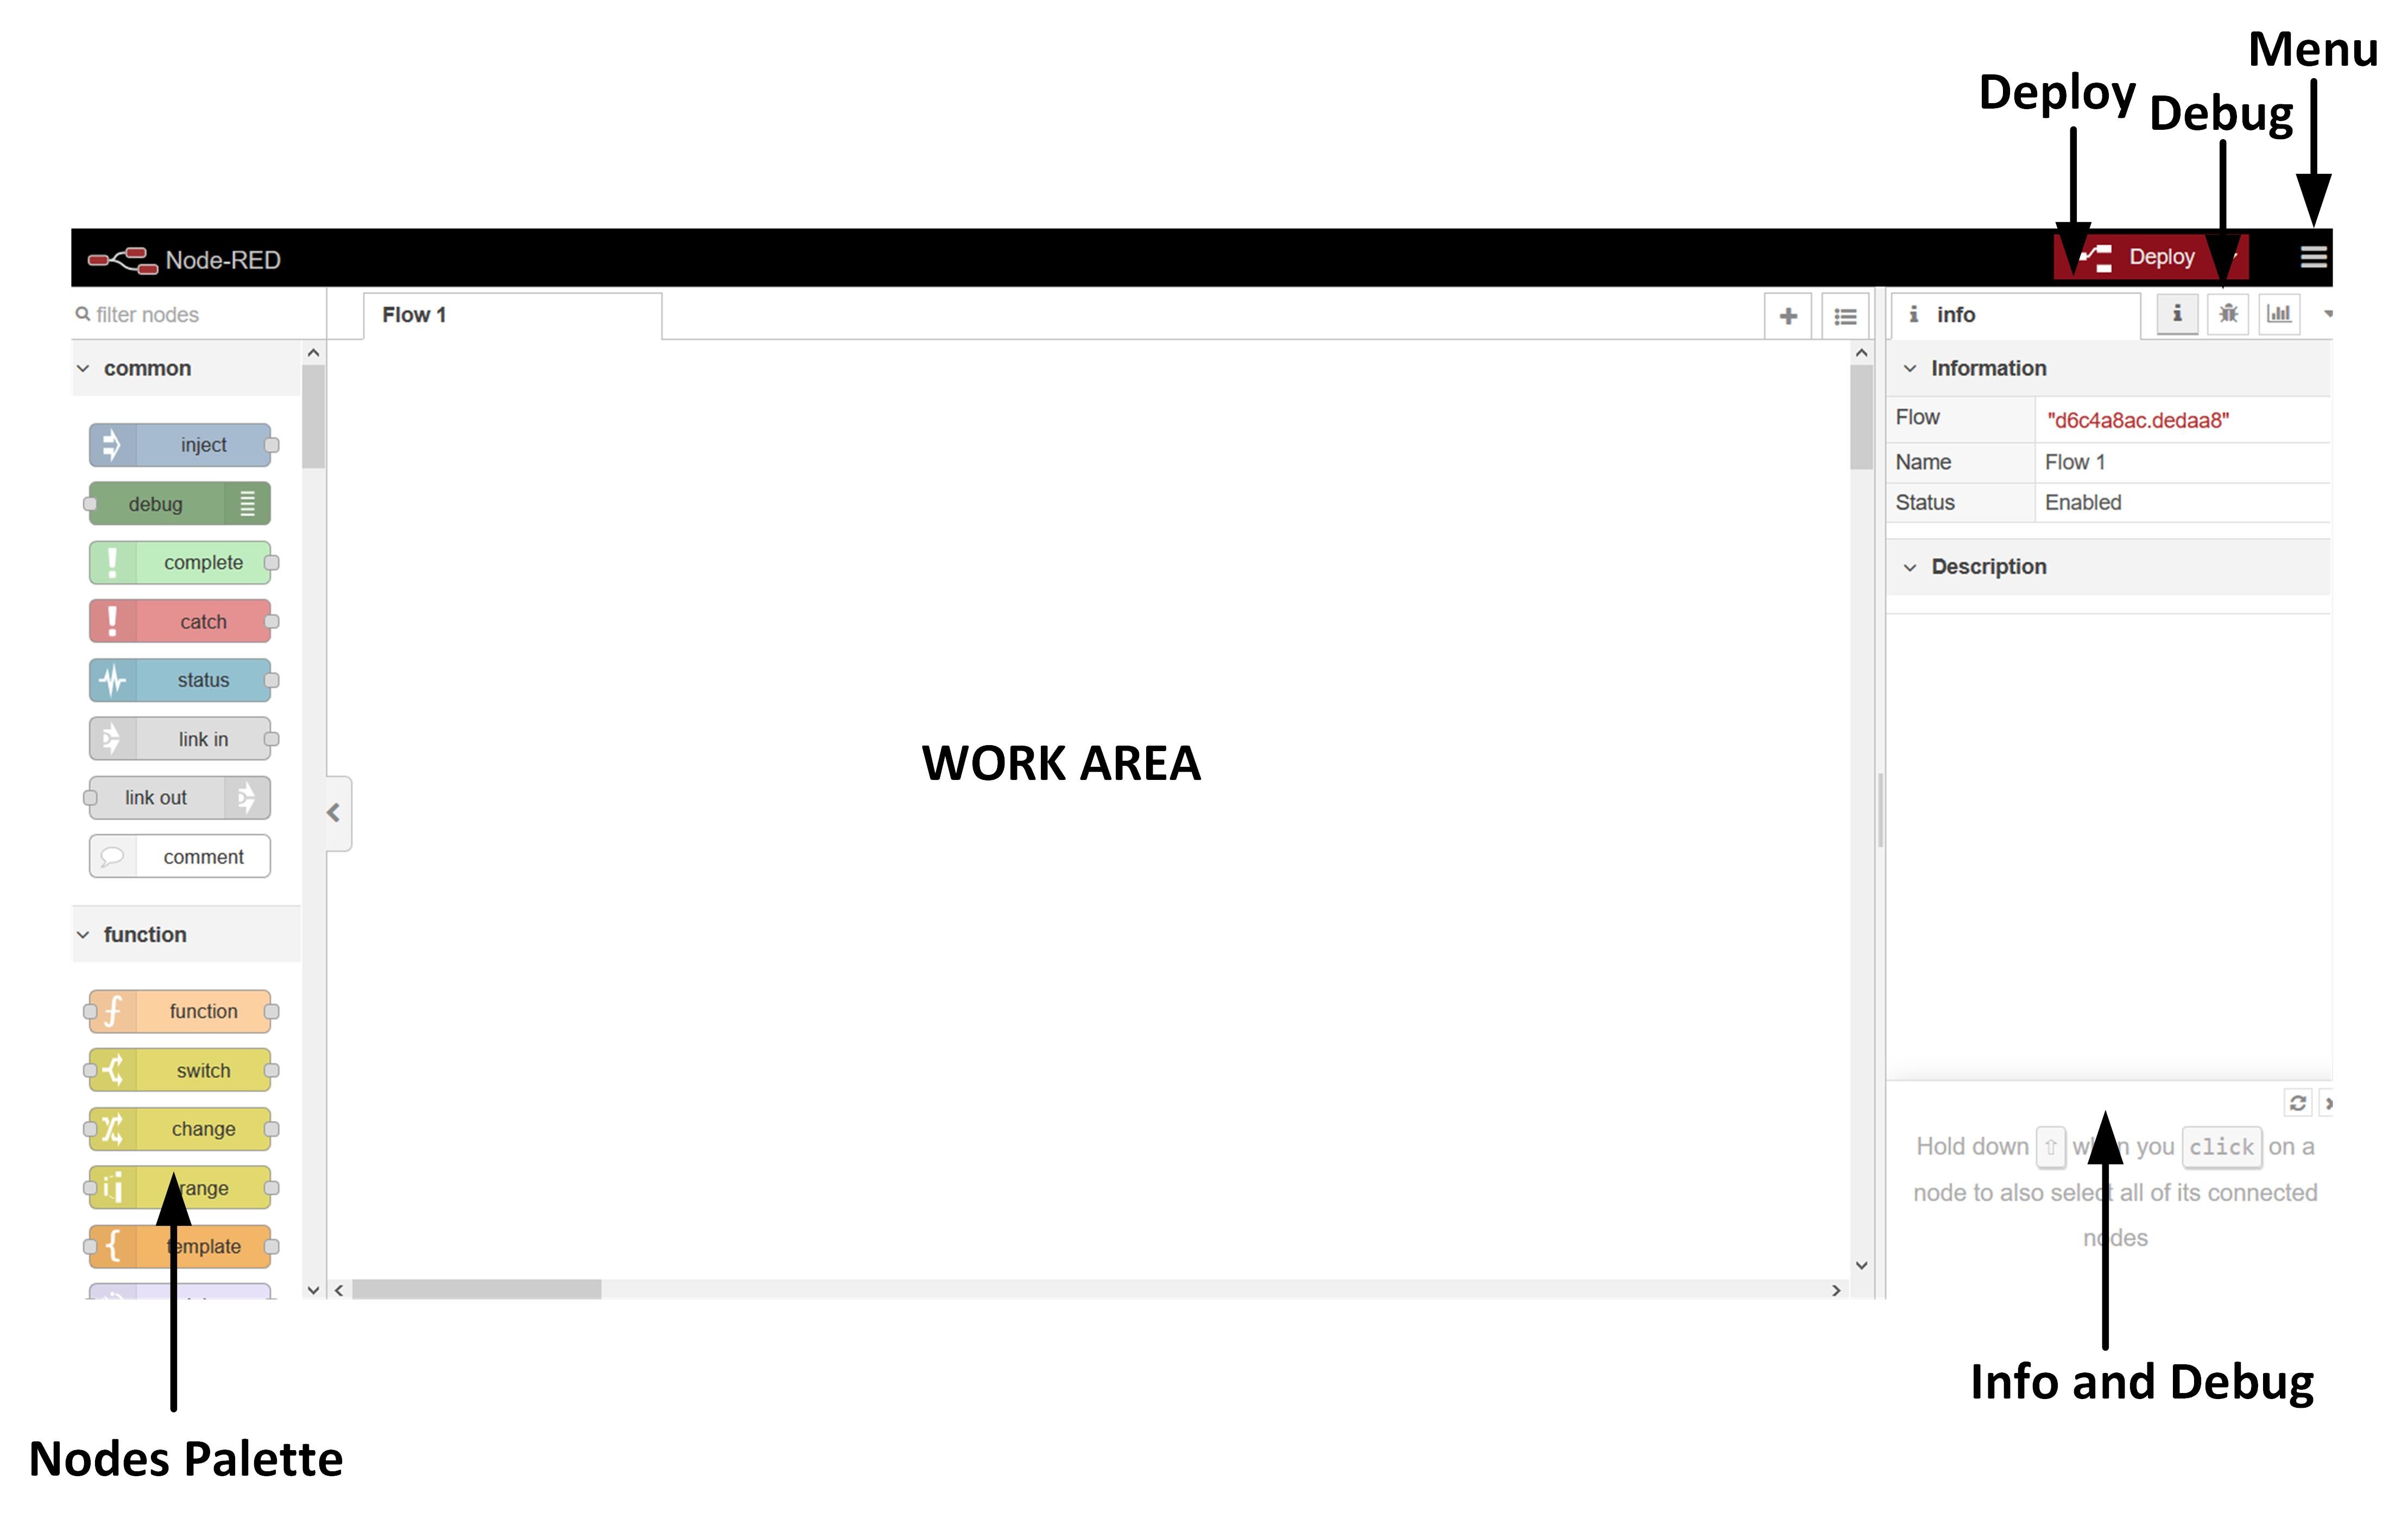
Figure 3 shows the Node-RED startup screen. The screen is basically made of up 3 sections: at the left hand side is a list of nodes available by default when the program is installed. Users however can add additional nodes from various sources on the Internet. The middle part is the work area where the required nodes are dragged and dropped and connected to form a flow program. Right-hand side is the information and debug area which can be very useful during program development.
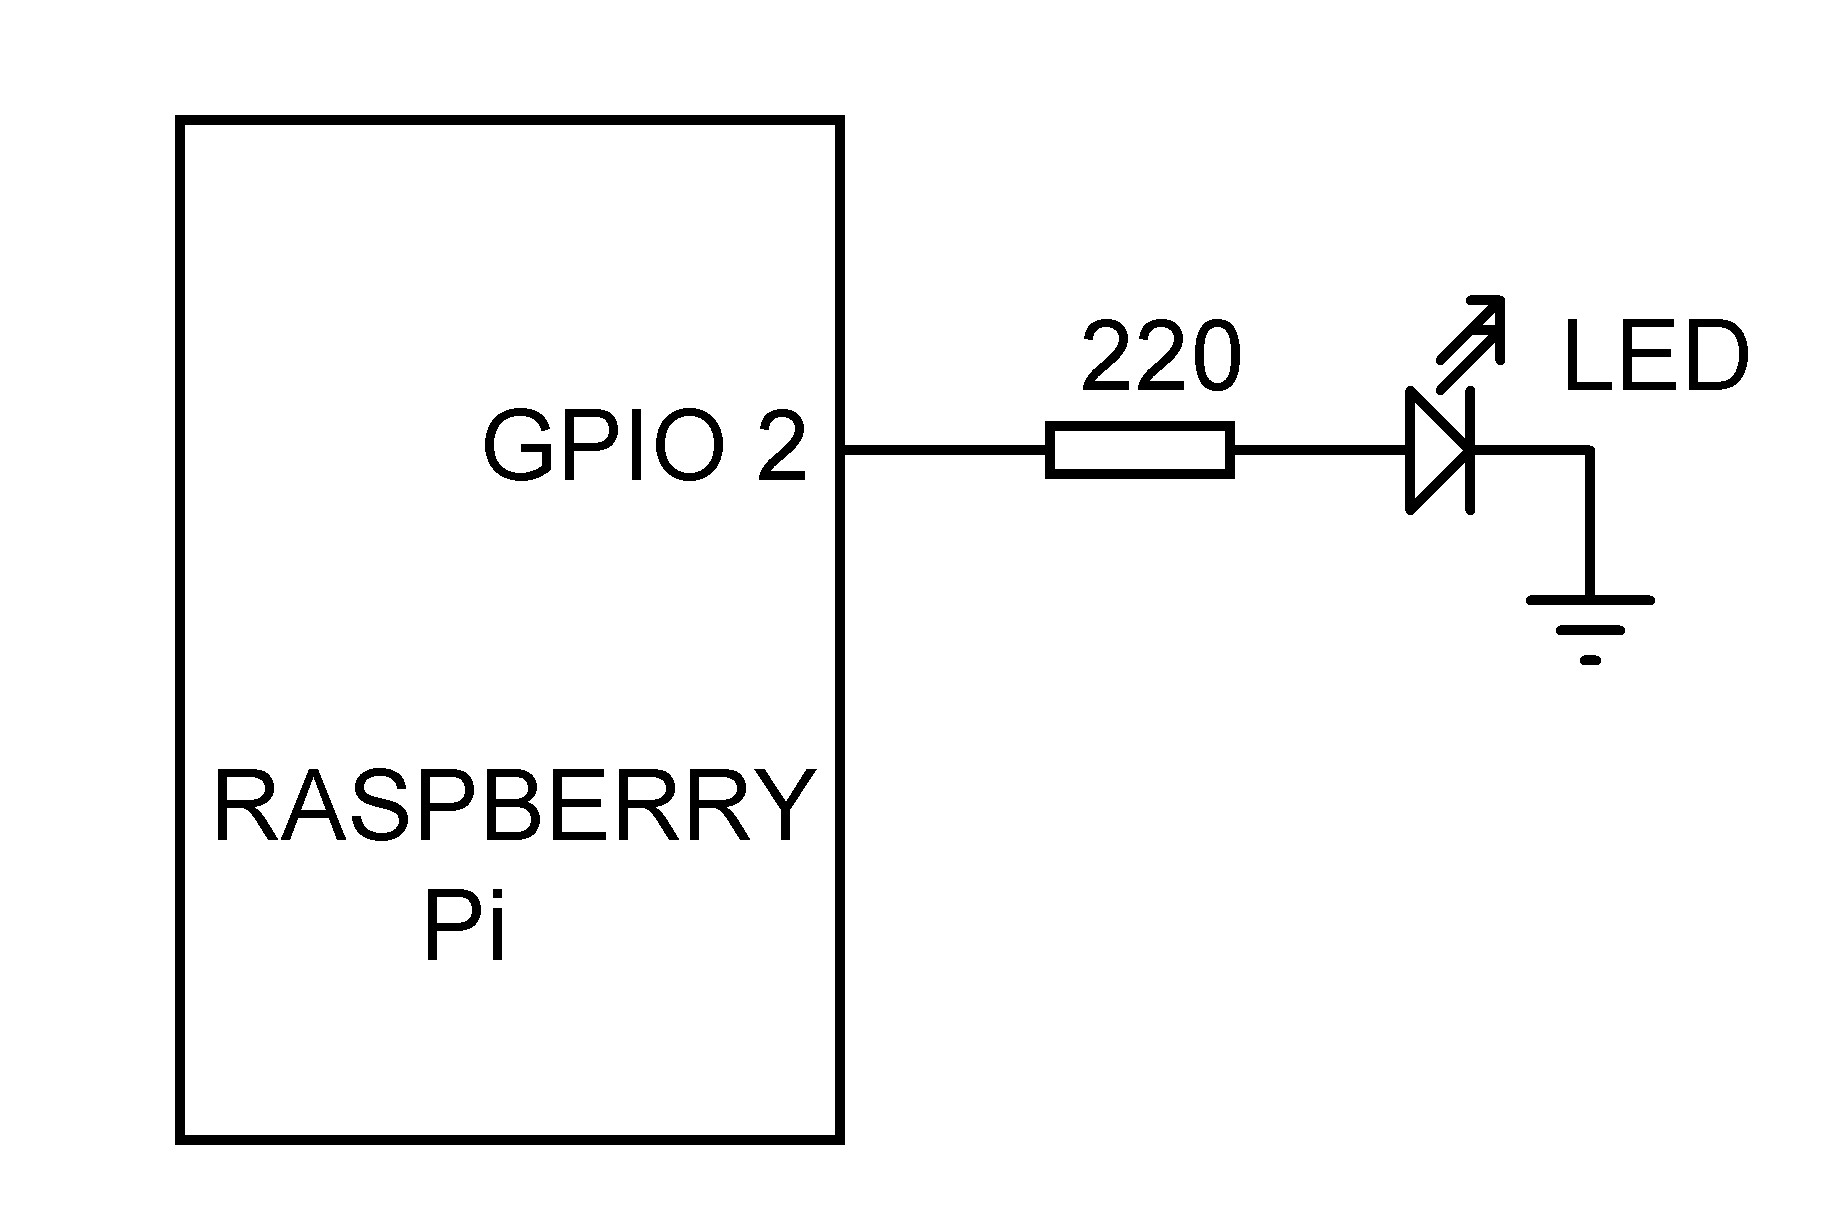
Perhaps the easiest way to understand how to use the Node-RED is to look at a simple example. In this example, an LED is connected to GPIO 2 of the Raspberry Pi through a 220-ohm current limiting resistor as shown in Figure 4.
In this simple project we will be controlling the LED from a Node-RED flow program. The steps are as follows (see flow program in Figure 5):
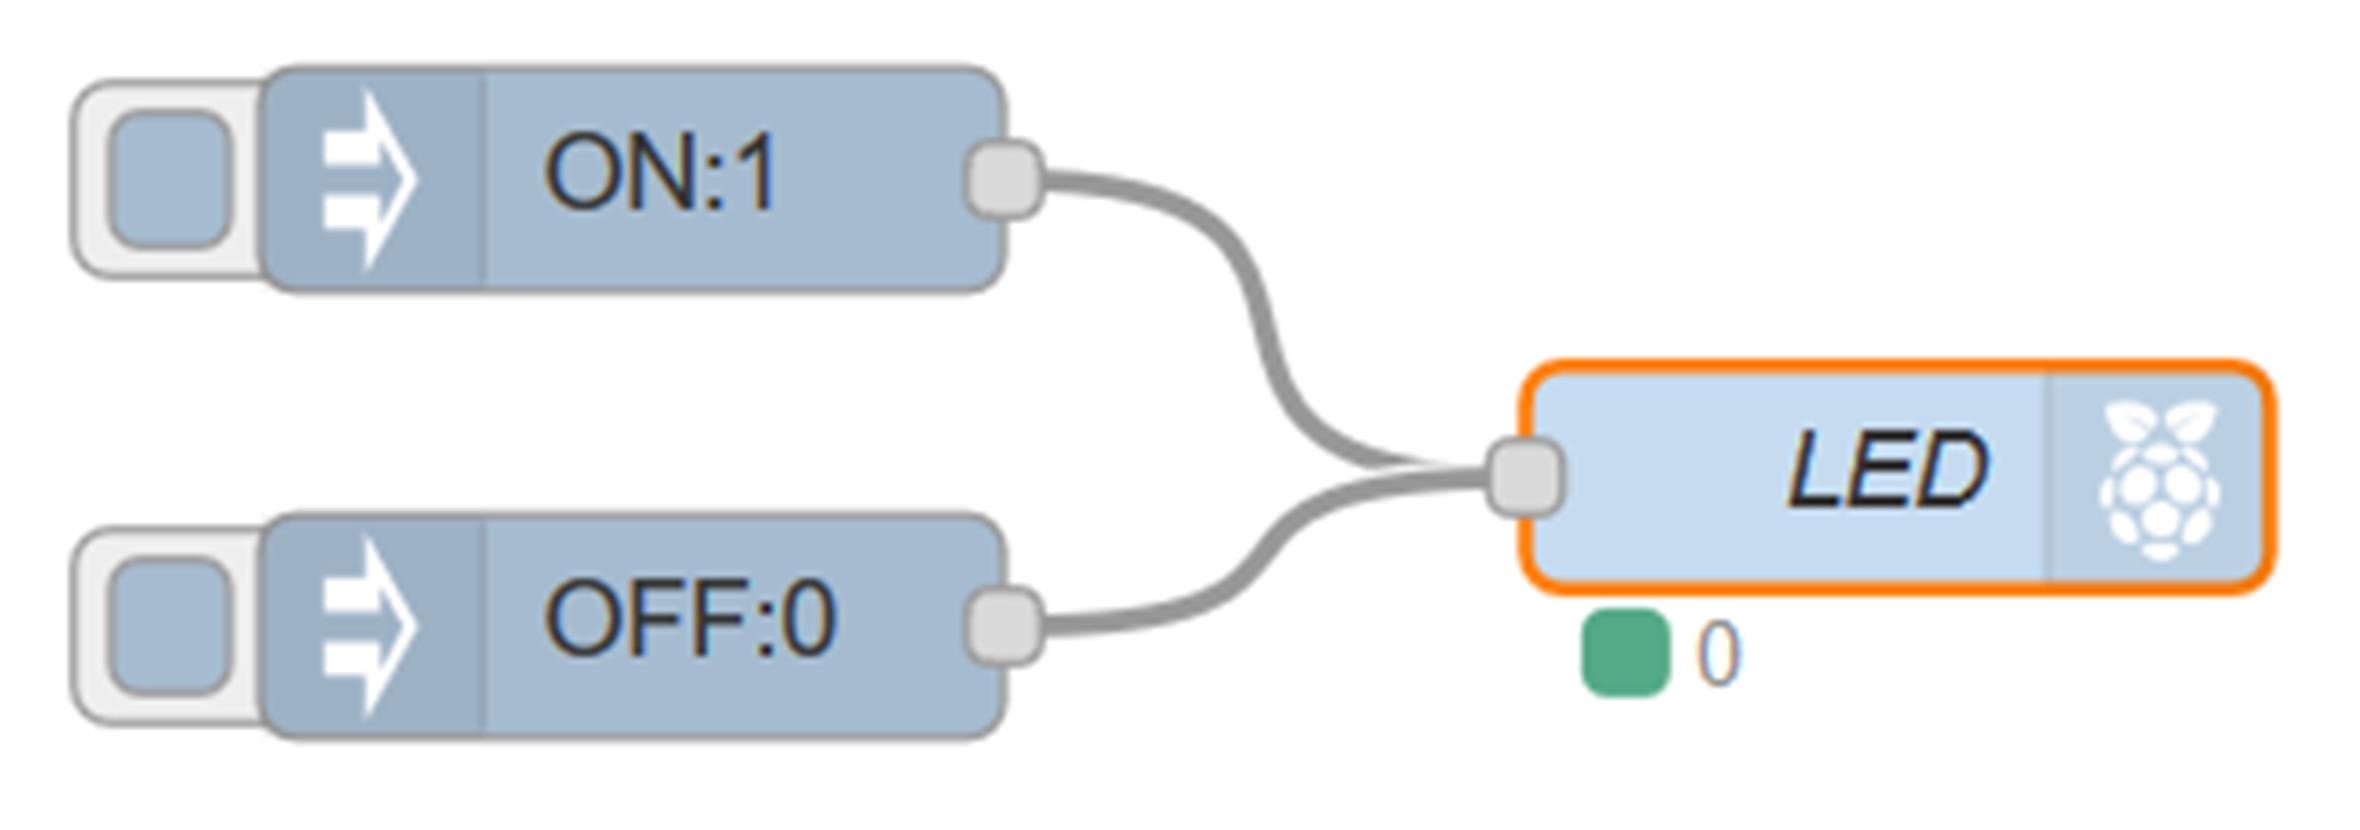
- Click, drag and drop an inject node to the work space. Inject nodes are used to inject messages (string, number etc) into a flow. In this example we will be injecting 1 or 0 to turn the LED ON or OFF respectively.
- Double-click on the inject node to configure it. Set its Payload to 'number' and enter 1. Clicking the square box at the left hand edge of this node will output 1 to turn ON the LED.
- Set the Topic of the injection mode to ON so that we can see the function of this node. Click Done to close the configuration screen.
- Click, drag and drop another inject node as shown in Figure 5 and set its Payload to 0 and its Topic to OFF. Clicking this node will output 0 to turn OFF the LED.
- Click, drag and drop an rpi gpio out node to the workspace. This node is used to send digital or PWM data to a GPIO port of the Raspberry Pi. Connect the node as shown in Figure 5.
- Double-click on rpi gpio out node to configure it as shown in Figure 6. Set the Pin to GPIO2, Type to Digital output, click Initialise pin state and set the initial pin state to 0. Set the name of the node to LED. Click Done to close the configuration screen.
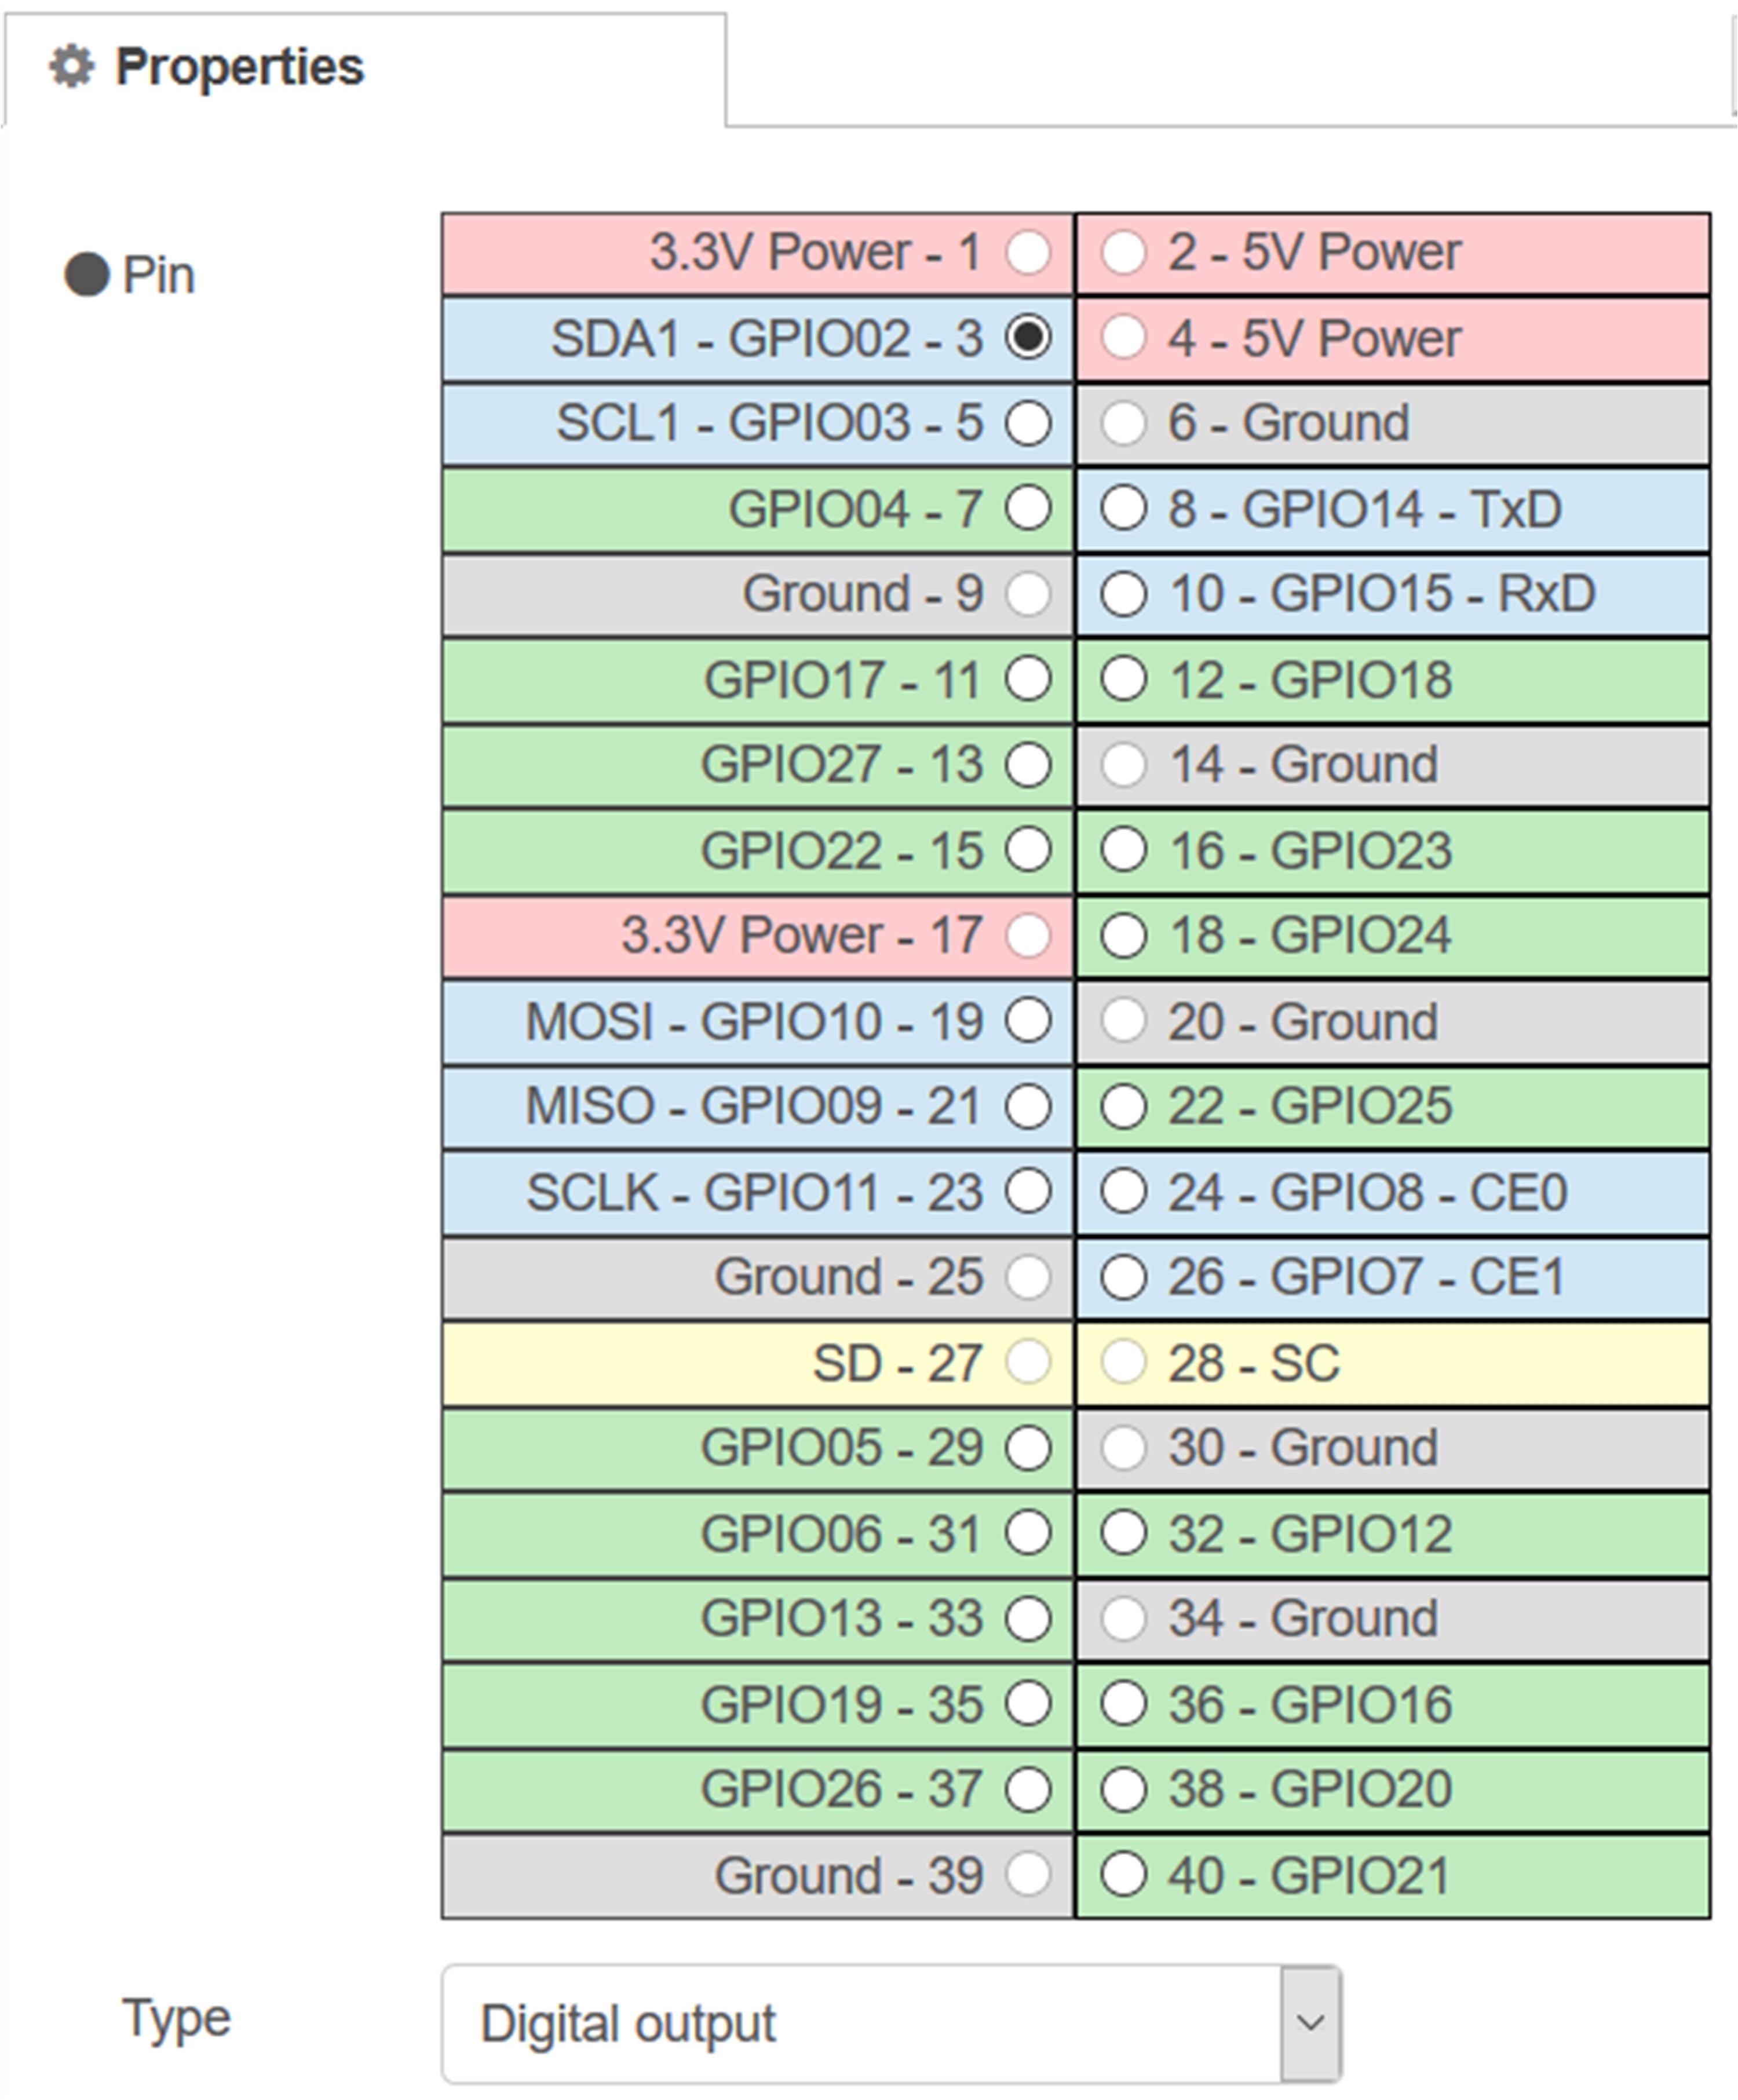
Figure 6: Configuring node RPi's gpio out.
We have now completed our flow program. Click Deploy to compile the program and generate the executable code. Make sure that there are no error messages at this stage of the design. Click the square button at the left hand side of the ON inject node and you should see the LED turning ON. Clicking the button on the other inject node will turn OFF the LED.
Further aspects
In this introduction and very simple example we have seen what Node-RED is and how it can be used. One of the powerful points of Node-RED is that it is supported by large communities and there are many nodes developed by third parties that is available free of charge and they can be used in complex projects. For example, the openweathermap node gives the local weather conditions such as the temperature, humidity, air pressure, wind speed, precipitation data etc anywhere on Earth. A weather forecasting project can be built in a matter of less than an hour using this node and a few additional nodes. Doing such a project using external sensors is usually costly and may also take considerable amount time to develop. Node-RED supports UDP and TCP based communication with a single node over a Wi-Fi link. This feature enables users to send and receive wireless data from other devices connected to a Wi-Fi, such as mobile phones, tablets, PCs etc.
Some other nodes that the readers may find of interest that can be installed from the Internet free of charge are:
- Dashboard
- Bluetooth
- Amazon Alexa
- I2C and parallel LCD
- Worldmap
- A/D converter
- Ultrasonic sensor
Node-RED is not only for the Raspberry Pi. It can also be used (although limited) with the Arduino and ESP32 processors, or with a combination of the Raspberry Pi and the Arduino, or Raspberry Pi and the ESP32.
One of the very important Node-RED nodes is the function node. This node can be configured to have multiple outputs and users can write program codes during the configuration of this node. For example, after getting the local weather data using the openweathermap node, we may want to extract the local temperature and humidity data. This can easily be done by writing couple of statements inside the function node. Interested readers can get more information by referring to the web links [1] [2] [3] [4] [5] or to the Node-RED book published by the author.
(200164-01-online)
Want more great Elektor content like this?
Then take out an Elektor membership today and never miss an article, project, or tutorial.
Discussion (0 comments)