
Getting started with Node-RED
on
In recent years, the development and use of block-based visual programming tools has taken off. The idea behind this is that the programmer is provided with a set of visual blocks that they simply need to connect in a logical way to create the desired application program. Node-RED is such a visual block-based programming tool which is free and open-source, yet allows performing very complex tasks including web access, Twitter, e-mail, HTTP queries, Bluetooth, MQTT as well as controlling GPIO ports of popular computers like Raspberry Pi, Arduino, and ESP32. The nice thing about Node-RED is that the programmer does not have to learn to write complex programs. For example, they can create a program to send an e-mail message by connecting a few nodes and writing only a few lines of very simple code.
Getting Node-RED up and running
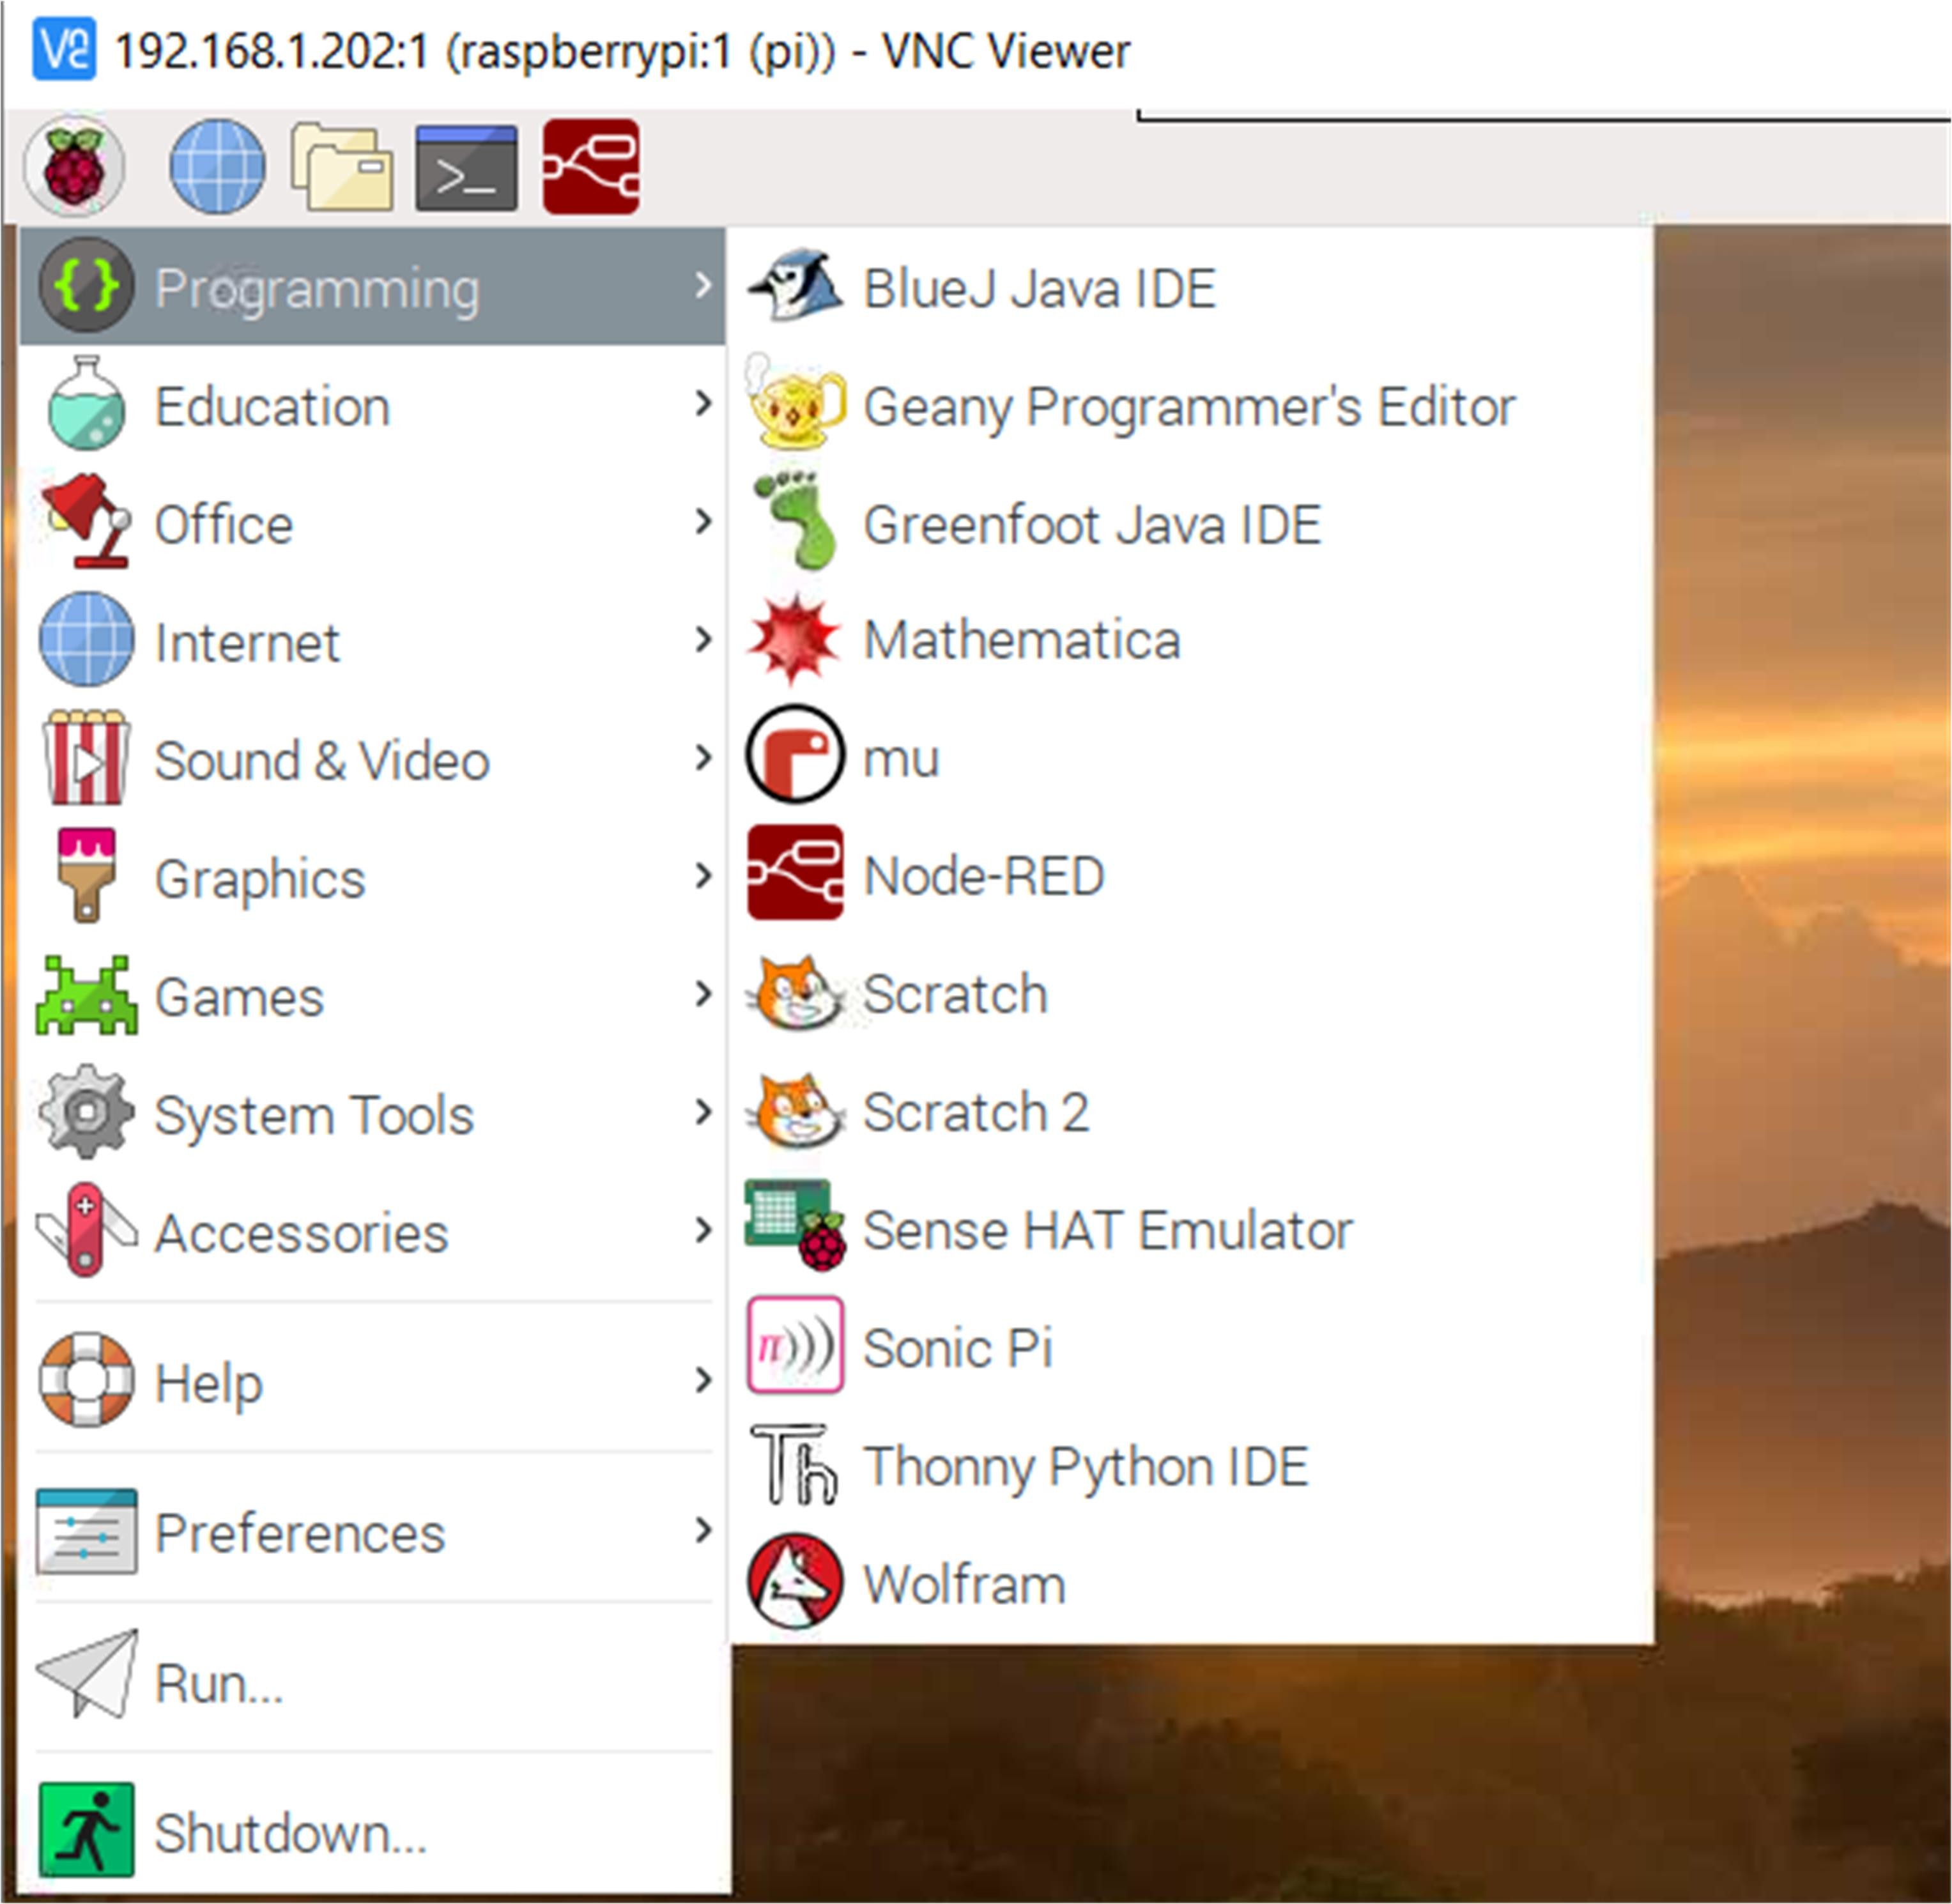
Node-RED is already included in the Raspbian operating system of the Raspberry Pi and can be launched either from the desktop (Figure 1) or by entering the command.
pi@raspberrypi:~ $ node-red-start
from the command line (Figure 2).
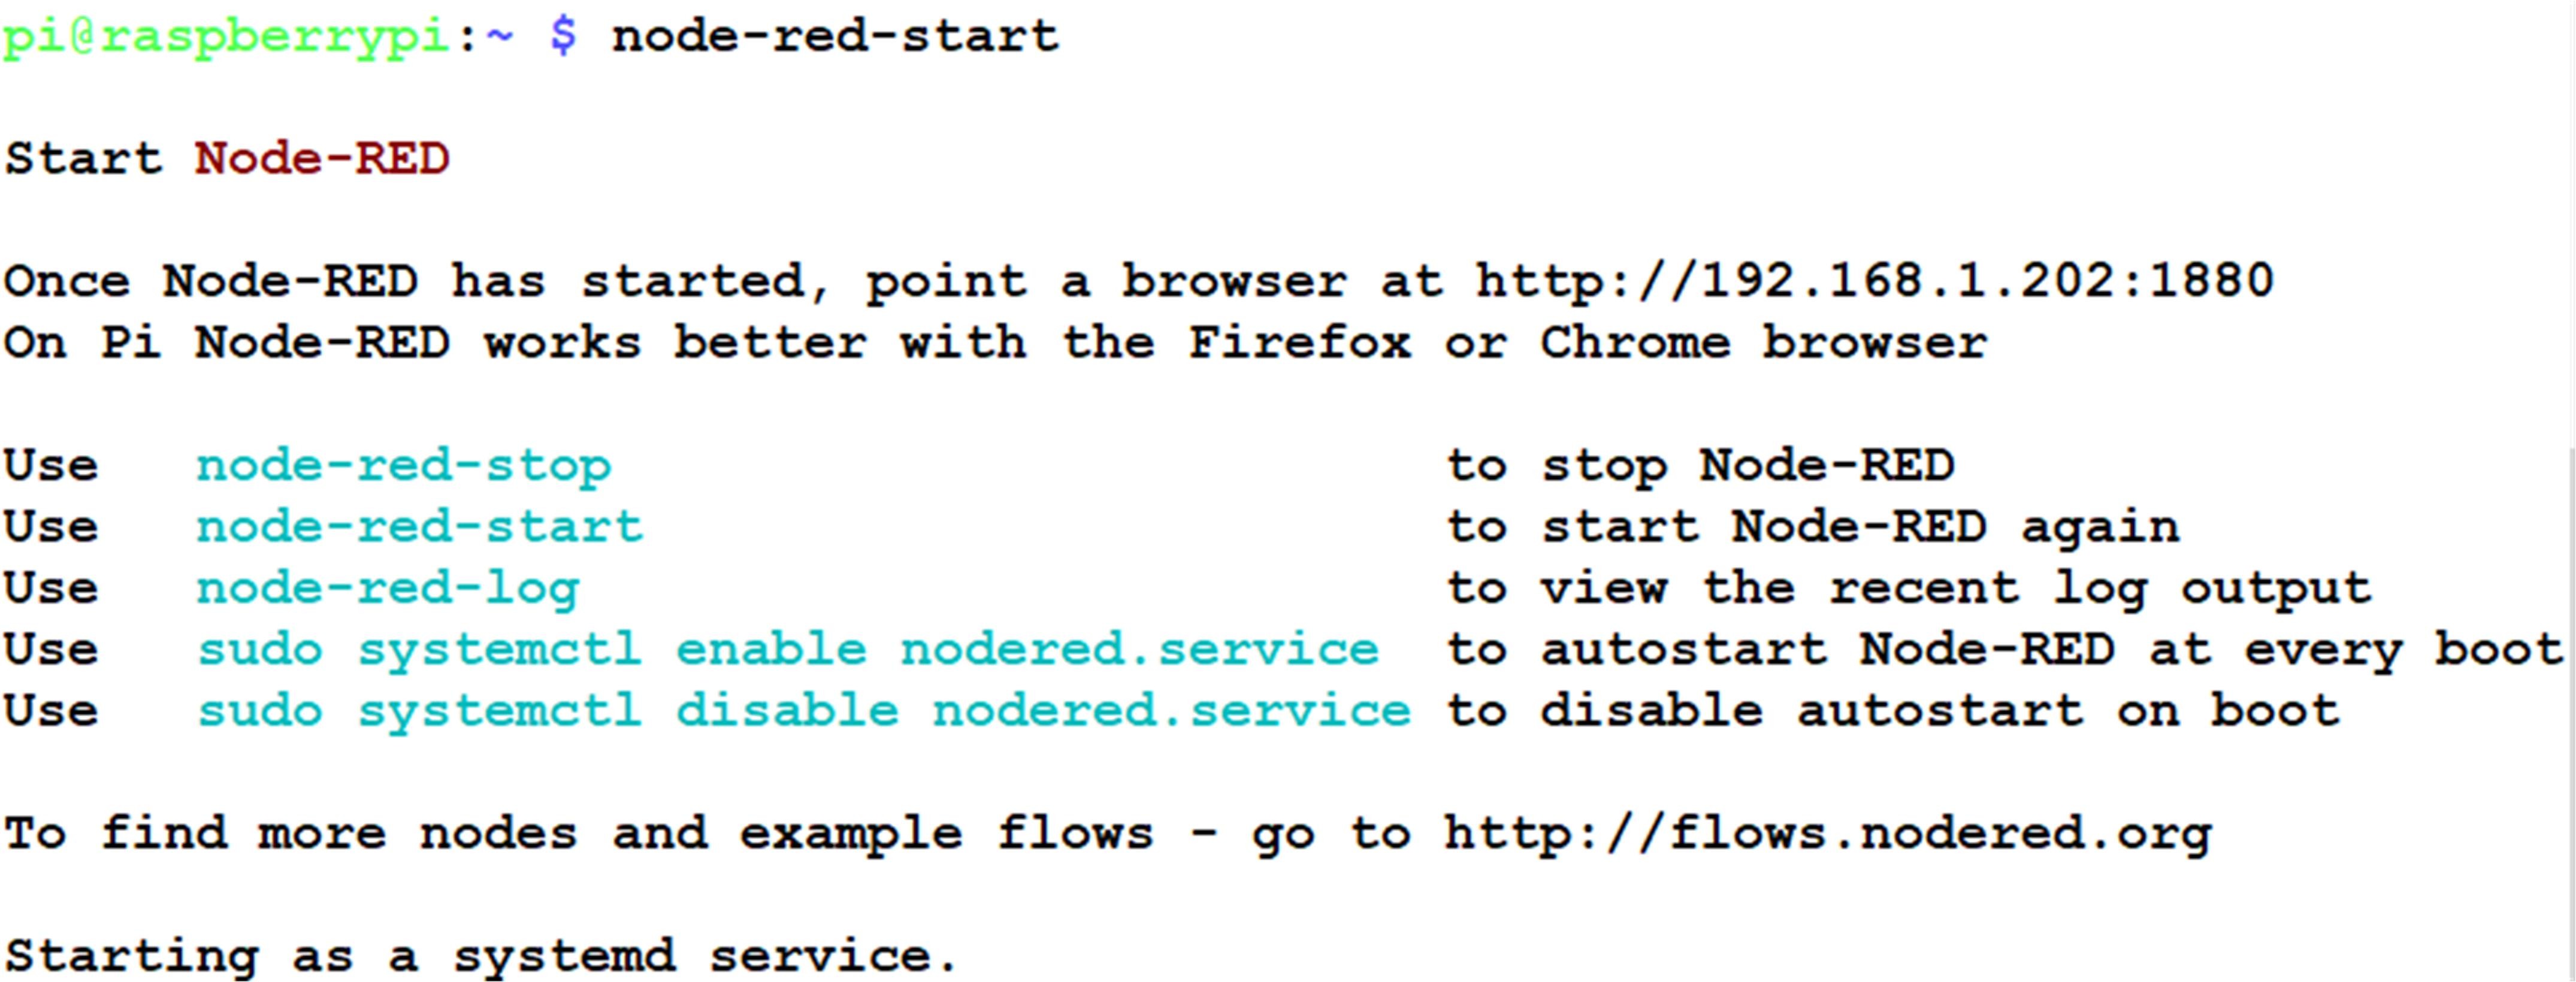
Node-RED is started as a service. A short list of available commands to start and stop this service is displayed on the screen after startup, as shown below in Figure 2. The local IP address 192.168.1.202 shown here is that of the author’s Raspberry Pi. You can easily identify the IP address of your own Raspberry Pi by entering the command ifconfig at the prompt and looking at the result in the line starting with wlan0.
Once you know “your” IP address, you can enter it in your PC’s browser to launch the Node-RED graphical user interface:
https://<Ihre IP-Adresse>:1880
In the author’s case, the following would be entered in the browser:
https://192.168.1.202:1880
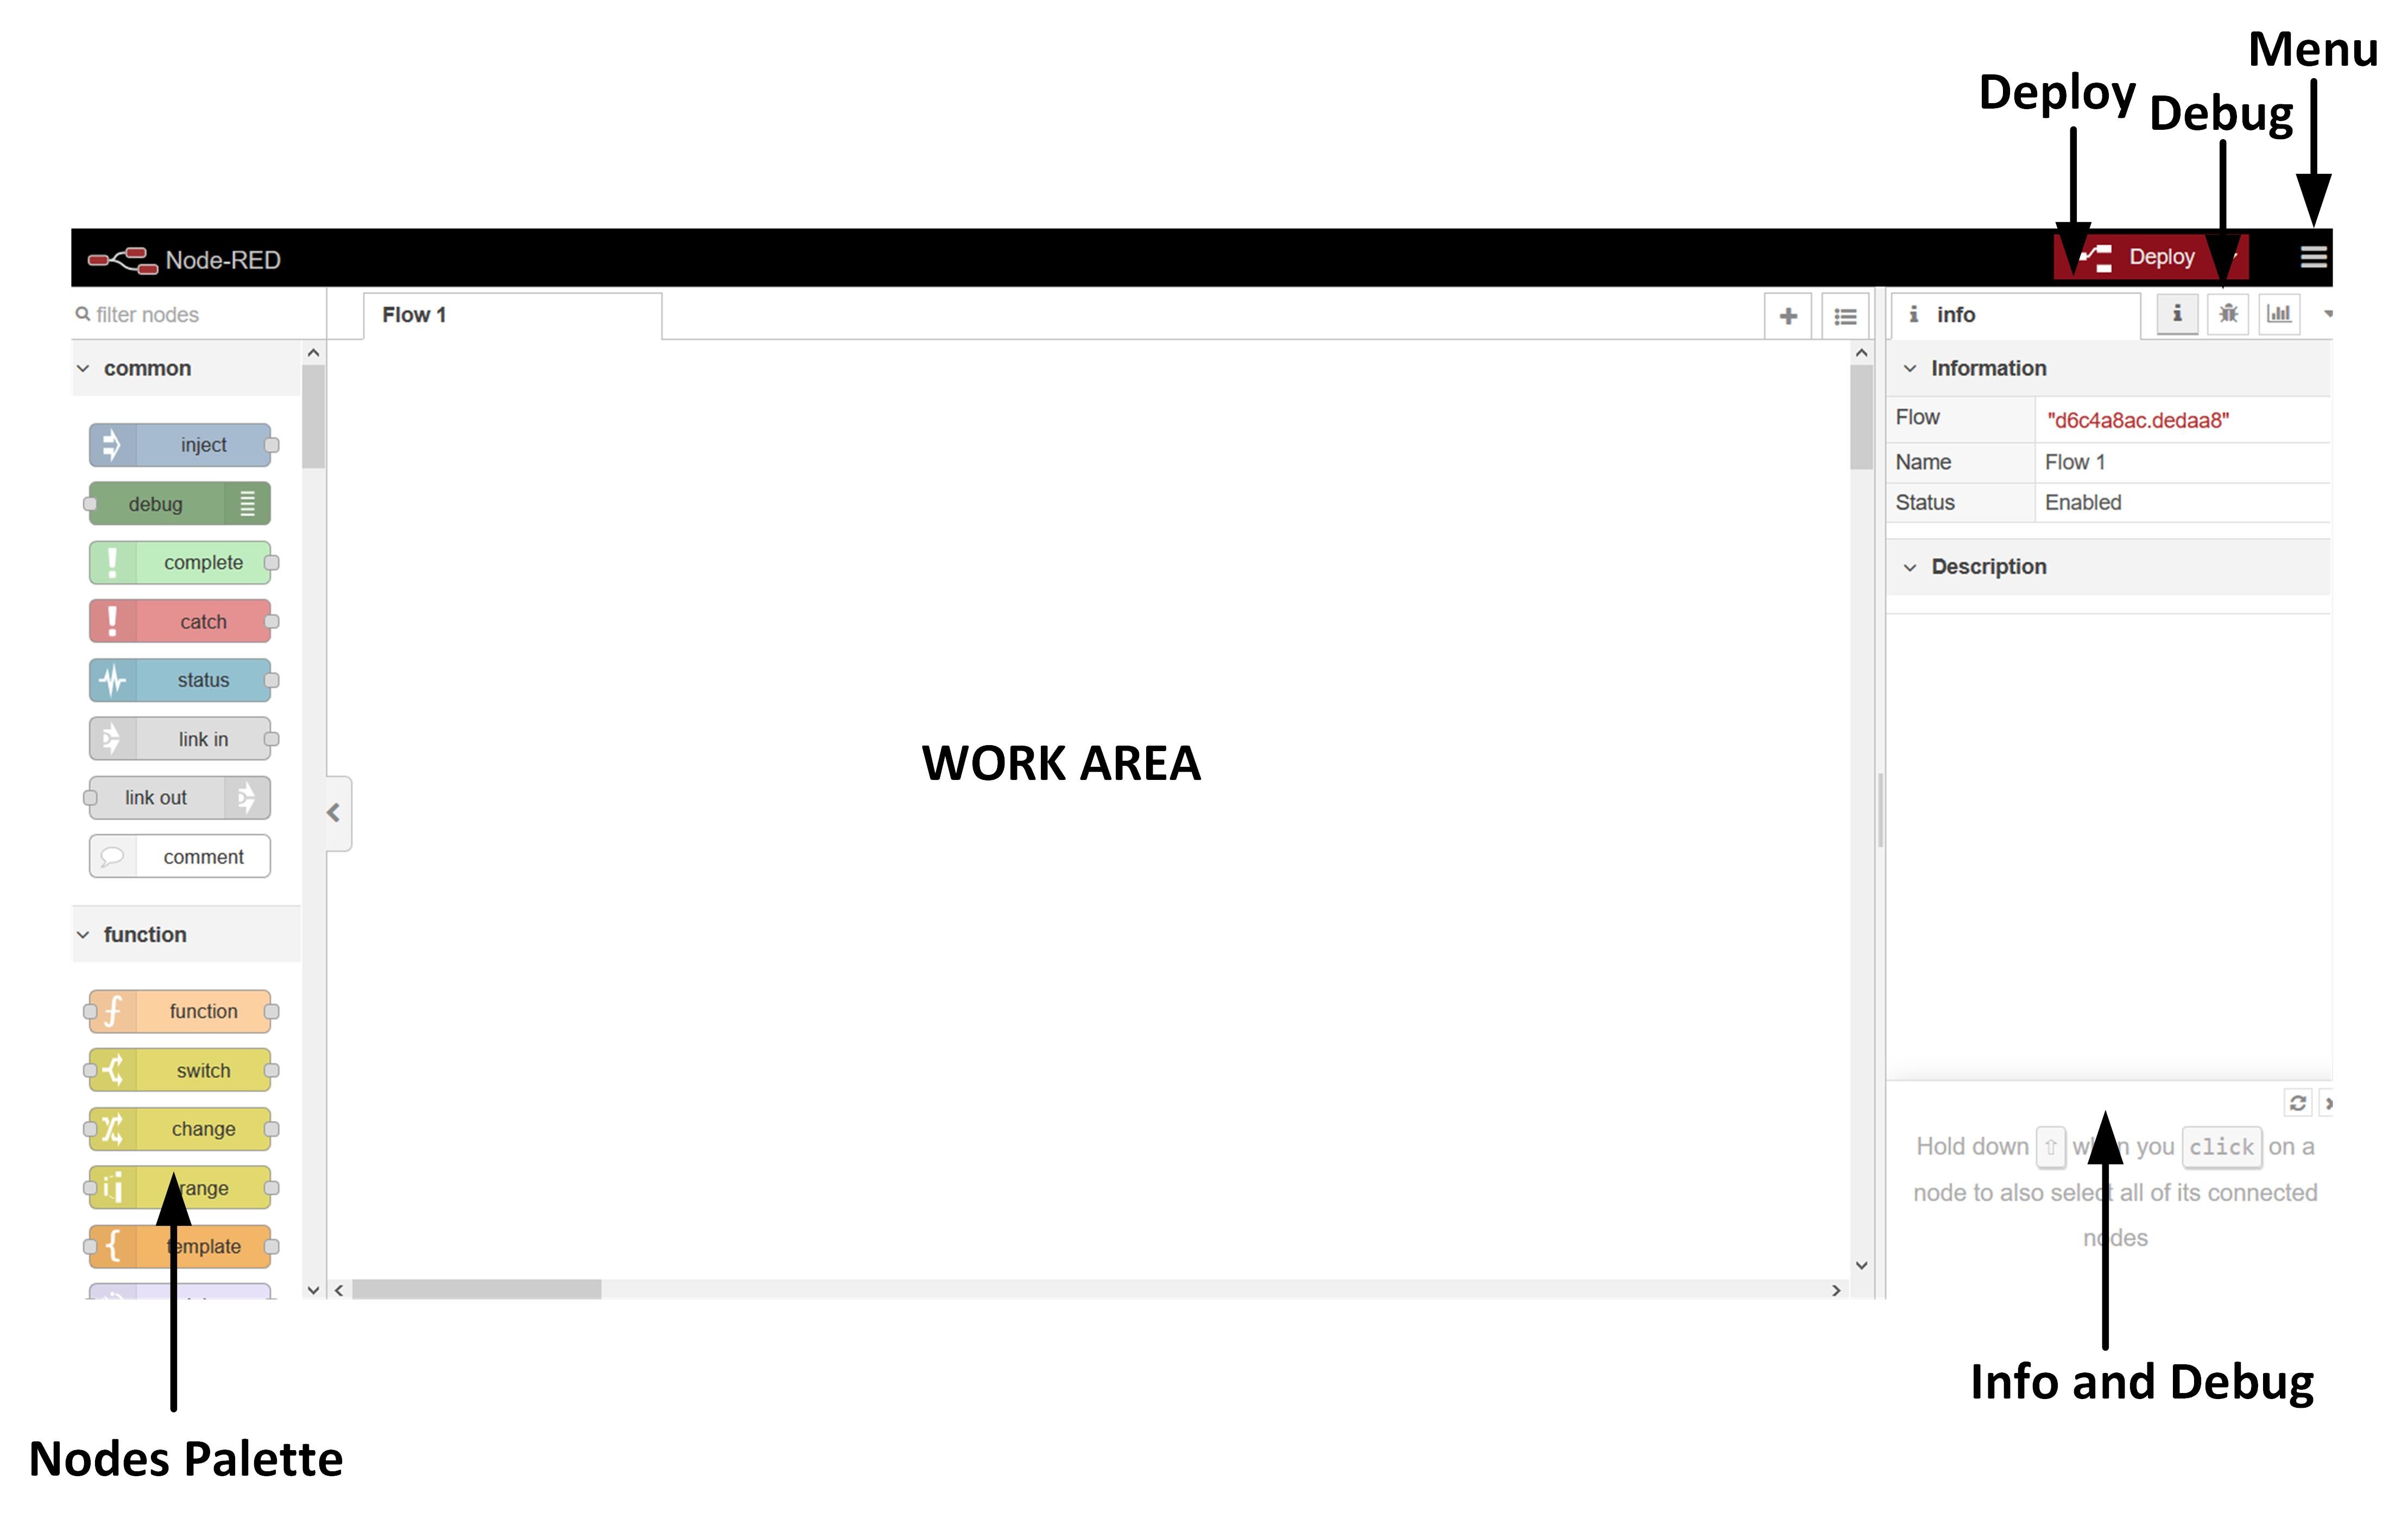
Figure 3 shows the startup screen of Node-RED, which is subdivided into three areas. The left area shows a list of nodes that are available by default when the program is installed, but can be expanded as needed with additional nodes from various sources on the Internet. The center part is the work area, where the required nodes are dragged and dropped and connected to form a program sequence. The area on the right is the information and debug area, which can be very useful during program development.
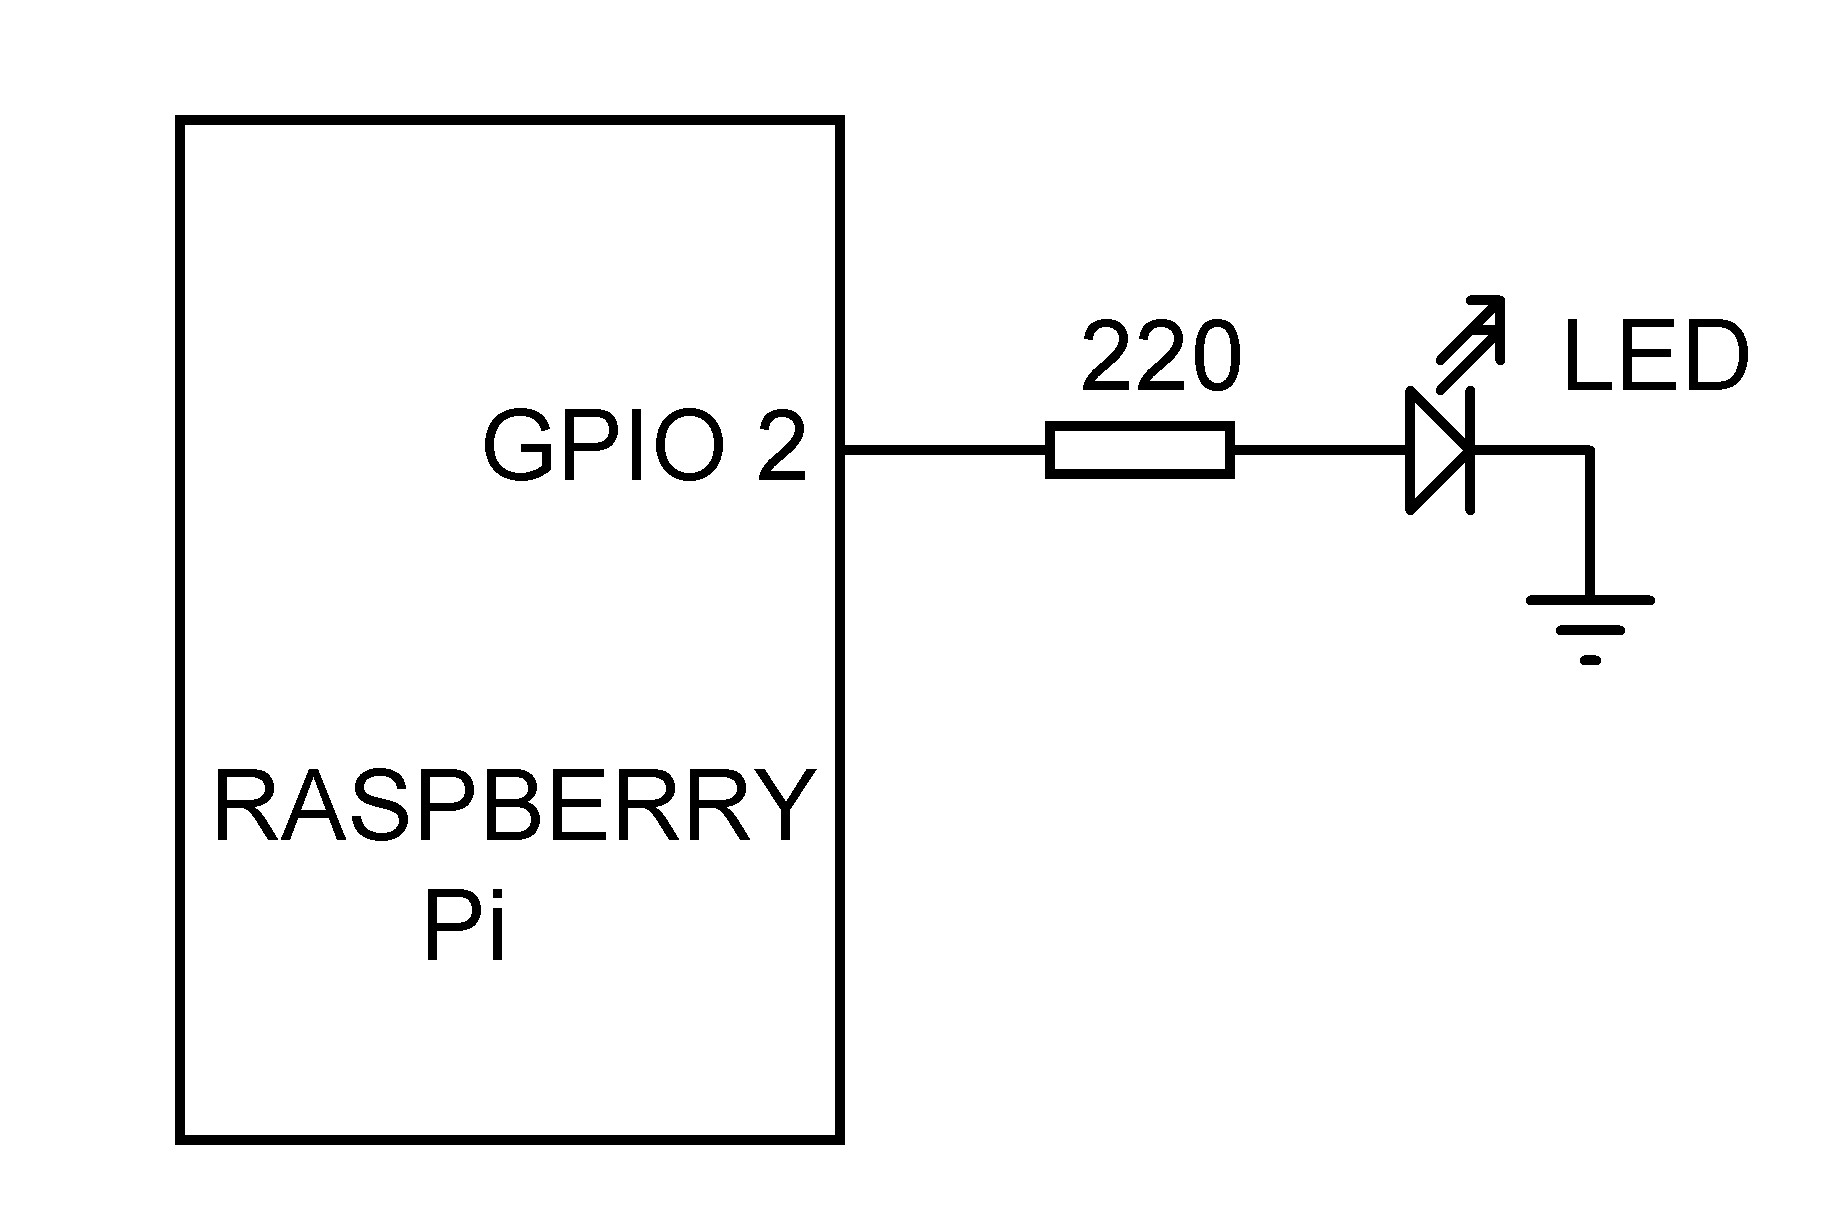
Let us take a look at how to use Node-RED with a very simple example, an LED connected to GPIO 2 of the Raspberry Pi via a 220-Ω current limiting resistor (Figure 4).
The LED is to be controlled by a Node-RED flow program. This ridiculously simple program (Figure 5) is configured like this:
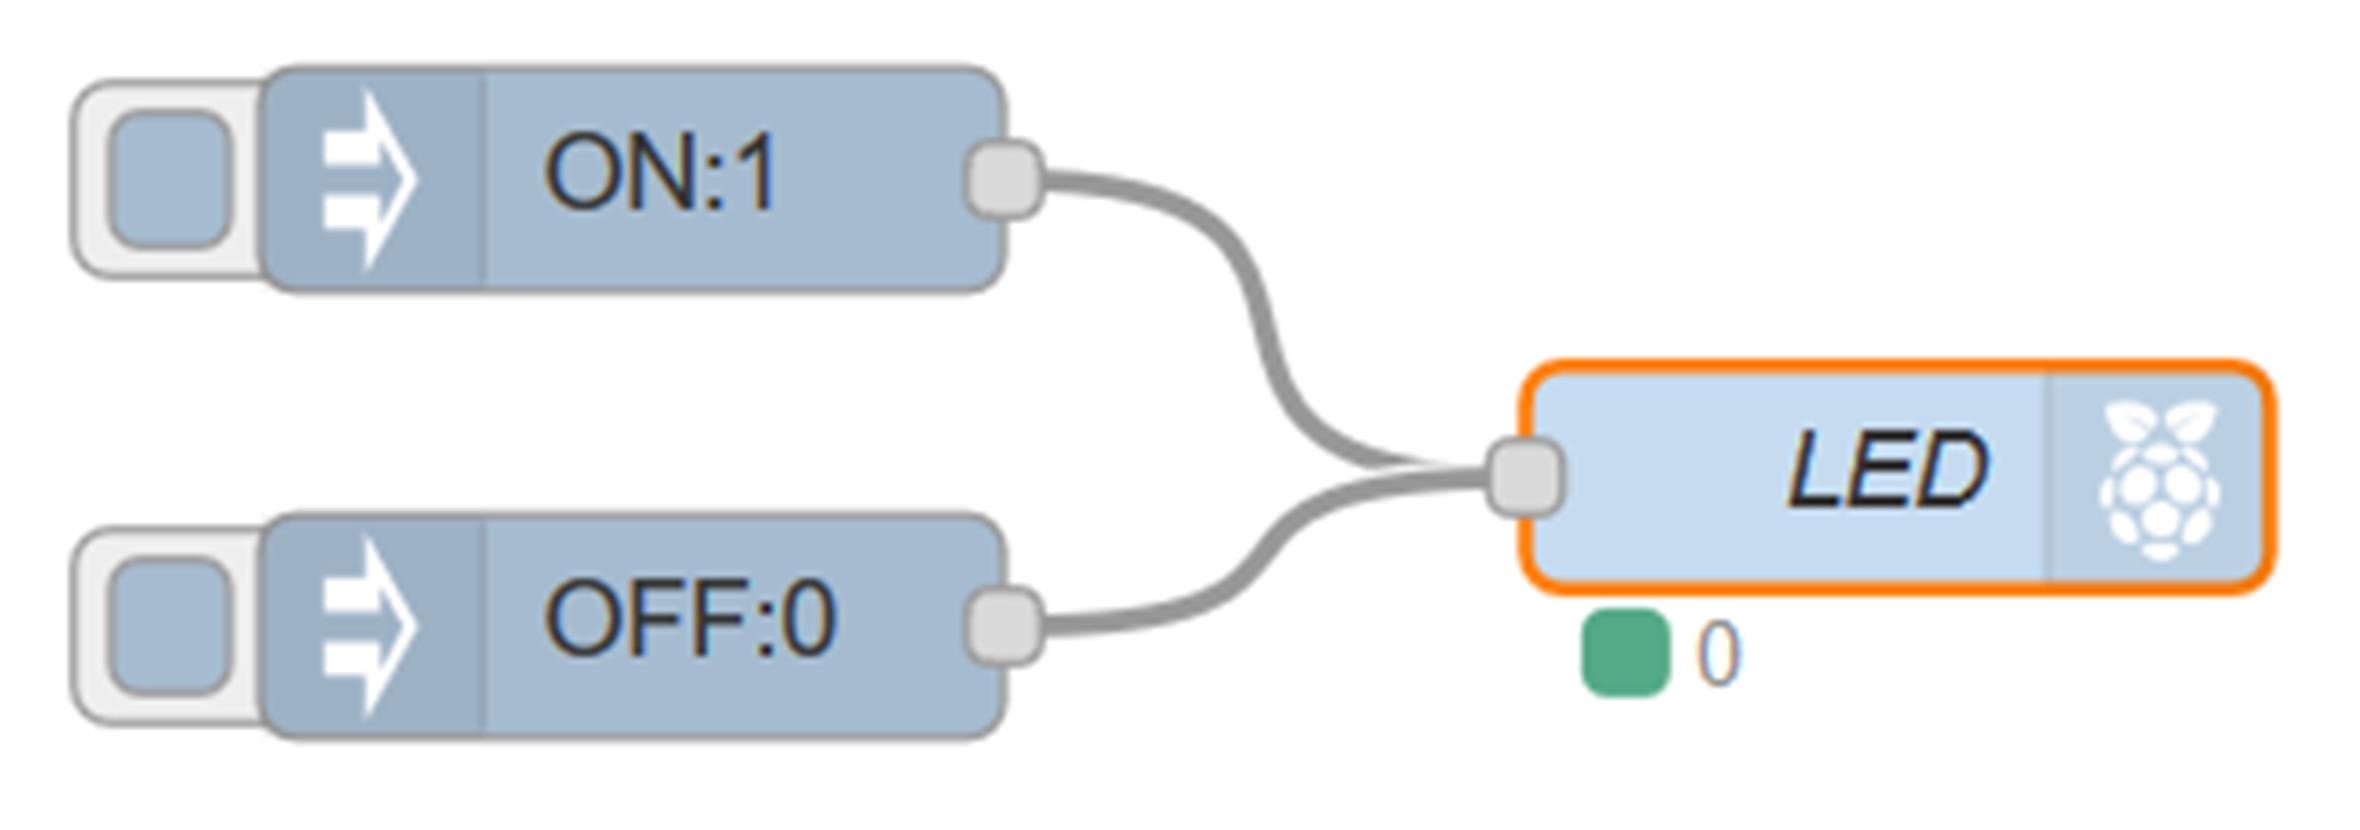
- Click on the Inject node, drag it into the work area and drop it. Inject nodes are used to input messages (such as strings or numbers) into a flow program. In this example, we will “inject” 1 or 0 to turn the LED on and off.
- Double-click on the Inject node to configure it. Set Payload to number and enter a “1”. Clicking on the square field on the left edge of this node will output “1” to turn on the LED.
- Set the Topic of the injection mode to ON so that you can see the function of this node. Then click Done to close the configuration window.
- Click, drag and drop another Inject node into the workspace, set Payload to “0” and its Topic to OFF. When you click on this node, a “0” is output to turn off the LED.
- Now drag an rpi gpio out node into the work area. This node sends digital or PWM data to a GPIO port of the Raspberry Pi. Connect the node as shown in Figure 5.
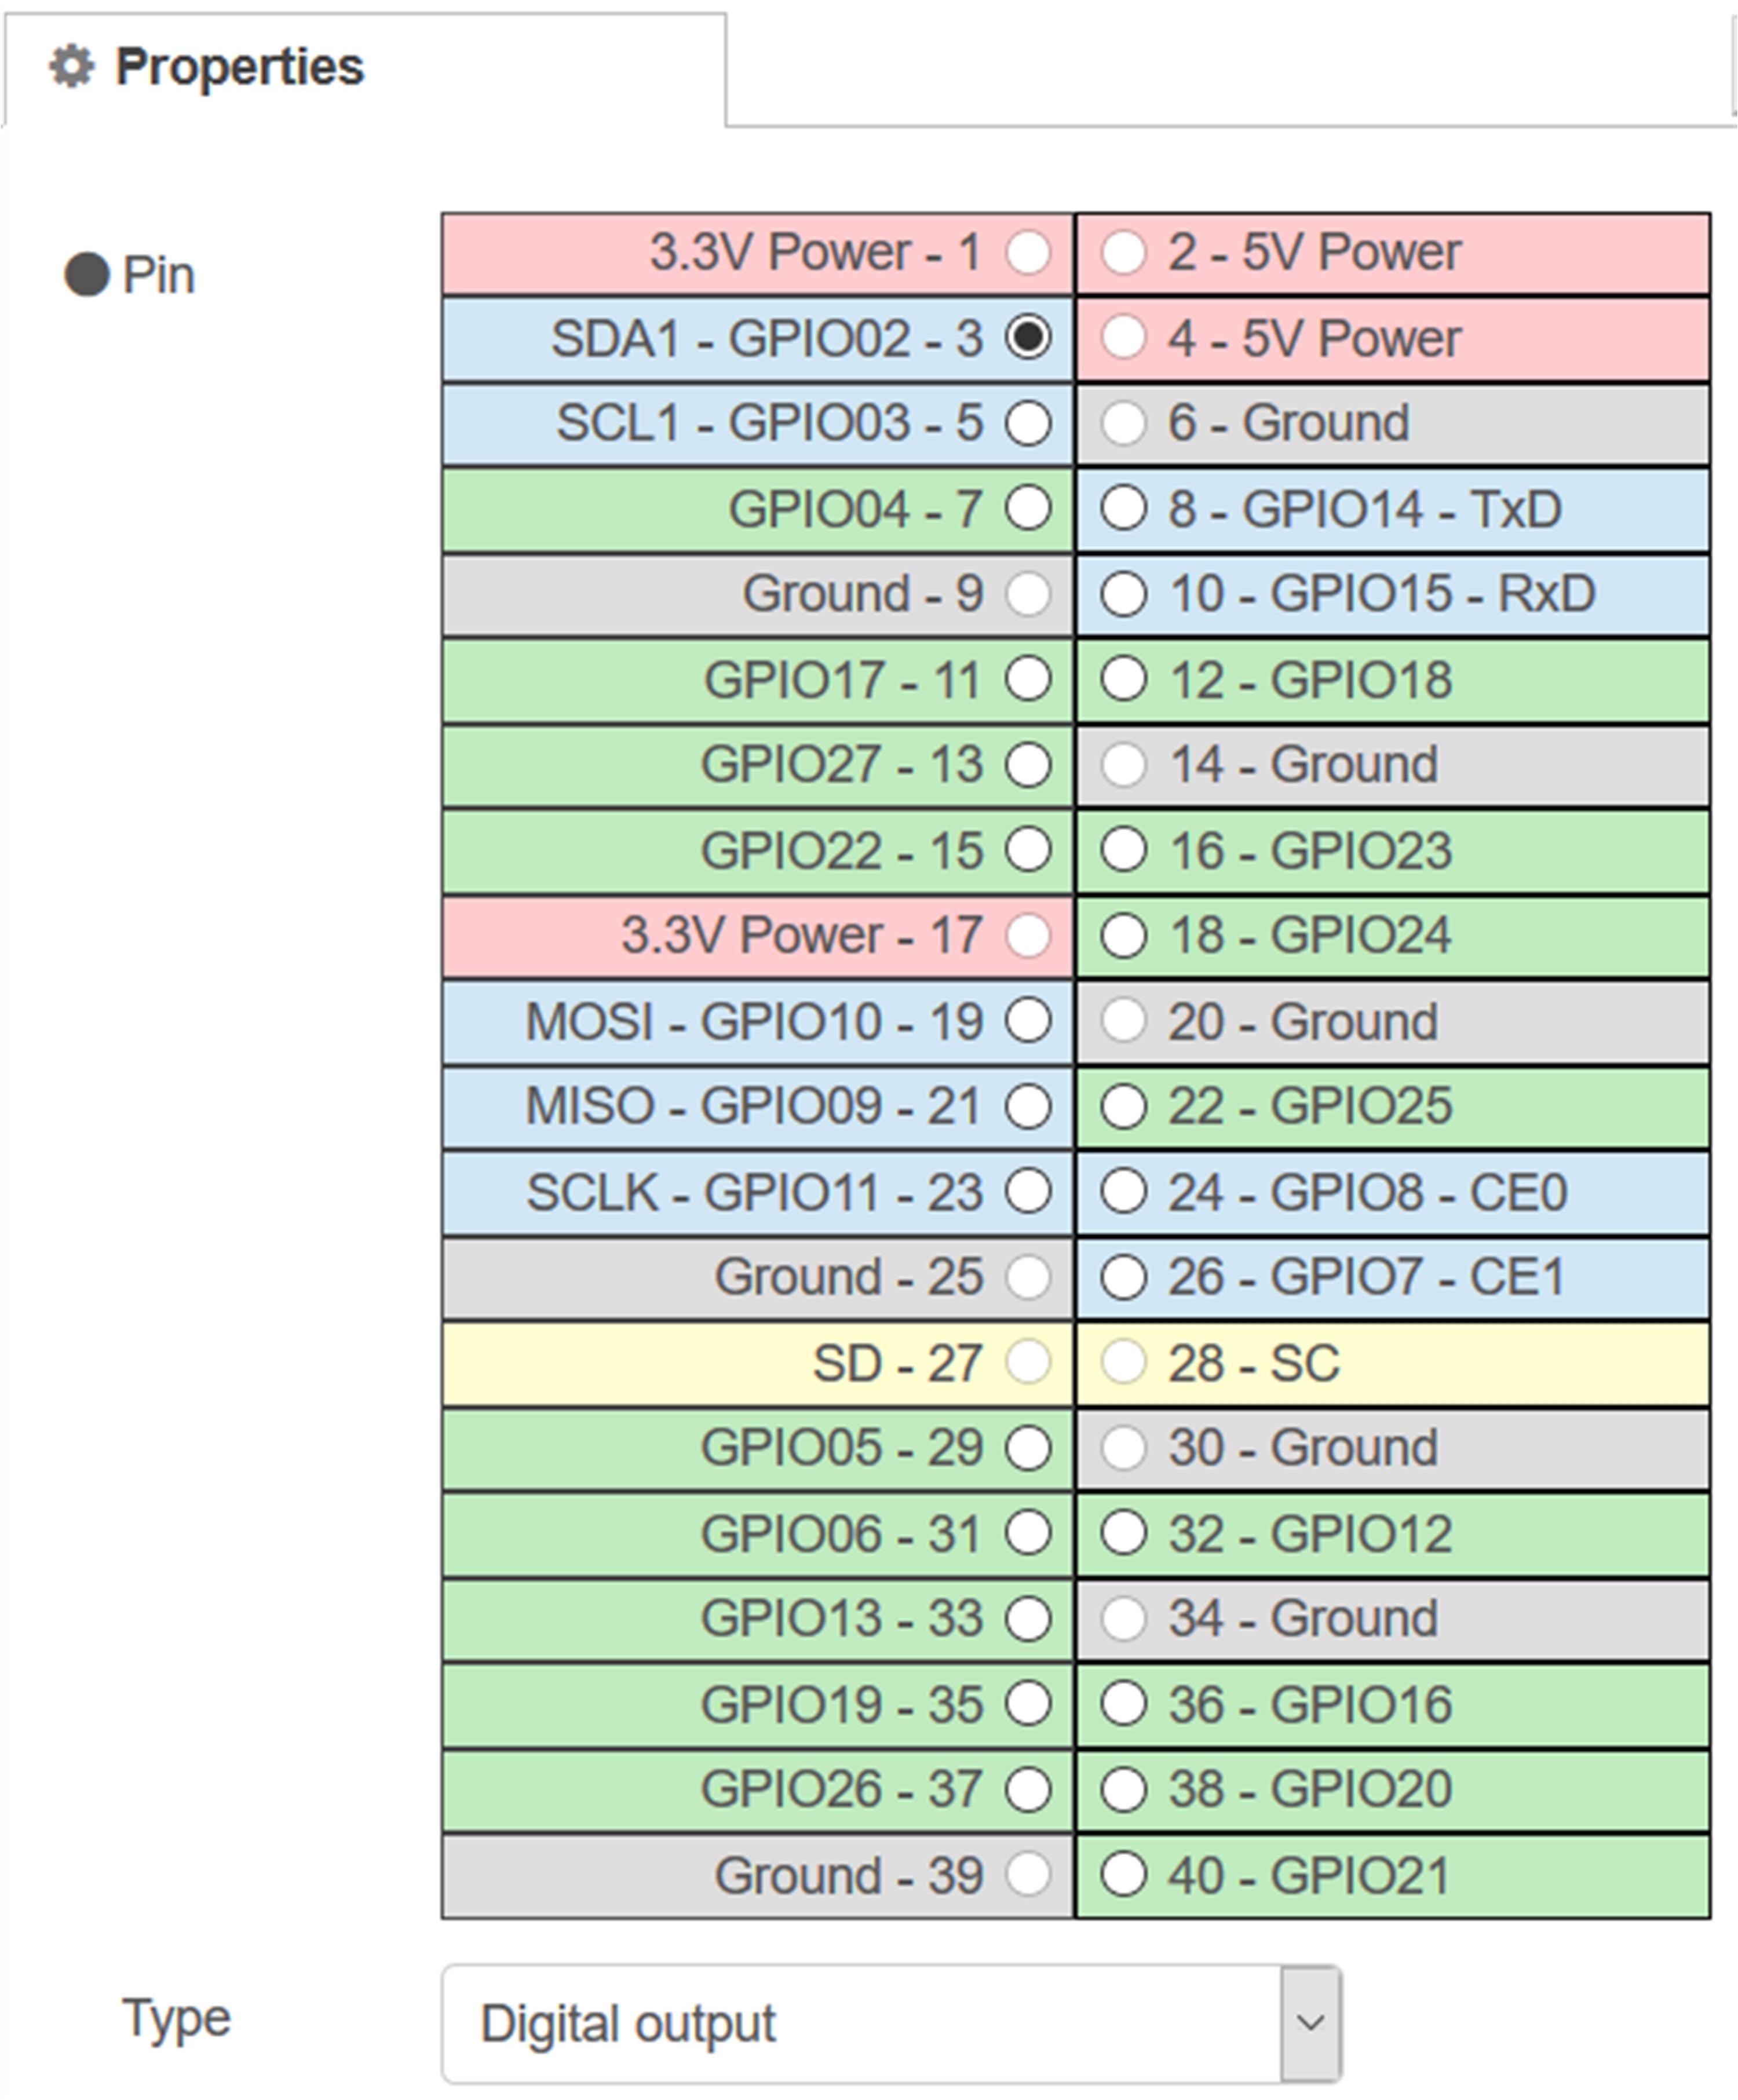
- Double-clicking on this node opens a window where you can configure the GPIO port of the Raspberry Pi (Figure 6). Set Pin to GPIO2, Type to Digital output, click Initialise pin state and set the initial state of the LED to “0”. Set the name of the node to LED. Finally, click Done to close the configuration screen.
This completes the flow program. Click Deploy to compile the program and generate executable code. Make sure that no error messages are displayed at this stage of the design. If so, you can click on the square button on the left side of the ON injection node to turn on the LED. When you then click on the button of the other injection node, the LED will go dark again.
More possibilities
With this very simple example, we have seen what Node-RED is and how it is used. One of the strengths of Node-RED is that it is supported by large communities and that there are many nodes developed by third parties that are available for free and can be used in complex projects. For example, there is the openweathermap node, which provides local weather information such as temperature, humidity, air pressure, wind speed, precipitation amount and so on anywhere on Earth. A weather forecast project can be created in less than an hour with this and some additional nodes. If such a project were to be realized in the conventional way with “your own” external sensors, this would be much more complicated, time-consuming, and usually also considerably more expensive. Node-RED also supports UDP- and TCP-based communication with a node via a WiFi connection. This feature allows users to wirelessly send and receive data from remote locations via a WiFi connection from networked devices such as cell phones, tablets, or PCs.
Some other interesting nodes that can be downloaded and installed for free from the Internet are:
- Dashboard
- Bluetooth
- Amazon´s Alexa
- I2C- and parallel LCD
- World map
- A/D-converter
- Ultrasonic senso
Node-RED is not only for the Raspberry Pi, but can be used (albeit limited) with the Arduino and ESP32 microcontroller boards or combinations of Raspberry Pi and Arduino or Raspberry Pi and ESP32.
One of the most important Node-RED nodes is the function node, which can be configured to have multiple outputs. Configuring this node allows users to write their own program code. For example, the function node can be used to extract local temperature and humidity data from the local weather data provided by the openweathermap node. This can be easily achieved by a few commands in the configuration of the function node. Interested readers will find more information on the web at [1] [2] [3] [4] [5] or in the author’s Node-RED book.
(200164-03)
----------------------------------------------------------------------------------------------------------------------
Want to read more Elektor articles? Become an Elektor-Member now and don’t miss anything!
----------------------------------------------------------------------------------------------------------------------
Discussion (0 comments)