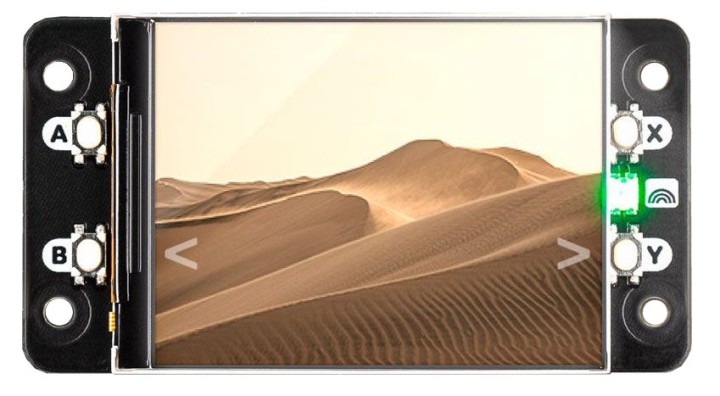
The Display HAT Mini from Pimoroni is equipped with a rectangular 2.0” 320-by-240-pixel LCD, four tactile buttons and an RGB LED. Intended for the Raspberry Pi Zero and Zero 2 W it is great for e.g., IoT and home automation applications.
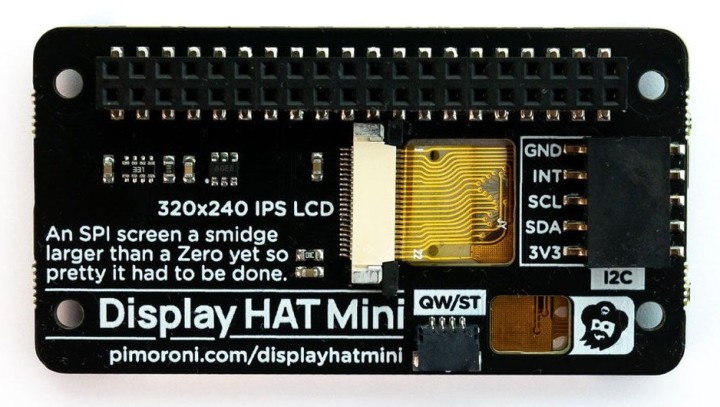
The Display HAT Mini from Pimoroni is equipped with a rectangular 2.0” diameter IPS (In-Plane Switching) LCD with SPI interface. It is intended for the Raspberry Pi Zero and Zero 2 W but, as it has the standard 40-pin HAT connector, it can be plugged on any Raspberry Pi equipped with such a connector if you are careful as the HAT’s I2C connector (‘Breakout Garden header’) collides with the Raspberry Pi’s Display connector. The Display HAT Mini also has four tactile buttons and an RGB LED.
Display HAT Mini Specifications
The display’s resolution is 320 by 240 pixels (3:2), which corresponds to about 200 PPI (pixels per inch). It has 65K color depth. Mounted on a Raspberry Pi Zero without stand-offs, the total height is approx. 15 mm. The display comes with two 10-mm-high stand-offs and four little screws (five in my case). To me, these stand-offs are too high, 8.5 mm would have been much better (but non-standard).
Besides the display, the HAT also features four tactile buttons and an RGB LED. The push buttons are placed very close to the display, making them a bit difficult to use. I suspect that they were placed that way to provide some extra mechanical support for the display.
Even though the HAT blocks access to the 40-pin HAT connector, extensions are still possible thanks to either the Qw/ST (Qwiic/STEMMA QT) connector and the so-called Breakout Garden header. Both headers provide access to the I2C bus.
Supported by Python Libraries
To use the Display HAT Mini on a Raspberry Pi you must install a library. Detailed instructions on how to do this are given in their GitHub corner. Examples for using the display with Pygame and PIL are provided too.
I plugged the Display Mini HAT on a Raspberry Pi Zero 2 W running Buster and controlled it over SSH. After installing the libraries, all the examples worked without a hitch.
Build a Weather Forecast Display
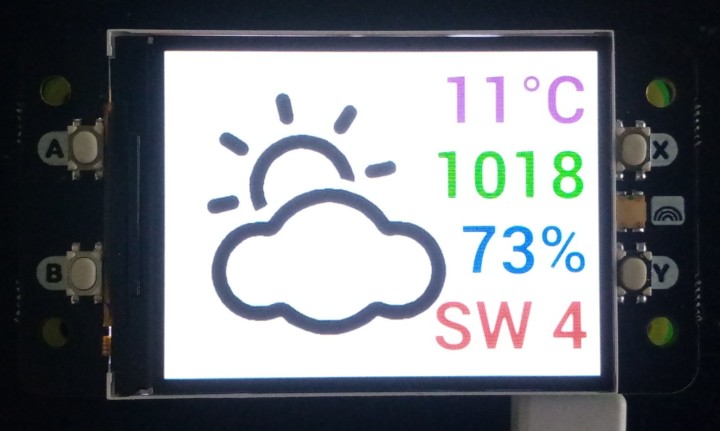
With the display up and running, I wanted to do something with it. On the internet I had found a collection of nice-looking weather icons, and so I decided to create a weather forecast display in Python3 showing the corresponding weather icon together with temperature, atmospheric pressure, humidity, and wind direction and speed. This data can be obtained from an online weather forecast server, there are plenty of those that offer free access. The Display HAT Mini makes for a great IoT or home automation display.
I used the push buttons ‘A’ and ‘B’ to control the brightness of the backlight of the display. Button ‘X’ lets you choose between degrees Celsius and degrees Fahrenheit, while the ‘Y’ button toggles between wind direction in degrees or as cardinal letters (e.g., ‘SW’ or ‘N’).
A Bright LED
The RGB LED provides some status information. Initially green should indicate proper operation, but I found the brightness too high even at very low values, so I switched it off. Now the LED will only light up in case of a problem: red when the weather data could not be fetched and orange when the weather data is invalid.
Note that by default, the screen is upside-down with respect to the push button print on the HAT. For this reason, the program rotates the display buffer by 180° before copying it to the screen.
The current consumption of my system at maximum backlight intensity was around 200 mA.
Summarizing, the Display HAT Mini is a cool add-on for a Raspberry Pi Zero (2 W). The image quality is great, and it is easy to use in your applications. The supporting library also provides access to the push buttons (placed a bit too close to the display for my taste), RGB LED (a tad on the bright side) and backlight.
Note that due to the display the HAT is slightly larger than a Raspberry Pi Zero (2 W), 35 mm instead of 30 mm, so choose your enclosure wisely. I2C extension connectors are available on the rear side.
Read full article
Hide full article
Add a rating to this article
★★★★★
★★★★★
Page 1 / 1
Login
No account yet?Register for free!
Forgot password?
Please enter your email address. Instructions for resetting the password will be emailed to you now.


Discussion (4 comments)
François Vorburger 3 years ago
First attempt failed due to missing module httplib2.
Did pip install httplib2
2nd attempt failed due to some font errors:
NotImplementedError: font module not available (ImportError: libSDL2_ttf-2.0.so.0: cannot open shared object file: No such file or directory)
What else did you installed in order to get your example working?
Content Director, Elektor 3 years ago
ClemensValens 3 years ago
See the comment section, starting at line 18:
You may also want to check out https://github.com/ClemensAtElektor/HyperPixel2r where this problem is described in more detail.
François Vorburger 3 years ago
Sorry about not checking myself. Next time I will ;-)