Pimoroni Weather HAT with Weather Sensor Assembly (Review)
The Weather Hat from Pimoroni is a meteorlogically minded Raspberry Pi HAT. It plugs onto any Raspberry Pi equipped with the 40-pin extension pin header. On the board are, besides a small color display and four push-buttons, two sensors. The popular BME280 measures relative humidity, barometric pressure, and temperature, while an LTR-559 detects ambient light intensity. The HAT connects seamlessly to a wind and rain sensor assembly.
The Weather Hat from Pimoroni is, as they say at Pimoroni, a meteorlogically minded Raspberry Pi HAT. It comes in a small plastic bag with some screws and standoffs. There seem to be hardly any components on the board with its playful design, except for a display and a bunch of connectors, but that is a false impression. It is just that the parts on it are really tiny.
Humidity, Temperature, Pressure and Light Intensity Sensors
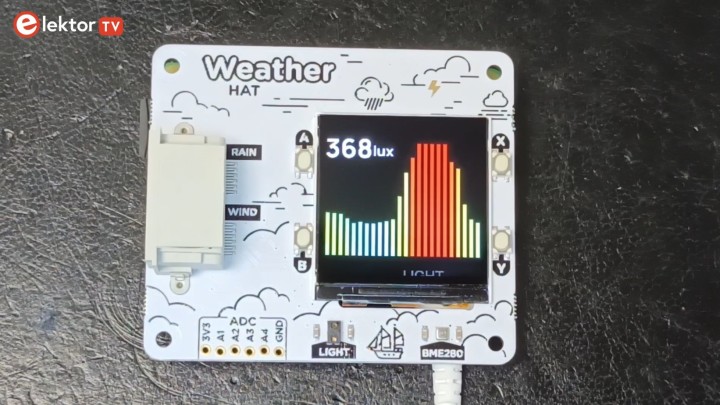
Don’t get me wrong, components are not fighting for space either, but there is a microcontroller on it, an ML51XB9AE from Nuvoton. There are also two sensors. The popular BME280 measures relative humidity, barometric pressure, and temperature, while an LTR-559 detects ambient light intensity. This sensor can also function as a proximity detector. The Weather HAT showing ambient light intensity.
Placed around the display are four small pushbuttons labelled ‘A’, ‘B’, ‘X’ and ‘Y’ as found on other display HATs from Pimoroni. Similarly, on the bottom side, we find the Pimoroni-style I²C extension connector. A slightly staggered header footprint exposes four analog inputs.
Connect Wind and Rain Sensors to the Weather HAT
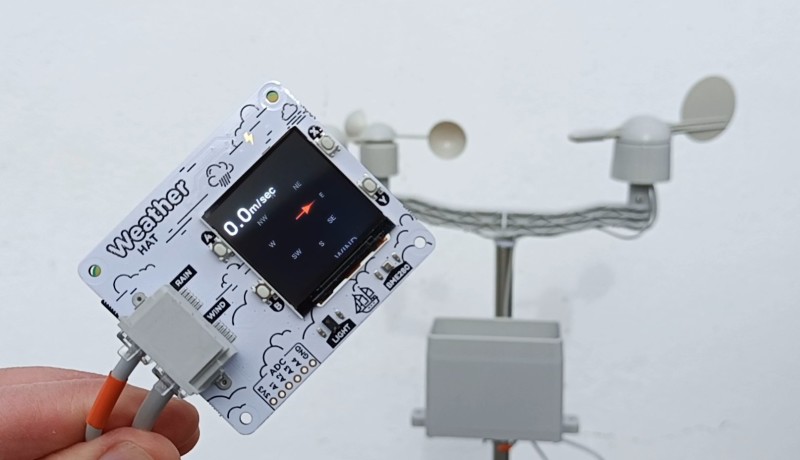
Next to the display is a large double RJ11 socket. Here you can connect one of those weather sensor assemblies available online. They consist of a wind speed and wind direction sensor and a bucket rain sensor, and they are wired up using RJ11 jacks.
The Weather HAT plugs onto any Raspberry Pi equipped with the 40-pin extension pin header. I used a Raspberry Pi Zero 2. When plugging it onto a full-size Raspberry Pi, make sure to mount the standoffs to avoid conflicts between the HAT's I²C connector and the Pi’s display connector.
Subscribe
Tag alert: Subscribe to the tag Review and you will receive an e-mail as soon as a new item about it is published on our website!
Python Support
After assembling the hardware, it is time to install the software. Pimoroni has provided Python 3 libraries for this at GitHub. Instructions on how to install the libraries can be found at the Pimoroni website.
I used SSH to install everything and then ran the weather.py example. This all worked fine, and the display showed rain, atmospheric pressure and temperature values. Rain was at zero, which was good as I was doing this inside. The temperature, although not a ridiculous value, is not super precise as the Raspberry Pi Zero gets warm and therfore heats up the HAT’s temperature sensor.
Nice Graphs
Pressing the ‘A’ button repeatedly brings up different screens for wind, rain and light data. The ‘X’ button cycles through screens for temperature, air pressure and humidity, data captured by the BME280 sensor. Most of the screens have colorful history graphs too. The wind speed and direction display is my favorite, with the light intensity runner-up.
The display, a 1.54”, 240 x 240 pixel IPS LCD, looks pretty nice, and has good colors.
Assembling the Wind and Rain Sensors
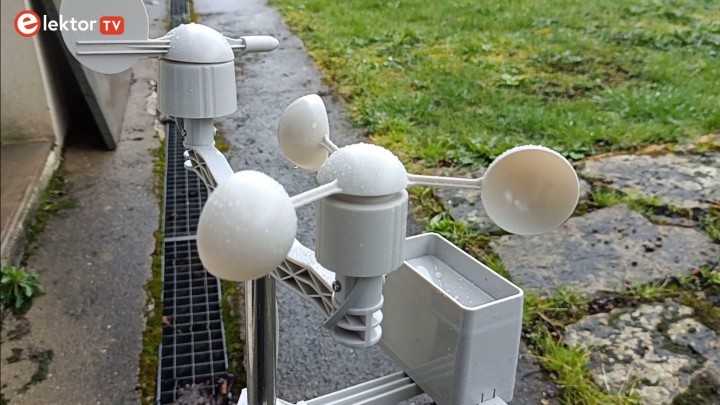
The weather sensor kit consists of three plastic sensor assemblies - wind speed cup anemometer, wind direction vane and rain -, two plastic mounts, two 20-mm-diameter thin metal (chrome?) tubes, and some fixing materials. Putting everything together is easy enough, as most parts can be mounted in only one way.
The wind sensors are mounted on a plastic beam-like support which in turn is fixed on the end of one of the two metal tubes, the one that has holes in it.
The rain sensor mounts on a plastic arm that you clamp to the tube. Even though everything is secured with nuts and bolts and screws, the complete assembly remains a bit wiggly. The second metal tube slides into the first but is not secured by anything. I wouldn’t trust it in a storm.
Label the Cables for the Weather HAT
The cable of the wind speed sensor connects to the bottom of the wind direction sensor, so only two cables run down the mast. I recommend clearly labelling them because the Weather HAT is picky about which sensor connects to which socket and once the sensors are sitting high on a mast, it is hard to see which cable goes where. The weather sensors busy measuring wind speed and direction and rain fall.
To attach the weather sensor assembly to a pole, mast or other support, you can use the two gear clamps and the four long tie-wraps that are part of the kit.
Even though the parts are all nicely made and fit together perfectly, the assembled weather sensor doesn’t inspire much confidence. I guess only time can tell how long it will survive out in the wild. I think running the cables through a plastic conduit to protect them against the sun might be a good idea.
Conclusion
The Weather HAT by Pimoroni is a nice and easy way to quickly build a simple weather station with a Raspberry Pi. Installation and usage instructions are clear, and everything works perfectly. Adding a weather sensor assembly with wind and rain sensors turns it into a complete weather station. The HAT’s four analog inputs and I²C port allow extending the system even further.
The Python 3 examples show how to capture data and how to print them on the display. There is plenty of documentation online for the weather sensor assembly explaining how to interpret and process the data it provides, which is very helpful.
The Weather HAT is Best in the Lab
However, the kit is more of an experimental indoor lab setup. It requires some work before you can install it as a real outdoor weather station. The Raspberry Pi heats up the HAT’s temperature sensor, making a deported sensor necessary, and the 2.5-meter-long cables from the wind and rain sensors will be too short for most installations.
Make it Wireless
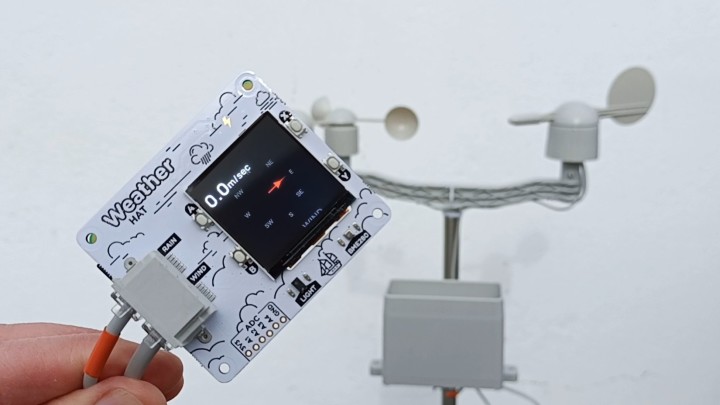
I recommend using a Raspberry Pi Zero 2W with Wi-Fi, so you can put the board outside, close to the sensors in a waterproof enclosure. It must be partly transparent, of course, because of the light sensor and the display. The display can provide local status information but remains a bit of a gadget in such a setup. The Pimoroni Weather HAT with the sensor assembly in the background.
Read full article
Hide full article
Add a rating to this article
★★★★★
★★★★★
Page 1 / 1
Login
No account yet?Register for free!
Forgot password?
Please enter your email address. Instructions for resetting the password will be emailed to you now.

Discussion (0 comments)