YouTuber MadEDoctor has found a way to upgrade the RAM chip on a 1 GB Raspberry Pi 4 to 8 GB using some simple tools and a bit of know-how, making it accessible to hobbyists with an easy-to-follow guide. The upgrade process is straightforward and can save you the trouble of trying to find a Pi 4 with more RAM.
Raspberry Pi enthusiasts have been struggling to get their hands on the popular single-board computer due to a shortage of them, especially the 8 GB version. However, YouTuber MadEDoctor of Bulgaria has found a way to upgrade the RAM chip on a 1 GB Pi 4 to 8 GB using some simple tools and a bit of know-how.
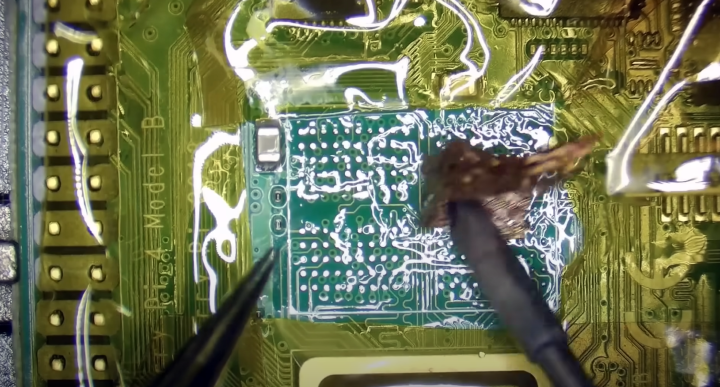
Replacing the RAM chip on a Raspberry Pi 4 may seem daunting, but MadEDoctor has made it accessible to hobbyists with an easy-to-follow video guide. First, you need to obtain a compatible RAM chip, which you can find online. These chips come with balls made of lead-free solder, but you can reball them with leaded solder balls to lower the melting point, although it’s not necessary.
The Method
Considering that this is his first video on the channel, the fact that it’s had almost 300,000 views, and he’s sitting at almost 3,000 subscribers, it seems this is a popular topic!
To replace the RAM chip, you will need a hot air gun, flux, a soldering iron, and some solder wick. He recommends putting some heat shielding on the board to protect it from the hot air. Then, you can remove the old chip with hot air and use the soldering iron with wick to clean the pads. Next, add some flux and align the new chip before soldering it on with hot air.
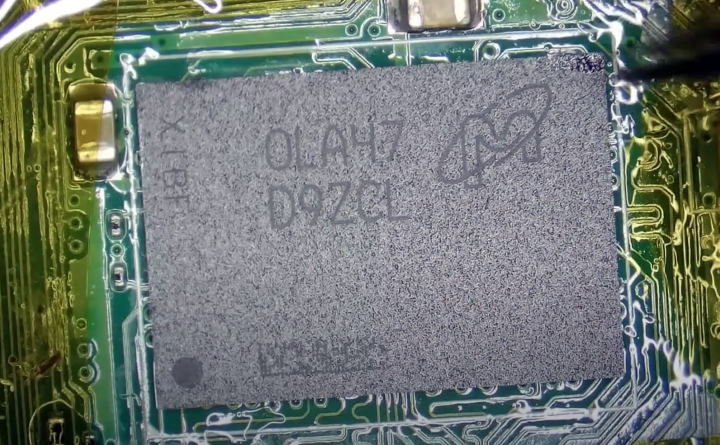
The upgrade process is surprisingly straightforward, and there’s no need for reballing equipment, stencils, or solder paste. The video provides the RAM chip part numbers and a step-by-step guide, making it accessible to anyone who wants to give it a try. Not only that, but his description has a comprehensive list of parts.
While it may seem risky to replace the RAM chip on a Raspberry Pi, the method is easy to follow (although certainly not beginner work), and can save you the trouble of trying to find a Pi 4 with more RAM. Plus, the Pi 4 recognized the extra RAM added without any configuration needed, making the upgrade even more worthwhile.
If you’re interested in taking your Raspberry Pi upgrades to the next level, his video is a great place to start. It’s an excellent example of how to bring BGA replacement to a hobbyist level, and you might just learn a thing or two about hot air rework in the process.
His SMD toolkit is quite comprehensive. Source: video
I know I did! Disable checkingPremium suggestionsDisable checkingPremium suggestionsDisable checkingPremium suggestions
Read full article
Hide full article
Add a rating to this article
★★★★★
★★★★★
Page 1 / 1
Login
No account yet?Register for free!
Forgot password?
Please enter your email address. Instructions for resetting the password will be emailed to you now.


Discussion (0 comments)