
M5Stack – An ESP32 Plus Graphic Display in a Cute Case
May 16, 2019
on
on
In my recent reviews, I've been working with the ESP32 controller module to develop small IoT applications. The processor is equipped with Wi-Fi, Bluetooth and plenty of memory and is also programmable via the Arduino IDE. In addition, these modules are really cheap and breadboard-friendly development boards. With just a few additional components (such as RGB LED, photo sensor and jumpers) and the necessary Arduino library, even newbies can quickly get up and running with a simple project where sensor values are sent to a cloud platform and displayed there.
A good add-on to the basic ESP32 module is a small display able to show status messages such as ‘No Network’, for example, the Lolin board, (which I looked at in a previous review) has this built-in display feature. A few weeks ago, my colleague Mathias Claußen who normally slaves away in our lab, pointed out the M5Stack ESP32 dev system to me. The base module integrates a small ESP32 board into a neat, compact housing; almost the entire front surface is taken up with a graphics-capable colour display which has a resolution of 320 x 240 pixels. Below the screen area is a row of three push-buttons; In addition, there are various expansion connectors and ports along all the sides of the housing. There are also additional modules or shields (for example — GPS), which can be easily plugged between the top and bottom of the base module, so you can assemble your own custom ‘stack’. My colleague Clemens Valens has already written a review introducing the M5Stack system.
I found a tutorial on the net showing how to integrate all the necessary libraries into my Arduino IDE setup. This also included some small demos. It quickly became apparent that the developers had encapsulated the display driver functions (and also the push button scanning) into an object called M5. After incorporating the Lib with
and in the sketch call the procedure
and now you can use commands such as
to control the display.
On GitHub there is also a so-called API Reference available. However, I didn’t find everything I was looking for there. For example, I had to experiment to find out which parameter values define the font size (M5.Lcd.setTextSize) (N.B. the values 2 to 5 are useful).
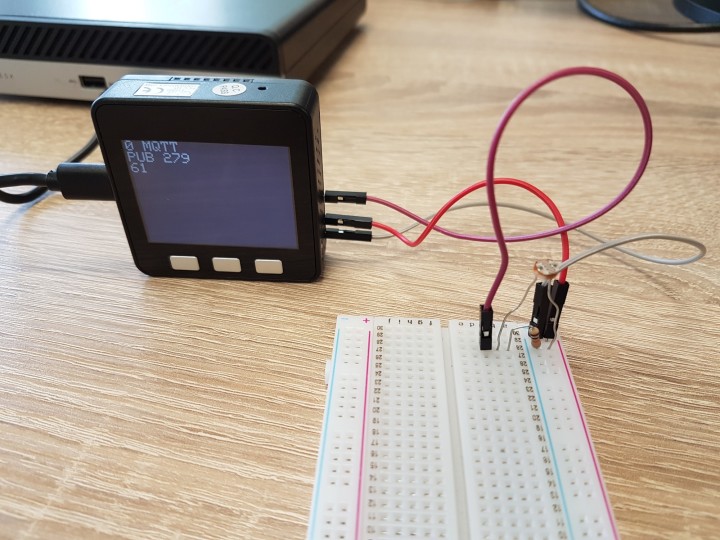
Eventually I was able to port a small project, which I had previously developed for the Lolin OLED board, onto the M5Stack. In this application, the values of a light sensing LDR are sampled and sent to the cloud platform OpenSenseMap (see review). I read the voltage across the LDR (circuit) connected to expansion connector sockets along the right side of the M5Stack (see photo).
You can download my first M5Stack app below. Incidentally, a small battery is built into the M5Stack (an additional (larger) battery is also available). Using just the integrated battery makes the whole package portable but the M5stack will only run for about an hour before it needs recharging.
You can download my first M5Stack app below. Incidentally, a small battery is built into the M5Stack (an additional (larger) battery is also available). Using just the integrated battery makes the whole package portable but the M5stack will only run for about an hour before it needs recharging.
The M5Stack display is just about the right size to display small text messages in this sort of situation. I quickly rejected the idea of writing a small PC app that communicates with the M5Stack over UDP or rudimentary TCP / IP. It is easier and more flexible to enter text messages via a simple web browser and send them to the display - this will work from a PC as well as from any mobile device.
I have already programmed an ESP32 web server for my IoT blog; this sends out an HTML web page, which is used to set the SSID and password for your own Wi-Fi network. In order to be able to enter the values in a browser, you need to log in to an ESP32’s self-generated ‘local’ network, and enter the address 192.168.4.1 to address the ESP32 (ESP32 in Access Point mode). After the login data for the router network had arrived at the ESP32, this could log in, and then got another address (for example, this was 192.168.0.38 in my case).
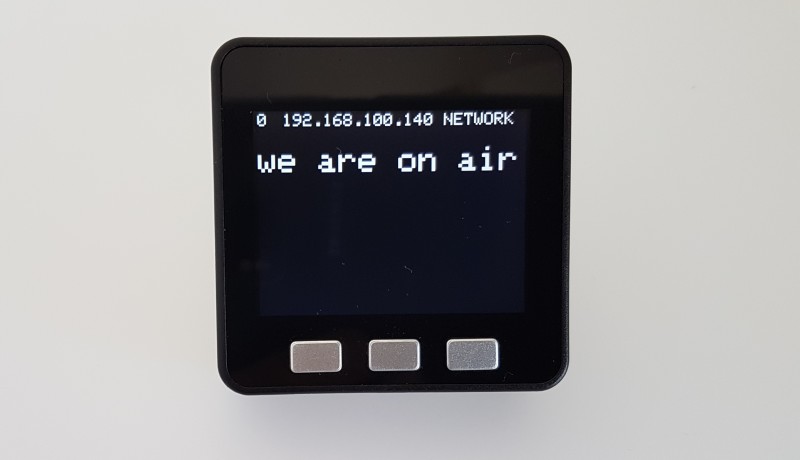
To build this application, I used one of my previous sketches as a base. I expanded the web server function so that when this second address is accessed a web page is output which has a single text field (i.e. the message to the DJ) and a Submit button to submit the text. Once the ESP32 web server has received the text message from the client web browser, it is displayed on the M5Stack screen.
Secondly, my code was a bit cumbersome, there were too many individual functions used for the two different websites and to evaluate the requests. Here we should use a library suitable for both websites - no matter whether up to eight configuration values or only a small text message is entered.
Third, I wanted to stop operating the ESP32 both as an access point and in station mode all the time. Not only was this potentially insecure, it also increased power consumption.
After some time spent making changes and mods to the code I came up with the solution you can download below.
To solve the screen flicker issue I used a small character buffer - in fact, there are up to four, which can be used optionally at different cursor positions. In my application, the first buffer is only responsible for the heartbeat display (a character that switches between 0 and 1). Another buffer stores the status text (logged in or not), the address at which the ESP32 can be reached is also displayed here. The third buffer stores the message body. The functions for setting the DisplayBuffer parameters (position, font size, length of the text) and for writing text are of course all documented in the source code.
To abstract the web server, I first wrote a small Param class - it manages a set of up to eight parameters that have a name, a value, and a type. With the lines
I 'pull' two objects of this class in the application sketch. The first object receives the message text (Messages.PValue[0]). The second object is used to manage the settings (NetworkConfig.PValue[0] is the SSID, NetworkConfig.PValue[1] is the password). Such an object allows us to pass a set of strings to other libraries at the same time. In addition, we can write functions that return a Param-object (i.e. multiple strings at once).
My new webserver library makes use of it. The lines
make the web server functions accessible via the object myWebserver. The line
takes apart the GET parameter that encodes the values entered by the user (in the browser address line after the "?") for a submitted web form. The values obtained are then written to the NetworkConfig object and are accessible using NetworkConfig.PValue[x]. Conversely, you can use myWebserver.SerializeToHTMLInputTable(NetworkConfig) to get an HTML table with the required input fields, in which the user can enter the values of NetworkConfig (SSID, password).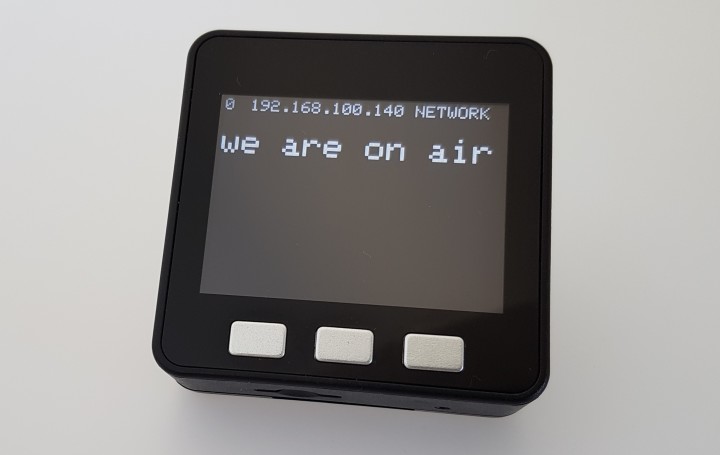
A good add-on to the basic ESP32 module is a small display able to show status messages such as ‘No Network’, for example, the Lolin board, (which I looked at in a previous review) has this built-in display feature. A few weeks ago, my colleague Mathias Claußen who normally slaves away in our lab, pointed out the M5Stack ESP32 dev system to me. The base module integrates a small ESP32 board into a neat, compact housing; almost the entire front surface is taken up with a graphics-capable colour display which has a resolution of 320 x 240 pixels. Below the screen area is a row of three push-buttons; In addition, there are various expansion connectors and ports along all the sides of the housing. There are also additional modules or shields (for example — GPS), which can be easily plugged between the top and bottom of the base module, so you can assemble your own custom ‘stack’. My colleague Clemens Valens has already written a review introducing the M5Stack system.
How do I control the display?
In my reviews, I always try to develop a small example application but time, as always, is short. The first thing that came to mind was to build a little sketch to write text to the screen. For the network connectivity, I could simply take over that part from my previous projects - the ESP32 is programmable here using the familiar Arduino IDE.I found a tutorial on the net showing how to integrate all the necessary libraries into my Arduino IDE setup. This also included some small demos. It quickly became apparent that the developers had encapsulated the display driver functions (and also the push button scanning) into an object called M5. After incorporating the Lib with
#include <M5Stack.h>
and in the sketch call the procedure
M5.begin();
and now you can use commands such as
M5.Lcd.setCursor(x, y);
M5.Lcd.setTextSize(2);
M5.Lcd.print(“Hello World!”);
M5.Lcd.setTextSize(2);
M5.Lcd.print(“Hello World!”);
to control the display.
On GitHub there is also a so-called API Reference available. However, I didn’t find everything I was looking for there. For example, I had to experiment to find out which parameter values define the font size (M5.Lcd.setTextSize) (N.B. the values 2 to 5 are useful).
Eventually I was able to port a small project, which I had previously developed for the Lolin OLED board, onto the M5Stack. In this application, the values of a light sensing LDR are sampled and sent to the cloud platform OpenSenseMap (see review). I read the voltage across the LDR (circuit) connected to expansion connector sockets along the right side of the M5Stack (see photo).
You can download my first M5Stack app below. Incidentally, a small battery is built into the M5Stack (an additional (larger) battery is also available). Using just the integrated battery makes the whole package portable but the M5stack will only run for about an hour before it needs recharging.
You can download my first M5Stack app below. Incidentally, a small battery is built into the M5Stack (an additional (larger) battery is also available). Using just the integrated battery makes the whole package portable but the M5stack will only run for about an hour before it needs recharging.
Messages via a web server
Although quick-and-dirty porting of a previous project did the job, it doesn’t really take full advantage of the display, the neat layout and portability of the M5Stack system. I got to thinking and decided what I could do with it. We have a small DJ setup at home; from time to time friends and acquaintances use the decks, and we use a camera setup to record events. Occasionally I need to communicate with the guy working the decks and I’ve often thought it would be more convenient if I could send a message without needing to wave my arms around to get his attention.The M5Stack display is just about the right size to display small text messages in this sort of situation. I quickly rejected the idea of writing a small PC app that communicates with the M5Stack over UDP or rudimentary TCP / IP. It is easier and more flexible to enter text messages via a simple web browser and send them to the display - this will work from a PC as well as from any mobile device.
I have already programmed an ESP32 web server for my IoT blog; this sends out an HTML web page, which is used to set the SSID and password for your own Wi-Fi network. In order to be able to enter the values in a browser, you need to log in to an ESP32’s self-generated ‘local’ network, and enter the address 192.168.4.1 to address the ESP32 (ESP32 in Access Point mode). After the login data for the router network had arrived at the ESP32, this could log in, and then got another address (for example, this was 192.168.0.38 in my case).
To build this application, I used one of my previous sketches as a base. I expanded the web server function so that when this second address is accessed a web page is output which has a single text field (i.e. the message to the DJ) and a Submit button to submit the text. Once the ESP32 web server has received the text message from the client web browser, it is displayed on the M5Stack screen.
The WiFiWebserver and DisplayBuffer library
There were three things that bothered me about my first prototype. Firstly, the message displayed on the screen flickered noticeably. Incidentally, there is no dedicated command to clear the screen on the M5Stack API; to delete text; you need to overwrite it with a string of spaces and then write the new text.Secondly, my code was a bit cumbersome, there were too many individual functions used for the two different websites and to evaluate the requests. Here we should use a library suitable for both websites - no matter whether up to eight configuration values or only a small text message is entered.
Third, I wanted to stop operating the ESP32 both as an access point and in station mode all the time. Not only was this potentially insecure, it also increased power consumption.
After some time spent making changes and mods to the code I came up with the solution you can download below.
To solve the screen flicker issue I used a small character buffer - in fact, there are up to four, which can be used optionally at different cursor positions. In my application, the first buffer is only responsible for the heartbeat display (a character that switches between 0 and 1). Another buffer stores the status text (logged in or not), the address at which the ESP32 can be reached is also displayed here. The third buffer stores the message body. The functions for setting the DisplayBuffer parameters (position, font size, length of the text) and for writing text are of course all documented in the source code.
To abstract the web server, I first wrote a small Param class - it manages a set of up to eight parameters that have a name, a value, and a type. With the lines
Param Messages = Param();
Param NetworkConfig = Param();
Param NetworkConfig = Param();
I 'pull' two objects of this class in the application sketch. The first object receives the message text (Messages.PValue[0]). The second object is used to manage the settings (NetworkConfig.PValue[0] is the SSID, NetworkConfig.PValue[1] is the password). Such an object allows us to pass a set of strings to other libraries at the same time. In addition, we can write functions that return a Param-object (i.e. multiple strings at once).
My new webserver library makes use of it. The lines
#include <WiFiWebserver.h>
WiFiWebserver myWebserver = WiFiWebserver();
WiFiWebserver myWebserver = WiFiWebserver();
make the web server functions accessible via the object myWebserver. The line
NetworkConfig = myWebserver.DeSerializeFromGETParameter(GETParameter, NetworkConfig);
takes apart the GET parameter that encodes the values entered by the user (in the browser address line after the "?") for a submitted web form. The values obtained are then written to the NetworkConfig object and are accessible using NetworkConfig.PValue[x]. Conversely, you can use myWebserver.SerializeToHTMLInputTable(NetworkConfig) to get an HTML table with the required input fields, in which the user can enter the values of NetworkConfig (SSID, password).
Push button activity
The only thing remaining now is the third problem - the ESP32 should not constantly configure as an access point to setup its own network. In my new application, the ESP32 goes into station mode at the beginning of the program and tries to log into the router network. If successful, the address appears in this network along with the text 'Network'; the web server then waits for the request of a web browser. If you want to change the settings, then you have to press the left and the middle button of the M5Stack at the same time (take a look at the source code, to see how the pushbuttons are polled). The address 192.168.4.1 appears which the ESP32 uses in its own local network. If you log in to this network (for example by using a smartphone), you can use this address to access the configuration web page. For this project only the SSID and the password need to be entered. After sending, the ESP32 tries to log into the router network (this takes a moment). If you press the two buttons together again, the address will appear in this network after a few seconds. The buttons should be pressed whenever the heartbeat indicator is running - if it stops, then the ESP32 is busy doing other tasks. This is of course not optimal for the user - we will see in one of the upcoming reviews, how we can solve this!Read full article
Hide full article
Discussion (0 comments)