
My first design with Alchitry Au and Vivado
Shows you how to use the Alchitry Au with Vivado using VHDL. This first one is simple and straight forward. Design files are included.
Prepare yourself
First you have to download and install the Vivado and the Alchitry tools.
Obvious Vivado must be installed, even when you want the use the Alchitry Designer with the LUCID language. Several Vivado sub-tools will be used to generate the downloadable file containing your design.
Since the Alchitry board is not compatible with the native Xilinx or Digilent JTAG programmers, the Alchitry-loader must be used to load your design into the Artix-7 (the FPGA on the board).
URL's used
The installation guide for Vivado and Alchitry-labs, see:
https://alchitry.com/blogs/tutorials/getting-started-with-the-au
For Vivado: https://xilinx.com/support/download.html
For Architry: https://alchitry.com/pages/alchitry-labs
The project is just a simple proof of concept. It will take you through all necessary steps to create, implement and download a design in to the Alchitry Au board.
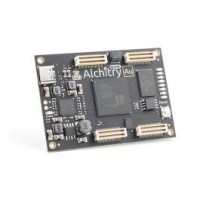
To keep it easy and clear I have created a 32 bit counter that runs on to 100 MHz clock provided on the Alchitry Au board. The 8 MSB bits are connected to the 8 LEDs on the Alchitry Au board.
The heart of the project is a piece of VHDL code the reflects the basics of a counter. The length of the counter is depends on the declaration of the signal 'çnt'. In my case it is 32 bits, but with exactly the same code you can create a 2, 4 or 128 bit counter !
The code for the counter:
Please note that on the rising edge of the clock (clk) the counter (cnt) will be resetted (reset is low) or a 1 is added to the value of 'cnt'.
For those who are unfamiliar with the Vivado design flow, I have created a 'walk through' document which is together with the sources enclosed in the lab.
Have fun
First you have to download and install the Vivado and the Alchitry tools.
Obvious Vivado must be installed, even when you want the use the Alchitry Designer with the LUCID language. Several Vivado sub-tools will be used to generate the downloadable file containing your design.
Since the Alchitry board is not compatible with the native Xilinx or Digilent JTAG programmers, the Alchitry-loader must be used to load your design into the Artix-7 (the FPGA on the board).
URL's used
The installation guide for Vivado and Alchitry-labs, see:
https://alchitry.com/blogs/tutorials/getting-started-with-the-au
For Vivado: https://xilinx.com/support/download.html
For Architry: https://alchitry.com/pages/alchitry-labs
The project is just a simple proof of concept. It will take you through all necessary steps to create, implement and download a design in to the Alchitry Au board.
To keep it easy and clear I have created a 32 bit counter that runs on to 100 MHz clock provided on the Alchitry Au board. The 8 MSB bits are connected to the 8 LEDs on the Alchitry Au board.
The heart of the project is a piece of VHDL code the reflects the basics of a counter. The length of the counter is depends on the declaration of the signal 'çnt'. In my case it is 32 bits, but with exactly the same code you can create a 2, 4 or 128 bit counter !
The code for the counter:
process (clk)
begin
If rising_edge (clk) then
   if reset = '0' then
      cnt <= (others => '0');
   else
      cnt <= cnt + 1;
   end if;
end if;
end process;
Please note that on the rising edge of the clock (clk) the counter (cnt) will be resetted (reset is low) or a 1 is added to the value of 'cnt'.
For those who are unfamiliar with the Vivado design flow, I have created a 'walk through' document which is together with the sources enclosed in the lab.
Have fun
Build This Project
Bring this design to life with the Elektor PCB Service, powered by Eurocircuits. Upload the project files and order professionally manufactured PCBs or assembled boards through a proven European production platform.
Supporting KiCad, Eagle, Gerber, and ODB++ formats, the service is suitable for everything from prototypes and validation builds to series production and volume manufacturing.
Made in Europe. Fast. Reliable. Professional.
Discussion (0 comments)