
Small Circuits Revival (45): Get Roasted
on
Get Roasted
Idea: Elektor Labs
Not only the leaves fall from the trees, but also all kinds of delicacies such as hazel- and beechnuts, and especially chestnuts. And what do we do with chestnuts? Right: roast them! You don't have to buy a special roaster pan for that: with a few parts from the scavenged & left-over parts box, you can do it too.
Figure 1 shows the schematic of our roaster pan. We force a considerable current through a number of power resistors, so that they get hot — hot enough to roast the chestnuts we brought from the forest, park or garden. (We're talking about a temperature of 100°C to 140°C, so be careful not to burn your fingers.)

Of course, we could have connected the resistors directly to a transformer, but then there is a danger that things will get too hot. That's why we use an LM317, a standard voltage regulator, as a control element. It has the nice property that the output current is regulated back as soon as the chip temperature exceeds 150°C (and also when the output current exceeds 1.5 A).
Figure 2 shows a possible way to build the chestnut roaster. You do not have to design a PCB for it, prototyping board will do fine. The resistor values (which must be 9 W cement types) are calculated for an input voltage of 25 V. With P1 the voltage drop over IC1 is adjusted to the minimum. The resistors then dissipate about 40 W of power, which worked well for us.
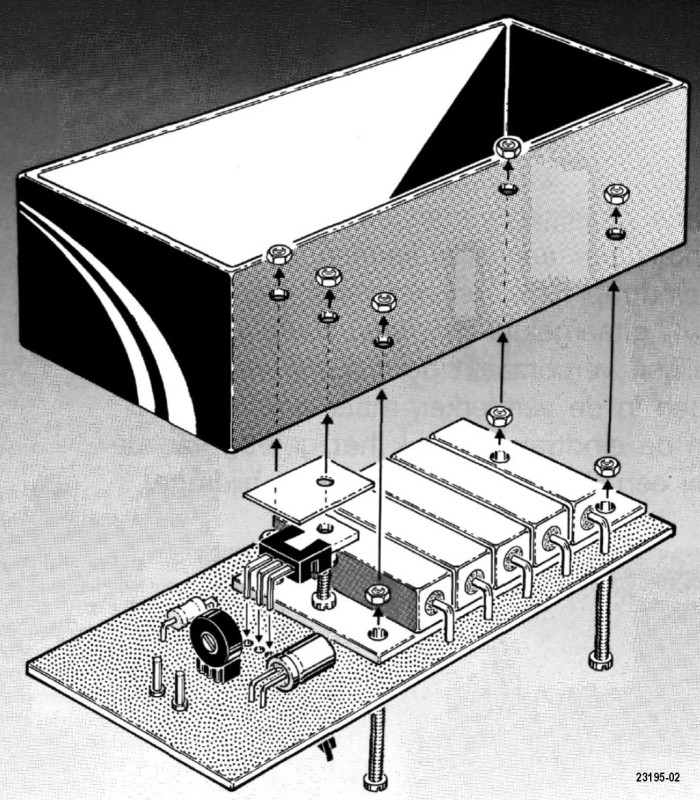
A final remark about the construction: in order for the LM317 to do its temperature-limiting work, it needs to be mounted about 2 cm away from the power resistors. For our prototype, we made a puff pan out of aluminum that was tightly bolted to the resistors; the LM317 was fixed against the underside of the "pan" (note the insulator for the metal tab).
And, last but not least, be careful with everything that gets hot! Don't let (small) children play with our chestnut roaster unsupervised!
Discussion (1 comment)