The Arduino GIGA R1 WiFi, a Portenta H7 for Makers? A Review
The Arduino GIGA R1 WiFi is a powerful board. With its two ARM Cortex-M7 and M4 cores, it offers plenty of processing power. As it has audio and video ports, it is great for multimedia and gaming applications, or machine learning and AI. Its form factor — identical to the Mega — ensures pin compatibility with existing shields. Let's have a closer look.
According to the Arduino blog, the Arduino GIGA R1 WiFi is the most powerful Arduino board ever. For makers, that is, because the GIGA R1 is based on the same microcontroller as the Portenta H7, the STM32H747. The Portenta X8 has one of these too, but with fewer pins. On the X8 it is even pushed into a corner as it is a kind of coprocessor for the big i.MX 8M SoC. (And what about the RP2040 Nano Connect with its RP2040 plus ESP32?) So, the GIGA is not the most powerful Arduino board ever, even though it is very powerful indeed.
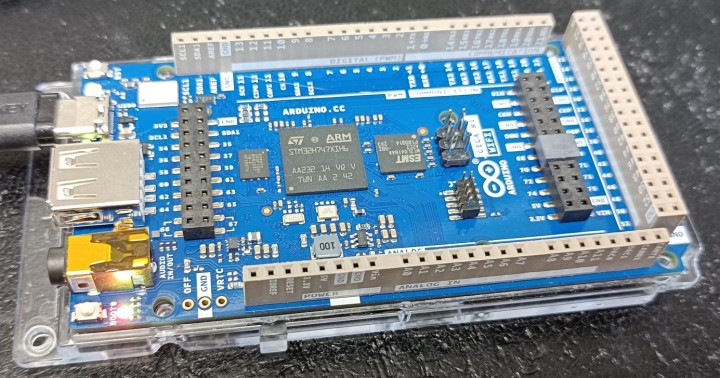
The Arduino GIGA R1 WiFi comes equipped with a transparent plastic bottom protection plate.
Isn't the Arduino GIGA R1 WiFi a Portenta?
As the GIGA has the same dimensions as the Arduino Mega, we kind of understand the reasoning behind the naming scheme. But its shape is about the only thing the GIGA has in common with the Mega. Its specifications are, unsurprisingly, very similar to the almost three times smaller Portenta H7.
They both have a dual-core microcontroller, comprising an ARM Cortex-M7 running at 480 MHz and Cortex-M4 clocked at 240 MHz. This MCU integrates 2 MB of flash memory and 1 MB of RAM. To this, both boards add 16 MB QSPI Flash memory and 8 MB of SDRAM. Again, both boards have a Murata module for wireless connectivity, meaning Wi-Fi and Bluetooth Low Energy (BLE).
Subscribe
Tag alert: Subscribe to the tag GIGA R1 WiFi and you will receive an e-mail as soon as a new item about it is published on our website!
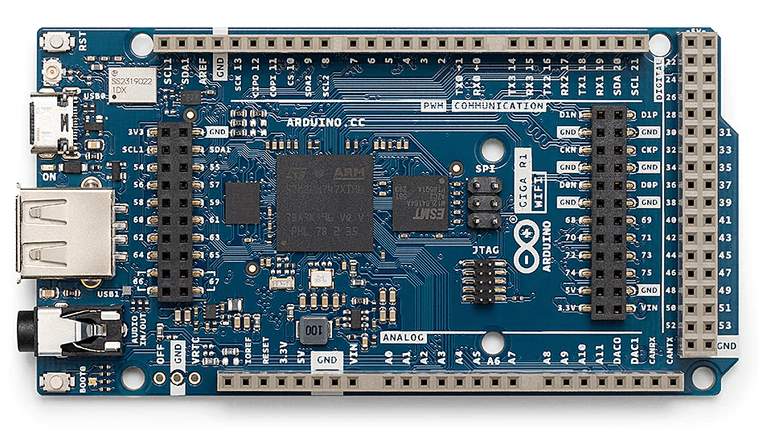
Extension Headers Galore
Both boards also have a USB-C connector but while the H7 features DisplayPort over USB-C, the GIGA does not. But the thing that makes the GIGA a board targeted at makers is its size. Because it is relatively big, it can have 0.1”-pitched pin headers (the H7 has two high-density micro headers) that let you plug extension shields and jumper wires on it.
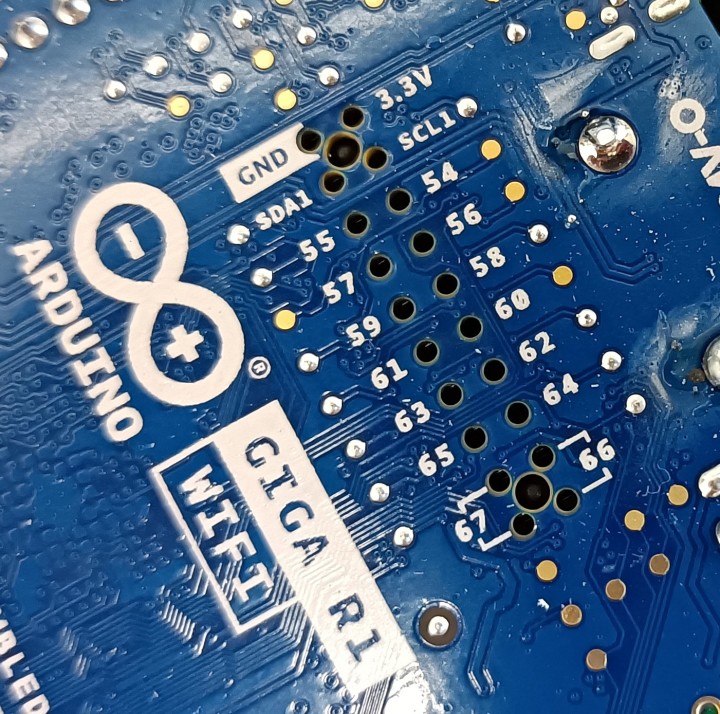
The camera connector (the one shown here) and display connector are accessible from both sides of the board.
Besides the Mega-style extension headers, the GIGA also has a display connector and a camera connector, both with a pitch of 0.1”. The special thing here is that these connectors are accessible from both sides of the board. This means that they remain accessible even if with an extension shield plugged on top of the GIGA.
A tiny 2x5 JTAG connector is available for programming, testing and debugging the board and its software. I didn’t try it, but the Arduino IDE 2.0 is probably capable of using it. But, don’t worry, you don’t need it, as the GIGA is a ‘normal’ Arduino board that can be programmed over its USB port (USB-C in this case).
Immature Software Support
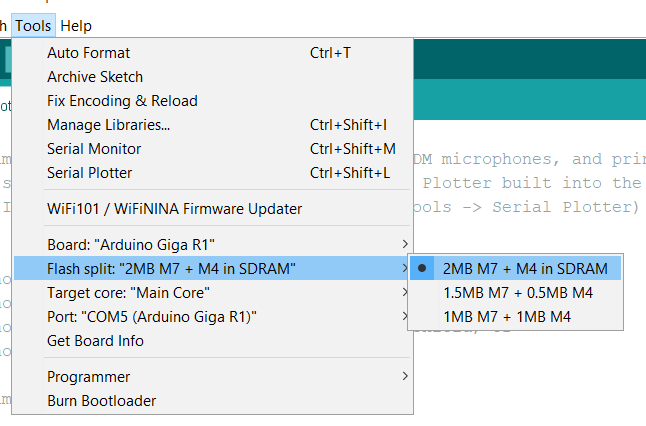
To use the GIGA in the Arduino IDE you must first install the ‘Arduino Mbed OS GIGA Boards’ boards package. For the moment, this package knows of only one board, so you can’t pick the wrong one. You can configure the memory map and choose the processor core in the Tools menu. The included example collection is a mix of examples for other Mbed OS boards, including the Portenta.
You can configure how to divide the MCU's memory between the two cores.
Out of the box, the board flashes an RGB LED next to the audio jack, and so I decided to try the MultipleBlinks example. Compilation is surprisingly fast, and after uploading the sketch to the board (the RGB LED breathes green while doing this, nice), the LED blinked as intended. However, if I have understood the sketch correctly, it accepts On/Off commands over the serial port for the blue LED. This didn’t work for me, though. I couldn’t control the LED and I didn’t receive any acknowledgment messages in return.
The example ArduinoLogo doesn't even compile.
Arduino GIGA R1 WiFi, a Powerful Board
With its two ARM Cortex-M7 and M4 cores, it offers plenty of processing power. As it has audio and video ports, it is great for multimedia and gaming applications. Its form factor identical to the Mega ensures pin compatibility with existing shields but with 3.3 V signal levels. The board can be powered from up to 24 V, which is practical and comes stuck into a transparent support, protecting it a bit against short circuits.
On the software side, things seem still a bit immature, with only a few examples specifically targeting or even mentioning the GIGA R1. But I am confident that this will be fixed in future releases of the boards package.
Retailing at almost €70 the board is a bit expensive, if you ask me. Cheaper, and smaller alternative Cortex-M7 boards are the Teensy 4.1 (NXP iMXRT1062) and the Daisy Seed (STM32H750) from Electrosmith.
Subscribe
Tag alert: Subscribe to the tag Arduino and you will receive an e-mail as soon as a new item about it is published on our website!
Elektor Magazine has been one of the leading sources of information on electronics for engineers, designers, start-ups and companies for 65 years. Our magazine is powered by an active community of electronics engineers – from students to professionals – who are passionate about designing and sharing innovative ideas.
For them, we publish hundreds of items a year, in formats such as articles, videos, webinars, and other learning formats. Our mission is to share knowledge in every possible way and inspire readers with the latest developments within the electrical engineering sector.
Thank you for your vote!
Leave further comments in the fields below.
Thank you for your vote!
If you wish to leave a comment with your rating, please first use the login below. If not, just close this window.

Discussion (2 comments)