
Review: Basler Dart BCON for LVDS Development Kit
FPGA on board
The processing board is an Avnet MicroZed 7010 SoM (System on Module), a low-cost development board based on the Xilinx Zynq-7010 AP (All Programmable) SoC (System on Chip). The SoC integrates a dual-core ARM Cortex-A9 running at speeds up to 866 MHz with USB 2.0, Gigabit Ethernet, SD/SDIO interfaces and 28K programmable logic cells (“FPGA fabric”). The SoM adds to that 1 GB of DDR3 and 128 MB QSPI flash plus a power supply and connectors.Probably the main reason for including an FPGA-based processing board in the kit is the camera’s LVDS interface. Low-cost popular processor boards featuring such interfaces are rare whereas an FPGA offers a perfect solution. Also the Zynq (if only it would be allowed in Scrabble…) comes with DSP slices, and, being partly an FPGA, is just good at image processing in general.
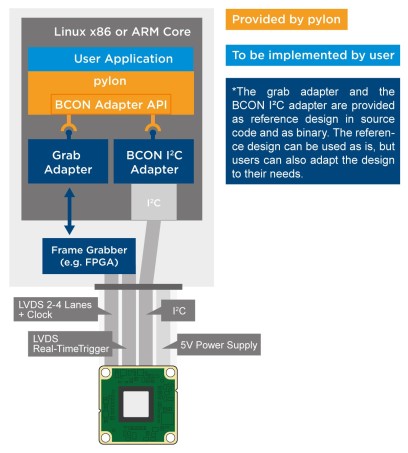
Developers who want to dive deeper into the hardware can download documentation and example Vivado projects from the Basler website to customize the Board Support Package (BSP).
First steps
Assembling the kit is really easy, and is made even easier by the excellent Quick Install Guide. Count five minutes for this step (unless you have to find your glasses first).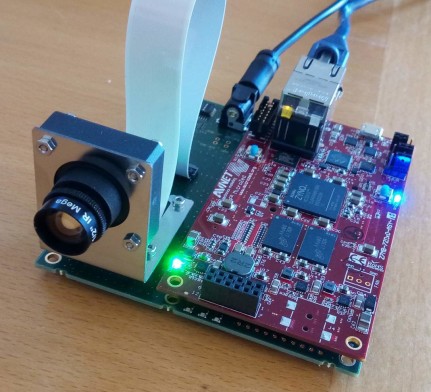
Once the kit assembled it is time to make it work. Since it is not possible to connect a display to the kit, communicating with it has to be done over a DHCP-enabled network. When the board’s IP address is known — check the network router’s DHCP client list if you can — connect to it via a Remote Desktop Protocol (RDP) connection. Doing so will get you a sober graphical desktop with a few icons on it.
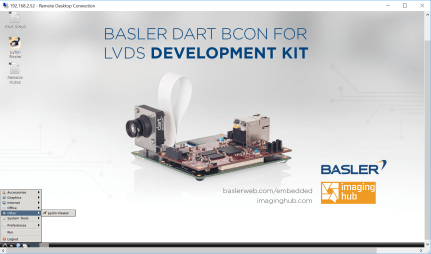
pylon 5.0
Launch ‘pylon Viewer’, connect to the camera (there should be only one, double-click on it), activate ‘Continuous Shot’ and adapt the zoom to make the image fit the window. Camera focus can be adjusted manually by rotating the lens. Small objects right in front of the lens as well as large objects hundred metres away can be brought into focus this way.Note that objects close to the camera will reflect the light of a very bright green LED on the MicroZed processing board close to the camera. If this hinders your application, you may want to mount the camera on another support (or remove the LED).
Programming samples
C/C++ source code for example programs are available on the SD card. These samples show how to connect to the camera and grab one or more images, and how to adjust its parameters.Read full article
Hide full article
Discussion (0 comments)