
Review: Thermal Imaging Camera HT-02

Configuration options
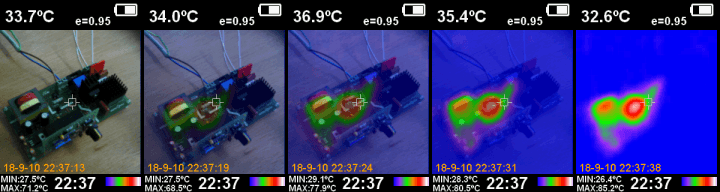
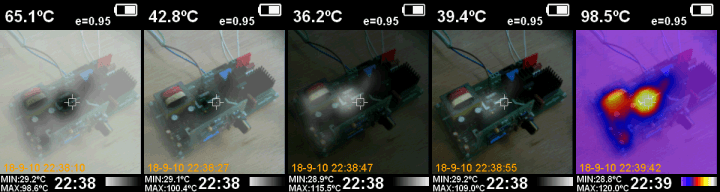
All the configuration options are clearly explained in the supplied user manual. Via the menu you can set the date and time, view the images stored on the SD card, set the intensity of the backlighting, switch between Fahrenheit and Celsius, set the background temperature (+ the user manual explains exactly what that is), read the capacity of the SD card, select the colour palette for the IR image, set the emissivity (this is also explained in the user manual and it includes a table with the appropriate settings for many common materials) and you can select whether the hottest or coldest image pixel should be indicated.
During use I found some of the settings to be not very intuitive, but a glance at the user manual quickly resolved these and most of the implementations are, in hindsight, okay. So initially I could not find how to change the ratio between the IR image and the visible light image (this is, make the IR image more or less visible and project it over the visible light image). This is easily set with the left/right buttons; you don't even need to go into the menu (which is what I actually expected and therefore could not find it initially).
In use
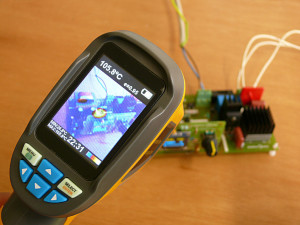
Working with the device itself is quite straightforward. You switch it on and point it at the subject. The button for taking an image required a bit of getting used to, because you have the tendency to firmly hold on to the device and then you inadvertently push the button with your index finger. But you quickly take that into account and once you have mastered it, you find that this button is often in the correct place after all. A button on the back would in many cases be more inconvenient, certainly because you then often inadvertently move the camera and the subject is then not captured in the right place or is blurry because of the movement. No, a nice pull with your trigger finger and the image can be stored (the camera asks you every time whether you would like to save the image or not, handy to prevent you from unwittingly activating the trigger button umpteen times). The images are stored as BMP files with the resolution of the camera — 240x320 pixels. The supplied 8 GB SD card should be able to contain more than 50,000 pictures, the user manual talks about 25,000. We haven't tried whether there is some limit in the device, but even the 'worst' case of 25,000 looks to be more than sufficient to us.
Of course you can do more than just store images. The live view functions works well too. The measured temperature of the centre pixel is shown at top-left on the screen. The minimum and maximum measured temperatures are conveniently displayed at bottom left. When you activate the function “Marking of spot temperature”, two squares, identical to the centre marker, show where the minimum and maximum temperatures are measured.
In practice, the viewing angle has been selected reasonably well. The best measuring distance is 50 cm. If you measure too close, you will see that the IR sensor and the visible light camera are not in the same place (this is physically not possibly, of course) and the images don't overlay each other very well any more. With very small circuits this could be a problem. You can then not quite accurately determine which component is the hot one. But it works great with an 'ordinary' sized circuit.
Image angle, range, accuracy and configuration options are therefore all in order. What is noticeable however, is the somewhat slow image refresh rate. There is a bit of a delay ('lag') and therefore you shouldn't move the camera too quickly if you would like to point it at something accurately. But this is not really annoying. Certainly not because most of the objects that you will measuring as an electronics engineer tend to be stationary.
An LED is built in that is intended to support the visible light camera (not the IR sensor of course, that doesn't need it) when there is too little light. This is not particularly powerful — it looks to be an ordinary 5mm LED — and, as far as I'm concerned, only usable in emergencies.
Conclusion
The configuration options are actually very complete. I have to admit that I'm probably no specialist in thermal cameras, but for the target groups — service personnel and developers — I cannot quickly think of any missing options that would be indispensable in this price category. It actually does very well what it needs to do and I really can't think of any negative points, except that small light then. In our lab we are keen to continue using it!


Discussion (0 comments)