
DIY Jam Jar Garden Lamps

Want to spice up your yard on a budget or just light it up in style? Make a set of AC Jam Jar Garden Lamps!
This project is also available at Instructables.
In this project, I'll guide you through how to make one of these basic but stylish outdoor yard lamps simply from some scrap pipes n' cans and one of your everyday Jam Jars. Each of these will house an LED light bulb that'll illuminate your yard without looking cheap.
CAUTION:
As these lamps will have 110V AC (or 220V depending on the country) powering them, keep in mind the safety hazards that come with working around electricity if dealt with improperly. NEVER work on a lamp while it is powered. If you can, ground any metal casing/enclosing tin parts on the lamp with an earth wire.
Supplies
To make one of these lamps, we'll need: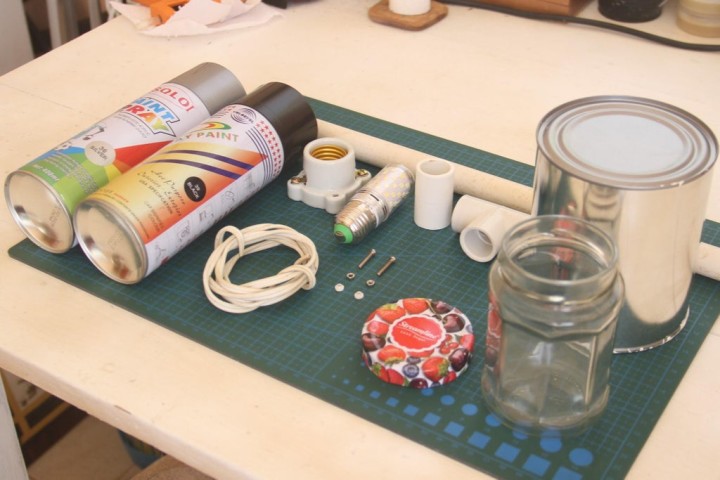
Other Supplies and Tools you may need:
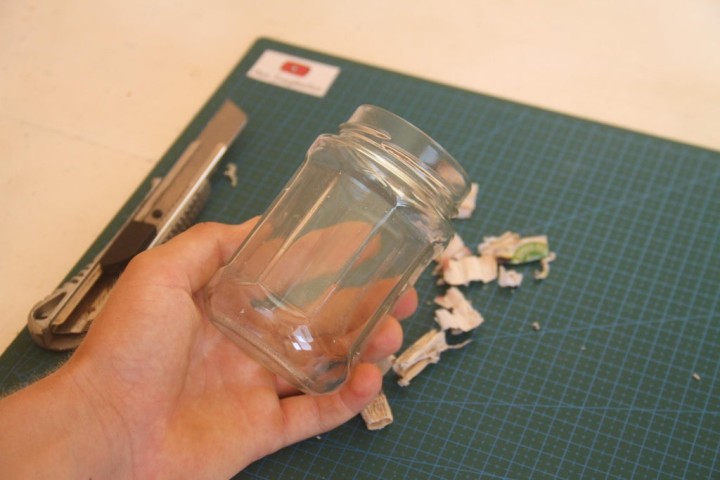
Preparing the Jam Jar
Peeling away the label on our Jam Jar can be done with a Utility knife or simply loosened off with some warm water under a tap. Scrub and wash well with some dish soap to remove excess sticky residue.
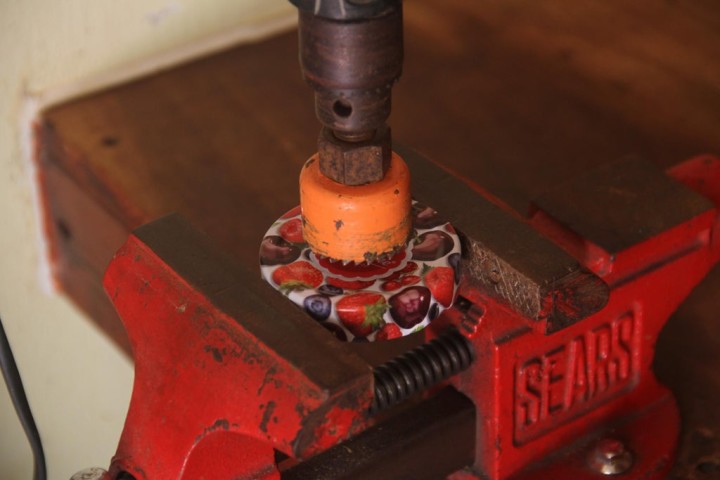
With the help of a drill machine, we can drill the appropriate-sized hole in our jar lid for the AC Lamp holder to poke through. Diameter - 38mm or 1 1/2 inch
Afterward, we can spray paint the lid with just a single coat. Though, an anti-rust primer is recommended to apply onto the lid first.
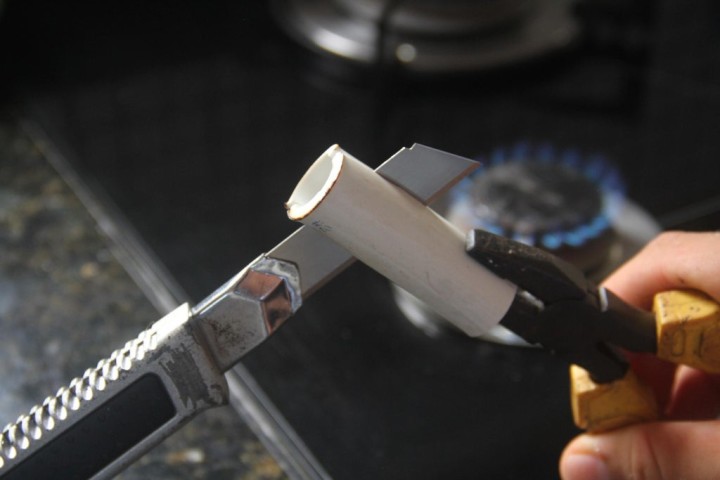
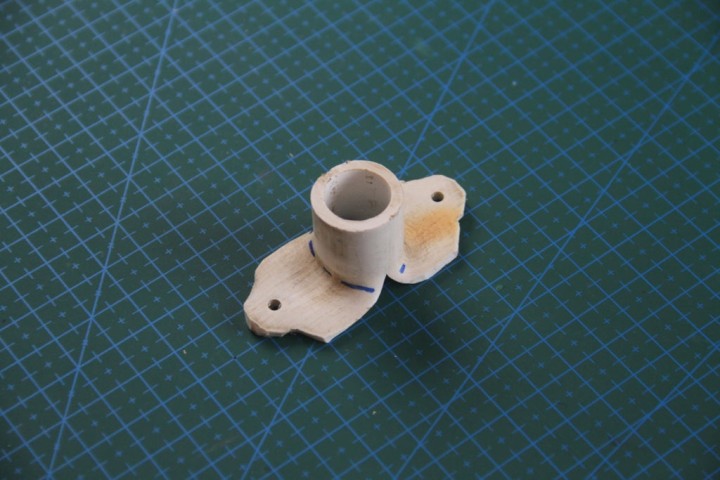
Making the Lamp's Head Joint
Heating up an 8cm section of pipe over the stove, we can split it down half-way and spread it flat on a surface. After trimming the piece and drilling it a pair of holes, this makes for a decent lamp head-to-pipe joint.
Forming the Lamp's Hat
We can take something as basic as a tin paint can and convert its bottom into an oriental-style hat for our lamp to help deflect rainwater. In forming it, be sure to snip around every 1cm and bend the sharp edges away below the hat for safety.
Diameter of can - 10cm
Prepping the Lamp Holder Stick
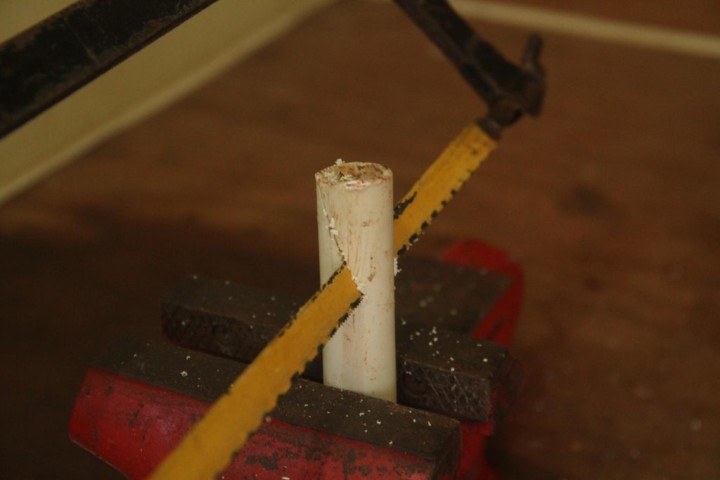
Let's trim off a wedge from the longest section of pipe to form a pointy grounding end. Cutting the pipe near that end will help create the necessary gap to fit in a PVC Tee Joint for the wires to slip out sideways.
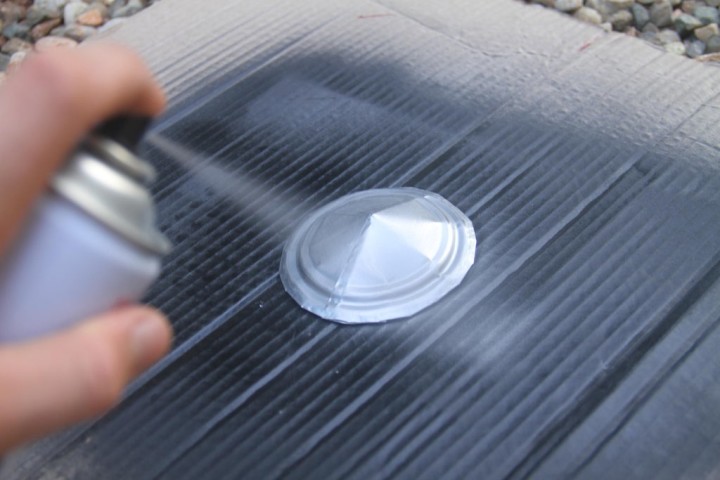
Now that we're done forming the necessary parts for the lamp, we can spray paint them with the color of your choice. I chose silver for metal parts and black for plastic ones.
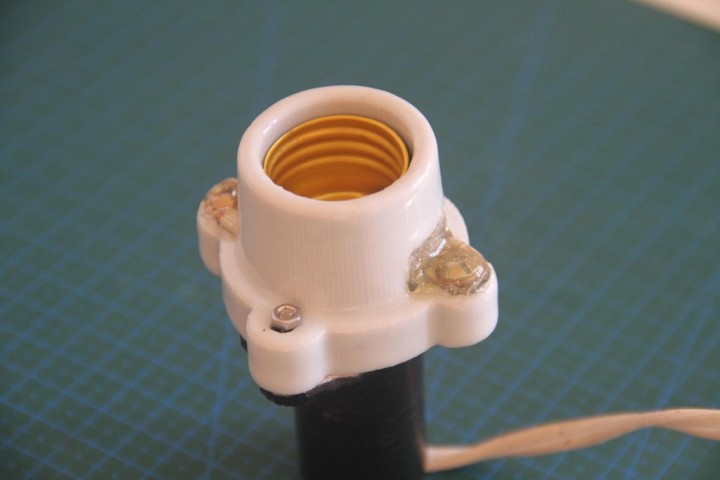
Assembling Bulb Base
Here, let's take the painted split joint we made earlier and bolt it to the porcelain bulb holder with those 3M nuts and bolts. For connecting the supporting pipe, let's also connect a half-inch coupling to the custom adjoining mount.

Electrically, we'll also pull through the 14AWG wire pair and fasten those to the bulb holder's screw leads.
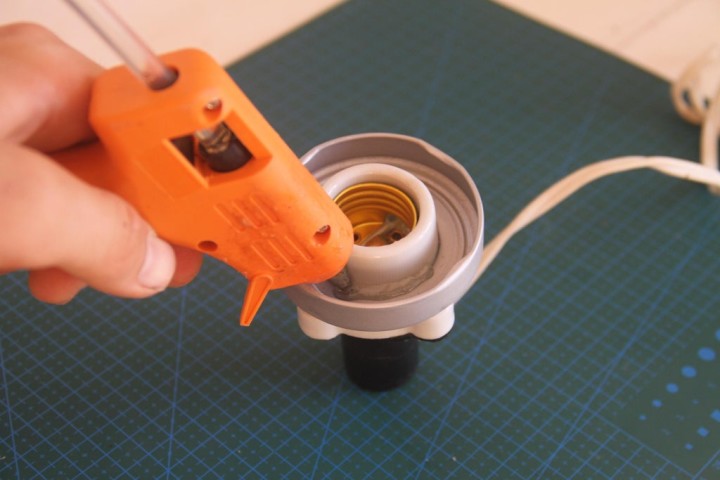
Securing Jar Lid
We'll insulate the electrical connections and take the cover holder or jar lid we drilled previously and hot glue it to the bulb holder. Be sure to check that these have a tight fit.
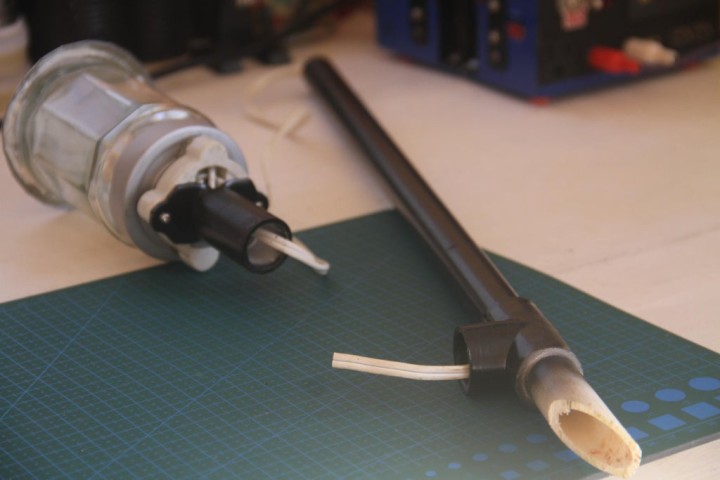
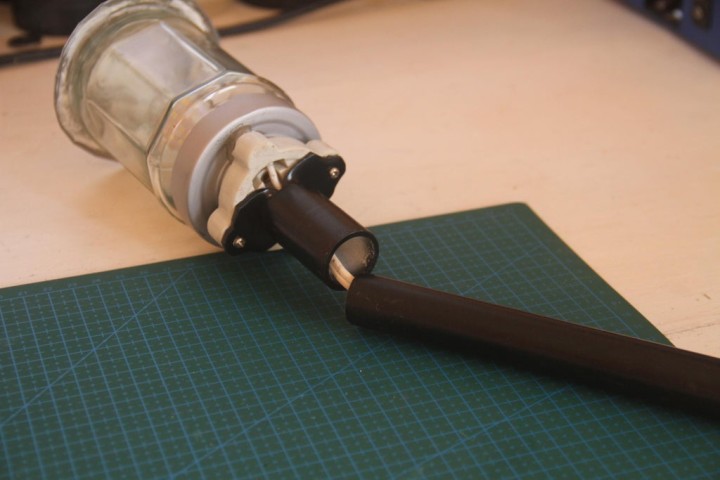
Assembling the 3 Parts
Let's screw in one of these LED bulbs into the socket (check that your bulb will fit in jar before purchasing). Then we can fit the 3 parts together that we've prepared earlier: Glass enclosure (top), lamp base with bulb, and the supporting ground pipe. Be sure to pull the two wires down and out through the Tee pipe.
Connecting Lamps to Mains
To install these lamps, you'd first need to already have underground electrical tubing in place (preferably, a junction wiring box containing live, neutral and ground to which we'll connect the lamp. Once the wires are hooked up to the system in parallel, these must get insulated and hidden away at the base of the lamp or junction box.
Creating a Base
We can create a basic supporting base out of concrete to help keep the lamp firmly seated in the ground. I used a sour cream plastic container for the mold.
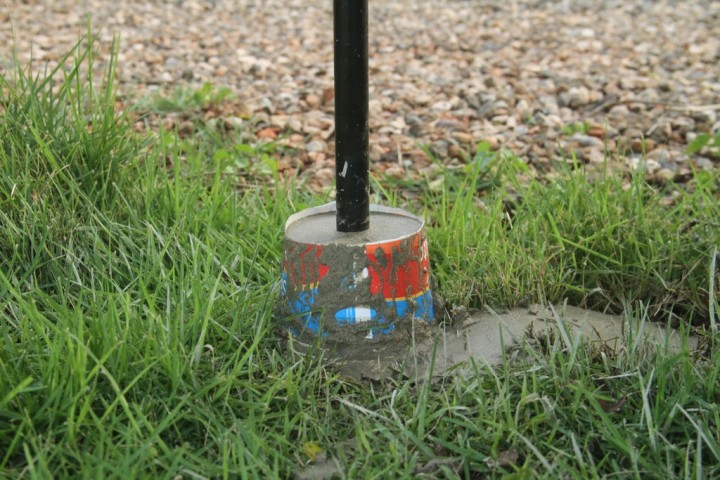
To blend in the base, we can do it with a layer of black spray paint, matching the rest of the lamp.
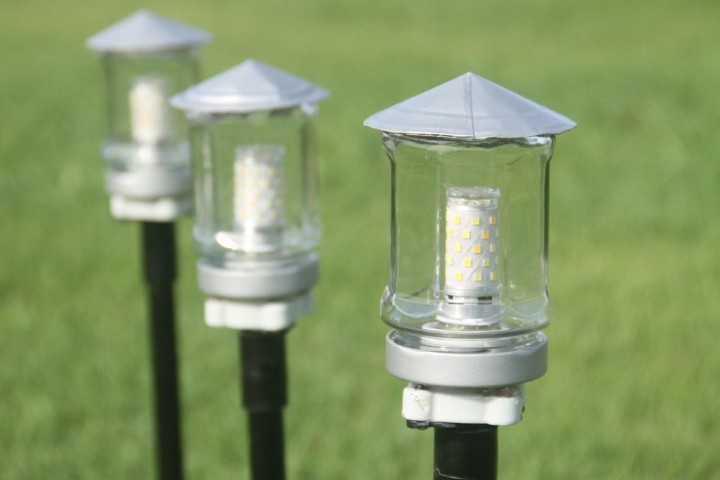
Finished Garden Lamp
You've made it this far, great job! Having followed the steps above, you now have at least one or more of these AC outdoor lamps as a neat addition to lighting your Yard, patio, or driveway in style. In my case, I made 3 of these DIY lamps specifically to replace the old/broken driveway lamps that were previously seated in those spots.
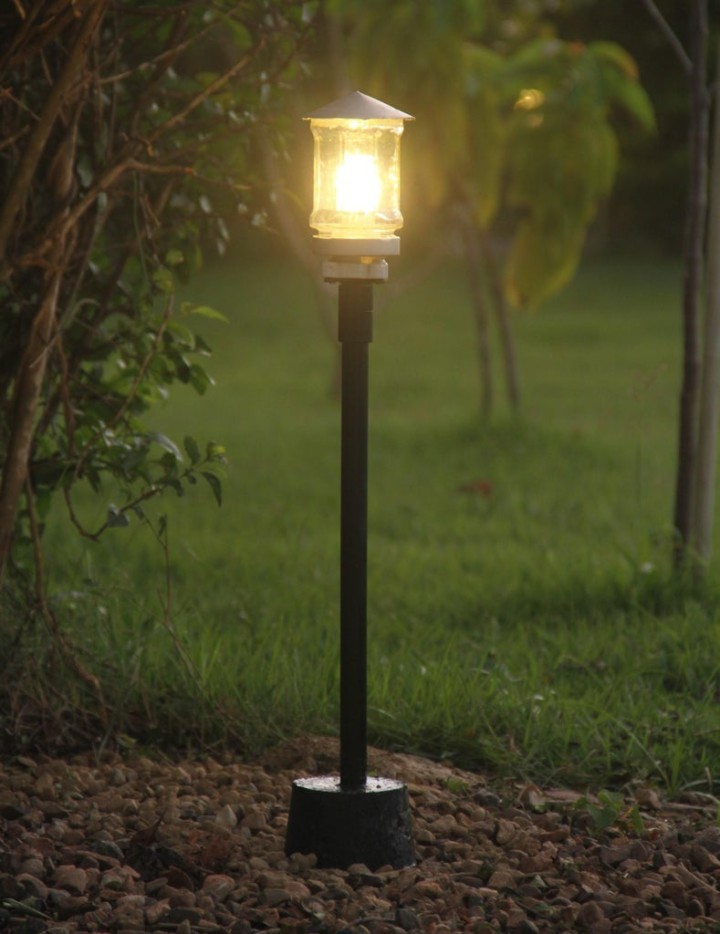
I've had these lamps sitting in the driveway for over 3 months as of releasing this Instructable. There are slight signs of corrosion on the tin due to not using a coat of primer spray paint prior to painting the parts. So it's quite important to prevent such a thing from happening with some basic anti-rust primer paint. Other than that, they're still running well outside to this day, lighting up the way. Thanks for reading and happy making!
In this project, I'll guide you through how to make one of these basic but stylish outdoor yard lamps simply from some scrap pipes n' cans and one of your everyday Jam Jars. Each of these will house an LED light bulb that'll illuminate your yard without looking cheap.
CAUTION:
As these lamps will have 110V AC (or 220V depending on the country) powering them, keep in mind the safety hazards that come with working around electricity if dealt with improperly. NEVER work on a lamp while it is powered. If you can, ground any metal casing/enclosing tin parts on the lamp with an earth wire.
Supplies
To make one of these lamps, we'll need:
- Glass Jam/Mason Jar with Lid
- 100mm Quarter-gallon Tin Paint Can
- 0.7m Section of 15mm or Half-Inch PVC pipe
- Half-Inch PVC Coupling
- Half-Inch PVC Tee fitting
- AC Threaded Bulb lamp Holder
- Small LED AC Light Bulb/Lamp
- 14 Gauge Electrical Wire
- M3 Nuts, Bolts, and Washers (x2 of each)
- Spray Paint - by the color of your choice
Other Supplies and Tools you may need:
- Drill Machine with 38mm borer and 3mm drill bits
- Stanley/Utility Knife
- Flat-nosed Pliers
- Wire Cutters
- Access to a Kitchen Stove
- Can-opener tool
- Superglue
- Hot Glue Gun
- Pipe Cutters or Hacksaw
- Scissors
Preparing the Jam Jar
Peeling away the label on our Jam Jar can be done with a Utility knife or simply loosened off with some warm water under a tap. Scrub and wash well with some dish soap to remove excess sticky residue.
With the help of a drill machine, we can drill the appropriate-sized hole in our jar lid for the AC Lamp holder to poke through. Diameter - 38mm or 1 1/2 inch
Afterward, we can spray paint the lid with just a single coat. Though, an anti-rust primer is recommended to apply onto the lid first.
Making the Lamp's Head Joint
Heating up an 8cm section of pipe over the stove, we can split it down half-way and spread it flat on a surface. After trimming the piece and drilling it a pair of holes, this makes for a decent lamp head-to-pipe joint.
Forming the Lamp's Hat
We can take something as basic as a tin paint can and convert its bottom into an oriental-style hat for our lamp to help deflect rainwater. In forming it, be sure to snip around every 1cm and bend the sharp edges away below the hat for safety.
Diameter of can - 10cm
Prepping the Lamp Holder Stick
Let's trim off a wedge from the longest section of pipe to form a pointy grounding end. Cutting the pipe near that end will help create the necessary gap to fit in a PVC Tee Joint for the wires to slip out sideways.
Now that we're done forming the necessary parts for the lamp, we can spray paint them with the color of your choice. I chose silver for metal parts and black for plastic ones.
Assembling Bulb Base
Here, let's take the painted split joint we made earlier and bolt it to the porcelain bulb holder with those 3M nuts and bolts. For connecting the supporting pipe, let's also connect a half-inch coupling to the custom adjoining mount.
Electrically, we'll also pull through the 14AWG wire pair and fasten those to the bulb holder's screw leads.
Securing Jar Lid
We'll insulate the electrical connections and take the cover holder or jar lid we drilled previously and hot glue it to the bulb holder. Be sure to check that these have a tight fit.
Assembling the 3 Parts
Let's screw in one of these LED bulbs into the socket (check that your bulb will fit in jar before purchasing). Then we can fit the 3 parts together that we've prepared earlier: Glass enclosure (top), lamp base with bulb, and the supporting ground pipe. Be sure to pull the two wires down and out through the Tee pipe.
Connecting Lamps to Mains
To install these lamps, you'd first need to already have underground electrical tubing in place (preferably, a junction wiring box containing live, neutral and ground to which we'll connect the lamp. Once the wires are hooked up to the system in parallel, these must get insulated and hidden away at the base of the lamp or junction box.
Creating a Base
We can create a basic supporting base out of concrete to help keep the lamp firmly seated in the ground. I used a sour cream plastic container for the mold.
To blend in the base, we can do it with a layer of black spray paint, matching the rest of the lamp.
Finished Garden Lamp
You've made it this far, great job! Having followed the steps above, you now have at least one or more of these AC outdoor lamps as a neat addition to lighting your Yard, patio, or driveway in style. In my case, I made 3 of these DIY lamps specifically to replace the old/broken driveway lamps that were previously seated in those spots.
I've had these lamps sitting in the driveway for over 3 months as of releasing this Instructable. There are slight signs of corrosion on the tin due to not using a coat of primer spray paint prior to painting the parts. So it's quite important to prevent such a thing from happening with some basic anti-rust primer paint. Other than that, they're still running well outside to this day, lighting up the way. Thanks for reading and happy making!
Discussion (0 comments)