
Electric guitar effects
If you like both music and electronics, the idea of building your own audio device must have crossed your mind many times.Building a hi-fi device requires hard work to find the best components, their best biasing points, etc. The goal is always to have low distortion and low noise, so in the end you get something that provides similar results to what you could buy at a music shop.
If you like both music and electronics, the idea of building your own audio device must have crossed your mind many times.
Building a hi-fi device requires hard work to find the best components, their best biasing points, etc. The goal is always to have low distortion and low noise, so in the end you get something that provides similar results to what you could buy at a music shop.
A guitar effects pedal, on the other hand, is about "doing hi-fi wrong" so you get distortion that will provide your guitar with a new sound. You can finally mess up every amplifier you've learned about to get funny shapes instead of usual sine waves. Fun and easy ! No matter if you're bad at electronics, you are sure to get your own unique sound from your guitar. Isn't it what every musician wants ?
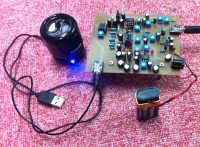
I have built a guitar multi-effects device using 4 well-known distortion effects :
- soft-clipping (effect 1)
- hard clipping (effect 2)
- band-pass filter (wah-wah - effect 3)
- transistor overdrive (effect 4)
Refer to the figures below if you want to see what those effects do !
Soft Clipping :
It is an op-amp based non-inverter amplifier, but the feedback includes 2 parallel diodes in opposite directions. Whenever the output signal amplitude is above 0.7V, the gain of the amplifier drops to 0dB. Therefore, for a sine wave input, you get a sine wave output with a "softly" flattened top and bottom.
Hard Clipping :
Same as the soft-clipping, but the diodes are connected between the output and the ground. Whenever the output signal amplitude is above 0.7V, It stays at 0.7V. Therefore, for a sine wave input, you get a sine wave output with a "hardly" flattened top and bottom. Since I wanted to make the signal asymmetric, I put 1 diode on a direction (0.7V limit) and 2 diodes on the opposite direction (1.4V limit). In the end, the bottom and the top are not flattened evenly, generating uneven harmonics.
Band-pass filter (wah-wah) :
It is an op-amp based second order band-pass filter. the cut-off frequency can be set with a potentiometer (which is usually connected to an analog pedal, to provide a "wah-wah" effect by moving the cut-off frequency real-time with your foot). Removing part of the bandwidth makes the sound "float" (listening to Jimi Hendrix will give you an idea !).
Transistor overdrive :
It is a (bipolar) common emitter amplifier biased with a voltage divider made with a potentiometer. With a small gain, If you set the biasing point close to VCC/2, you will get a bypass. If you set the biasing point close to VCC or GND (be careful with impedance matching), you can overdrive the transistor on one side of the wave. If you set a high gain, whatever the biasing point, you can overdrive the transistor on both sides of the wave. It is closed to hard clipping.
These effects are inserted between an input stage and an output stage.
Input Stage :
It is a JFET common source amplifier followed by a (bipolar) common collector. I assumed the output impedance of the electric guitar was 1 MOhm and the signal level was about 20 mVpp. The goal of this stage is to have a very high input impedance (as the guitar has a very high output impedance), a gain (~14dB) in order to have a signal level of about 100 mVpp (to work in the "distortion zone" of the following stages + keeping SNR low by putting the gain in the first stage rather than the last stages), and finally a low output impedance to be able to plug several effects in parallel.
Output Stage :
It is a summing amplifier with switches on the input to enable the user to choose what effects to turn on and turn off. The gain of each input can be set with a potentiometer in order to do some "mixing" as well. The output is followed by a voltage divider to set the final output gain and a follower for low output impedance. I didn't pay attention to phase shifts between inputs, as I thought it would give more interesting results than just adding 2 sounds !
Other :
the energy comes from a 9V battery (or a 9V DC source), with a lot of capacitors to have a stabilized Vcc. I made a virtual ground with a voltage divider (and capacitors) and a follower.
I simulated the whole circuit with circuitlab (www.circuitlab.com). You can follow this link if you own a circuitlab account to modify it and simulate it yourself : https://www.circuitlab.com/circuit/sr74q9/distorsion/ I made the PCB using EAGLE (I didn't have all values for resistors/capacitors ; actual values I used are the one on the PCB file, not on the circuitlab schematic).
This project is very easy to understand, and very quick to design and build. If you build your own you will be able to have your own unique sound and it will make playing the guitar even more enjoyable. Also great for musicians who want to start electronics (all first-year level) !
/!\ Always be careful when building audio devices, a mistake can lead to irreversible damages to your ears and I will not be responsible for it. Do not plug anything if you're not 100% sure it is safe ! /!\
Want to build a project?
Bring your design to life with the Elektor PCB Service, powered by Eurocircuits. Upload the project files and order professionally manufactured PCBs or assembled boards through a proven European production platform.
Supporting KiCad, Eagle, Gerber, and ODB++ formats, the service is suitable for everything from prototypes and validation builds to series production and volume manufacturing.
Made in Europe. Fast. Reliable. Professional.
Discussion (1 comment)