
Custom Keyword Spotting on the MAX78000FTHR
Train a custom keyword spotting model with no GPU required! Deploy it on the MAX78000FTHR
As the Elektor project page does not allow embedded pictures, please see my document here for better readability. Thank you!
https://docs.google.com/document/d/14G6-APrAmgRTYLkqTn-56aFpmHCR9ortLgaHQacN8EA/
-----------------------------------------------------
# Introduction
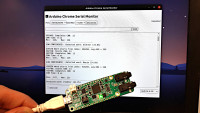
The MAX78000FTHR comes pre-programmed with a keyword spotting (KWS) example. It can recognize words such as Yes/No and numbers (1-9) and so on.
If you connect it to the PC, you can see the results over UART.
[Figure 1]
We can also build the example ourselves. These are some links with a step-by-step guide on it:
The dataset used is the Google speech commands dataset. The above guides show you how to modify to choose different combinations of words for the microcontroller to recognise.
However, I think many people will get stuck here. The main problem here is that not everyone has compatible hardware because a Linux computer with a CUDA compatible GPU is needed.
Therefore in this writeup, I will share my experiences of training a very small model on my laptop without a GPU.
I will show you how to take the KWS 20-word example project and train a subset model of only 2-words (Yes/No). The 2-word model is small enough and it took only 45 mins on my 4 year old laptop!
To end off, I also trained my own model with 2 custom words. For the purpose of this contest, I chose the words Elektor/Maxim. I hope it will garner more in this board for hobbyists at home!
-----------------------------------------------------
# Hardware
My laptop has the following specs. It is a Thinkpad 13 (2017 edition) without a GPU, so you can understand that it is almost impossible to compile the original KWS20 demo.
I run Ubuntu 20.04 LTS and this whole article will be based around the Linux command line.
[Figure 2]
MAX78000FTHR is used. No additional hardware is connected to it.
[Figure 3]
-----------------------------------------------------
# Training the Yes/No Model
I have chosen to train the model using the new Tensorflow branch, as I am more familiar with Tensorflow. Before training we will make some changes to reduce the number of words from 20 to 2. This will make it faster if your computer does not have a GPU.
Open up a new terminal window. I will refer to this as the training terminal window.
Step 1:
Make a directory called "elektor". All our work will be inside this folder.
Step 2:
Clone the Github repo (tensorflow branch) for the MAX78000 training
Step 3:
Install dependencies for the tensorflow directory
Step 4:
Make modifications to change 20-words into 2-words. The file is located here at “TensorFlow/datasets/kws20.py”.
See my Github commit which shows you the full list of what I have changed[Figure 4]
In this case, the 2 words I chose are “yes” and “no”. Feel free to choose other words available in the Google Speech Commands.
Step 5:
Train the model. Using the time command, I find that it takes about 45 min on my laptop.
[Figure 5]
Step 6:
After training, the models are located in these folders.
Step 7:
Evaluate the model accuracy. For me I got 96.29% using my Yes/No model.
[Figure 8]
-----------------------------------------------------
# Synthesizing the Yes/No Model
Now we shall convert the tensorflow model into C code for the microcontroller.
Open up a new Terminal window to keep things separate. I will refer to this as the synthesis terminal window.
Step 1:
Clone the Github repo for synthesis (including submodules are needed)
Step 2:
Install dependencies (in a virtual environment)
Step 3:
Quantize the model and generate code.
(The paths specific to the kws20 project are underlined, change these accordingly if you are using other examples)
[Figure 9]
The code has been generated in this folder:
Step 4:
Copy out the CNN and weights files and keep it somewhere first (3 files: cnn.h, cnn.c, weights.h).
We will paste them into the project folder later.
[Figure 10]
Step 5:
(Go back to the training terminal window)
Evaluate the model accuracy again to make a comparison between original and quantised
From this command, my original is 96.29% and after quantisation it reduced to 96.16%
-----------------------------------------------------
# Compile the application
Since the Maxim Micro IDE is Windows only, I will program the microcontroller on Ubuntu without the use of an IDE.
Open up a new Terminal again to keep things separate. I will refer to this as the make terminal window.
Step 1:
While the ai8x-synthesis contains the MAX78000 SDK, it is not the latest version and does not have the latest examples.
Clone the latest SDK from github.
Step 2: Download the compiler from the ARM website here
In my case I am on Ubuntu 20.04 LTS x64 and I downloaded `gcc-arm-none-eabi-10-2020-q4-major-x86_64-linux.tar.bz2`
Step 3:
For consistency, extract the toolchain archive into the SDK Tools folder. Note that the SDK Tools folder also contains the OpenOCD tool.
[Figure 11]
Step 4:
Add the toolchain into the PATH
Step 5:
Go to the example KWS20 folder (MAX78000_SDK/Examples/MAX78000/CNN/kws20_demo).
Replace the 3 files (cnn.h, cnn.c, weights.h) with the ones we got from the synthesis step.
[Figure 12]
Open up main.c and change the keywords array to be "Yes", "No", "Unknown"
[Figure 13]
Step 6:
Go to the Makefile and change the board to FTHR_RevA.
Comment out BOARD=EvKit_V1 and uncomment BOARD=FTHR_RevA
[Figure 14]
Step 7:
Clean the old build files if any
Step 8:
Finally make the project
You will see the ELF file generated under the build folder
[Figure 15]
-----------------------------------------------------
# Flash the microcontroller
We shall use OpenOCD to flash the ELF into the microcontroller.
Open another terminal window. I will refer to this as the flashing terminal window.
Step 1:
Connect the microcontroller
[Figure 16]
Step 2:
Flash the ELF to the microcontroller
Note: if you are unable to flash, press the reset button and try again immediately.
[Figure 17]
Step 3:
Optionally, you can debug using GDB too.
[First instance: Start the OpenOCD server]
[Second instance: Start the GDB client]
-----------------------------------------------------
# Testing the program
Plug in the board and say Yes/No. Notice that other words are no longer recognized – only the 2 words you have chosen.
[Figure 18]
Congrats! You have trained your very first model!
-----------------------------------------------------
# Collecting dataset (Elektor/Maxim)
Next up, we are going to train our own custom word model. I have chosen Elektor and Maxim for the purpose of this contest.
To make things simple, we shall match the format of the Google Speech Commands dataset. So we do not need to modify any of the inference code.
The audio has the following format:
Step 1:
Install Audacity
Step 2:
We will set up Audacity to record in the following format:
[Figure 19]
Also choose the project rate to be 16000 Hz
[Figure 20]
Alternatively, I have saved the settings in a template Audacity project. Download and simply open it up to have all the settings done already for you (Audacity_Template.aup)[Figure 21]
Step 3:
I did 5 recordings each of Elektor and Maxim. Ensure that after you do the recording, trim it down to exactly 1 second long.
[Figure 22]
Step 4:
Place the recordings into their respective folders under “TensorFlow/data/KWS/raw”.
[Figure 23]
Step 5:
Open up “TensorFlow/datasets/kws20.py” again and make changes to point to the elektor and maxim folder.
class_dict = {
'elektor': 0,
'maxim': 1,
}
desired_class_dict = {
'elektor': 0,
'maxim': 1,
}
[Figure 24]
-----------------------------------------------------
# Train and flash the new app (Elektor/Maxim)
I hope you have kept the Terminal windows still open. We only need to rerun the commands
Step 1:
(In the training terminal window)
Train the new model. Now because the dataset is much smaller, it only takes a minute or so to train
Step 2:
(In the synthesis terminal window)
Run the synthesis again.
Step 3:
Copy out the newly generated CNN and weights files again (3 files: cnn.h, cnn.c, weights.h) from "./ai8x-synthesis/tensorflow/tf-kws20"
Paste the 3 files into the project folder (MAX78000_SDK/Examples/MAX78000/CNN/kws20_demo).
Open up main.c and edit the keywords to "Elektor", "Maxim", "Unknown".
[Figure 25]
Step 4:
(In the make terminal window)
Clean the old build files and make the project again
Step 5:
(In the flashing terminal window)
Flash the new program into the microcontroller
Congrats! You have now trained your own custom model! See the video below on how it works.
-----------------------------------------------------
# Video Demo
Please watch my demo video on YouTube
https://www.youtube.com/watch?v=Asv1FbuFv90
[Figure 26]
-----------------------------------------------------
# Limitations of my model
The main limitation with my model is because I have a small dataset (only recorded myself 5 times for each word).
I am training with my own voice only so it is not effective in detecting other people’s voice. Also, if you watch the video carefully, the confidence level of the keyword detected is very low. This is possibly due to the background static noise from my PC mic which is creating a biased model.
[Figure 27]
Despite the limitations, the project ended up working well even with a small sample size. It shows how powerful this ecosystem is around the MAX78000.
-----------------------------------------------------
# Conclusion
In the future, I hope to try out Google Colabs which is to train the models in the cloud with GPU support. As I had delays in shipment of the board, I did not manage to try it before the deadline of the contest.
Possible suggestions of improvement for the MAX78000 developers will be the support of Edge Impulse for cloud training. By integrating ai8x-training to have Edge Impulse training instead, it will be very powerful as it will give access to more people to train their own models. As far as I can see, some changes are needed for ai8x-synthesis to add compatibility to accept the model format that is generated from Edge Impulse.
To end off, thank you Elektor for sending me the board to evaluate. I did not manage to complete my original idea as the learning curve is steep. Instead, I submitted this smaller project and I hope it proves to be useful to beginners.
-----------------------------------------------------
# Bonus: Power Profiling
I did not spend time isolating the power supply. Here, I only measured the entire current draw from the USB port using Nordic Power Profiler Kit II (PPK2). Nevertheless, some insights can be gained from here.
See in this photo, the PPK2 supplies 5V to the USB port, in which the MAX78000FTHR is plugged in.
[Figure 28]
Launch nRF Connect and open up the Power Profiler app.
[Figure 29]
From the results here, the average current draw is 10.53mA with spikes of maximum 54.50mA. Considering it includes the current drawn from the LEDs, voltage regulator and microphone and other sensors all together, the current drawn from the microcontroller is very low!
[Figure 30]
There is a repeating peak every 0.942ms. possibly due to the UART transmission taking up the most power.
[Figure 31]
-----------------------------------------------------
The End
https://docs.google.com/document/d/14G6-APrAmgRTYLkqTn-56aFpmHCR9ortLgaHQacN8EA/
-----------------------------------------------------
# Introduction
The MAX78000FTHR comes pre-programmed with a keyword spotting (KWS) example. It can recognize words such as Yes/No and numbers (1-9) and so on.
If you connect it to the PC, you can see the results over UART.
[Figure 1]
We can also build the example ourselves. These are some links with a step-by-step guide on it:
- https://www.elektormagazine.com/articles/ai-edge-get-started-maxim-max78000fthr
- https://www.elektormagazine.com/articles/making-coffee-max78000-ai
- https://www.elektormagazine.com/articles/making-coffee-with-the-max78000-and-some-ai-part-2
- https://www.maximintegrated.com/en/design/technical-documents/app-notes/7/7359.html
The dataset used is the Google speech commands dataset. The above guides show you how to modify to choose different combinations of words for the microcontroller to recognise.
However, I think many people will get stuck here. The main problem here is that not everyone has compatible hardware because a Linux computer with a CUDA compatible GPU is needed.
Therefore in this writeup, I will share my experiences of training a very small model on my laptop without a GPU.
I will show you how to take the KWS 20-word example project and train a subset model of only 2-words (Yes/No). The 2-word model is small enough and it took only 45 mins on my 4 year old laptop!
To end off, I also trained my own model with 2 custom words. For the purpose of this contest, I chose the words Elektor/Maxim. I hope it will garner more in this board for hobbyists at home!
-----------------------------------------------------
# Hardware
My laptop has the following specs. It is a Thinkpad 13 (2017 edition) without a GPU, so you can understand that it is almost impossible to compile the original KWS20 demo.
I run Ubuntu 20.04 LTS and this whole article will be based around the Linux command line.
[Figure 2]
MAX78000FTHR is used. No additional hardware is connected to it.
[Figure 3]
-----------------------------------------------------
# Training the Yes/No Model
I have chosen to train the model using the new Tensorflow branch, as I am more familiar with Tensorflow. Before training we will make some changes to reduce the number of words from 20 to 2. This will make it faster if your computer does not have a GPU.
Open up a new terminal window. I will refer to this as the training terminal window.
Step 1:
Make a directory called "elektor". All our work will be inside this folder.
$ mkdir -p $HOME/Documents/elektor
$ cd $HOME/Documents/elektor
Step 2:
Clone the Github repo (tensorflow branch) for the MAX78000 training
$ git clone https://github.com/MaximIntegratedAI/ai8x-training --branch develop-tf
Step 3:
Install dependencies for the tensorflow directory
$ cd ai8x-training/TensorFlow
$ export PYTHONPATH="./.pip:$PYTHONPATH"
$ pip3 install -t .pip -r requirements_tf.txt
Step 4:
Make modifications to change 20-words into 2-words. The file is located here at “TensorFlow/datasets/kws20.py”.
See my Github commit which shows you the full list of what I have changed[Figure 4]
In this case, the 2 words I chose are “yes” and “no”. Feel free to choose other words available in the Google Speech Commands.
Step 5:
Train the model. Using the time command, I find that it takes about 45 min on my laptop.
$ time ./train_kws20.sh
[Figure 5]
Step 6:
After training, the models are located in these folders.
- ai8x-training/TensorFlow/export/kws20
- ai8x-training/TensorFlow/logs/20210621-171537-kws20[Figure 6][Figure 7]
Step 7:
Evaluate the model accuracy. For me I got 96.29% using my Yes/No model.
$ ./evaluate.py --onnx-file ./export/kws20/saved_model.onnx --dataset kws20 "$@"
[Figure 8]
-----------------------------------------------------
# Synthesizing the Yes/No Model
Now we shall convert the tensorflow model into C code for the microcontroller.
Open up a new Terminal window to keep things separate. I will refer to this as the synthesis terminal window.
Step 1:
Clone the Github repo for synthesis (including submodules are needed)
$ cd $HOME/Documents/elektor
$ git clone https://github.com/MaximIntegratedAI/ai8x-synthesis --branch develop-tf --recurse-submodules -j8
$ cd ai8x-synthesis/
Step 2:
Install dependencies (in a virtual environment)
$ sudo apt-get install python3-venv
$ python3 -m venv env

$ source env/bin/activate
$ pip3 install -r requirements.txt
Step 3:
Quantize the model and generate code.
(The paths specific to the kws20 project are underlined, change these accordingly if you are using other examples)
$ ./ai8xize.py --verbose -L --top-level cnn --test-dir tensorflow --prefix tf-kws20 --checkpoint-file ../ai8x-training/TensorFlow/export/kws20/saved_model.onnx --config-file ./networks/kws20-hwc-tf.yaml --sample-input ../ai8x-training/TensorFlow/export/kws20/sampledata.npy --device MAX78000 --compact-data --mexpress --embedded-code --scale 1.0 --softmax --display-checkpoint --generate-dequantized-onnx-file $@
[Figure 9]
The code has been generated in this folder:
- ./ai8x-synthesis/tensorflow/tf-kws20
Step 4:
Copy out the CNN and weights files and keep it somewhere first (3 files: cnn.h, cnn.c, weights.h).
We will paste them into the project folder later.
[Figure 10]
Step 5:
(Go back to the training terminal window)
Evaluate the model accuracy again to make a comparison between original and quantised
$ ./evaluate.py --onnx-file ./export/kws20/saved_model_exposed_nodes.onnx --dataset kws20 "$@"

$ ./evaluate.py --onnx-file ./export/kws20/saved_model_dq.onnx --dataset kws20 "$@"
From this command, my original is 96.29% and after quantisation it reduced to 96.16%
-----------------------------------------------------
# Compile the application
Since the Maxim Micro IDE is Windows only, I will program the microcontroller on Ubuntu without the use of an IDE.
Open up a new Terminal again to keep things separate. I will refer to this as the make terminal window.
Step 1:
While the ai8x-synthesis contains the MAX78000 SDK, it is not the latest version and does not have the latest examples.
Clone the latest SDK from github.
$ git clone https://github.com/MaximIntegratedAI/MAX78000_SDK
Step 2: Download the compiler from the ARM website here
- GNU Tools for ARM Embedded Processors
- https://developer.arm.com/tools-and-software/open-source-software/developer-tools/gnu-toolchain/gnu-rm/downloads
In my case I am on Ubuntu 20.04 LTS x64 and I downloaded `gcc-arm-none-eabi-10-2020-q4-major-x86_64-linux.tar.bz2`
Step 3:
For consistency, extract the toolchain archive into the SDK Tools folder. Note that the SDK Tools folder also contains the OpenOCD tool.
$ cd ~/Downloads
$ tar -xf gcc-arm-none-eabi-10-2020-q4-major-x86_64-linux.tar.bz2 -C ~/Documents/elektor/MAX78000_SDK/Tools/
[Figure 11]
Step 4:
Add the toolchain into the PATH
$ export PATH="$HOME/Documents/elektor/MAX78000_SDK/Tools/gcc-arm-none-eabi-10-2020-q4-major/bin:$PATH"
Step 5:
Go to the example KWS20 folder (MAX78000_SDK/Examples/MAX78000/CNN/kws20_demo).
Replace the 3 files (cnn.h, cnn.c, weights.h) with the ones we got from the synthesis step.
[Figure 12]
Open up main.c and change the keywords array to be "Yes", "No", "Unknown"
[Figure 13]
Step 6:
Go to the Makefile and change the board to FTHR_RevA.
Comment out BOARD=EvKit_V1 and uncomment BOARD=FTHR_RevA
[Figure 14]
Step 7:
Clean the old build files if any
$ make distclean
Step 8:
Finally make the project
$ make
You will see the ELF file generated under the build folder
[Figure 15]
-----------------------------------------------------
# Flash the microcontroller
We shall use OpenOCD to flash the ELF into the microcontroller.
Open another terminal window. I will refer to this as the flashing terminal window.
Step 1:
Connect the microcontroller
[Figure 16]
Step 2:
Flash the ELF to the microcontroller
$ cd ~/Documents/elektor/MAX78000_SDK/Tools/OpenOCD/

$ TARGET_ELF="$HOME/Documents/elektor/MAX78000_SDK/Examples/MAX78000/CNN/kws20_demo/build/max78000.elf"

$ ./openocd -f interface/cmsis-dap.cfg -f target/max78000.cfg -s ./scripts -c "program $TARGET_ELF reset exit"
Note: if you are unable to flash, press the reset button and try again immediately.
[Figure 17]
Step 3:
Optionally, you can debug using GDB too.
[First instance: Start the OpenOCD server]
$ cd /home/zst/Documents/elektor/ai8x-synthesis/sdk/Tools/OpenOCD
$ ./openocd -f interface/cmsis-dap.cfg -f target/max78000.cfg -s ./scripts
[Second instance: Start the GDB client]
$ arm-none-eabi-gdb ./build/max78000.elf
  target remote localhost:3333
  monitor reset halt
  load
  compare-sections
  monitor reset halt
  continue
-----------------------------------------------------
# Testing the program
Plug in the board and say Yes/No. Notice that other words are no longer recognized – only the 2 words you have chosen.
[Figure 18]
Congrats! You have trained your very first model!
-----------------------------------------------------
# Collecting dataset (Elektor/Maxim)
Next up, we are going to train our own custom word model. I have chosen Elektor and Maxim for the purpose of this contest.
To make things simple, we shall match the format of the Google Speech Commands dataset. So we do not need to modify any of the inference code.
The audio has the following format:
- 1 second time length
- 32kB file size
- 16-bit little-endian PCM-encoded WAVE format
- Mono audio
- Sample rate of 16,000 (16kHz)
Step 1:
Install Audacity
$ sudo apt-get install -y audacity
Step 2:
We will set up Audacity to record in the following format:
- 16-bit little-endian PCM-encoded WAVE format
- Mono audio
- Sample rate of 16,000 (16kHz)Right click the track and choose 16-bit PCM and Split Stereo to Mono.
[Figure 19]
Also choose the project rate to be 16000 Hz
[Figure 20]
Alternatively, I have saved the settings in a template Audacity project. Download and simply open it up to have all the settings done already for you (Audacity_Template.aup)[Figure 21]
Step 3:
I did 5 recordings each of Elektor and Maxim. Ensure that after you do the recording, trim it down to exactly 1 second long.
[Figure 22]
Step 4:
Place the recordings into their respective folders under “TensorFlow/data/KWS/raw”.
[Figure 23]
Step 5:
Open up “TensorFlow/datasets/kws20.py” again and make changes to point to the elektor and maxim folder.
class_dict = {
'elektor': 0,
'maxim': 1,
}
desired_class_dict = {
'elektor': 0,
'maxim': 1,
}
[Figure 24]
-----------------------------------------------------
# Train and flash the new app (Elektor/Maxim)
I hope you have kept the Terminal windows still open. We only need to rerun the commands
Step 1:
(In the training terminal window)
Train the new model. Now because the dataset is much smaller, it only takes a minute or so to train
$ time ./train_kws20.sh
Step 2:
(In the synthesis terminal window)
Run the synthesis again.
$ ./ai8xize.py --verbose -L --top-level cnn --test-dir tensorflow --prefix tf-kws20 --checkpoint-file ../ai8x-training/TensorFlow/export/kws20/saved_model.onnx --config-file ./networks/kws20-hwc-tf.yaml --sample-input ../ai8x-training/TensorFlow/export/kws20/sampledata.npy --device MAX78000 --compact-data --mexpress --embedded-code --scale 1.0 --softmax --display-checkpoint --generate-dequantized-onnx-file $@
Step 3:
Copy out the newly generated CNN and weights files again (3 files: cnn.h, cnn.c, weights.h) from "./ai8x-synthesis/tensorflow/tf-kws20"
Paste the 3 files into the project folder (MAX78000_SDK/Examples/MAX78000/CNN/kws20_demo).
Open up main.c and edit the keywords to "Elektor", "Maxim", "Unknown".
[Figure 25]
Step 4:
(In the make terminal window)
Clean the old build files and make the project again
$ make distclean
$ make
Step 5:
(In the flashing terminal window)
Flash the new program into the microcontroller
$ ./openocd -f interface/cmsis-dap.cfg -f target/max78000.cfg -s ./scripts -c "program $TARGET_ELF reset exit"
Congrats! You have now trained your own custom model! See the video below on how it works.
-----------------------------------------------------
# Video Demo
Please watch my demo video on YouTube
https://www.youtube.com/watch?v=Asv1FbuFv90
[Figure 26]
-----------------------------------------------------
# Limitations of my model
The main limitation with my model is because I have a small dataset (only recorded myself 5 times for each word).
I am training with my own voice only so it is not effective in detecting other people’s voice. Also, if you watch the video carefully, the confidence level of the keyword detected is very low. This is possibly due to the background static noise from my PC mic which is creating a biased model.
[Figure 27]
Despite the limitations, the project ended up working well even with a small sample size. It shows how powerful this ecosystem is around the MAX78000.
-----------------------------------------------------
# Conclusion
In the future, I hope to try out Google Colabs which is to train the models in the cloud with GPU support. As I had delays in shipment of the board, I did not manage to try it before the deadline of the contest.
Possible suggestions of improvement for the MAX78000 developers will be the support of Edge Impulse for cloud training. By integrating ai8x-training to have Edge Impulse training instead, it will be very powerful as it will give access to more people to train their own models. As far as I can see, some changes are needed for ai8x-synthesis to add compatibility to accept the model format that is generated from Edge Impulse.
To end off, thank you Elektor for sending me the board to evaluate. I did not manage to complete my original idea as the learning curve is steep. Instead, I submitted this smaller project and I hope it proves to be useful to beginners.
-----------------------------------------------------
# Bonus: Power Profiling
I did not spend time isolating the power supply. Here, I only measured the entire current draw from the USB port using Nordic Power Profiler Kit II (PPK2). Nevertheless, some insights can be gained from here.
See in this photo, the PPK2 supplies 5V to the USB port, in which the MAX78000FTHR is plugged in.
[Figure 28]
Launch nRF Connect and open up the Power Profiler app.
[Figure 29]
From the results here, the average current draw is 10.53mA with spikes of maximum 54.50mA. Considering it includes the current drawn from the LEDs, voltage regulator and microphone and other sensors all together, the current drawn from the microcontroller is very low!
[Figure 30]
There is a repeating peak every 0.942ms. possibly due to the UART transmission taking up the most power.
[Figure 31]
-----------------------------------------------------
The End
Want to build a project?
Bring your design to life with the Elektor PCB Service, powered by Eurocircuits. Upload the project files and order professionally manufactured PCBs or assembled boards through a proven European production platform.
Supporting KiCad, Eagle, Gerber, and ODB++ formats, the service is suitable for everything from prototypes and validation builds to series production and volume manufacturing.
Made in Europe. Fast. Reliable. Professional.
Discussion (0 comments)