
C Programming on Raspberry Pi
on
Editor’s Note: This is a sample from the book C Programming on Raspberry Pi — Develop innovative hardware-based projects in C (D. Ibrahim, Elektor 2021).
UDP and TCP/IP
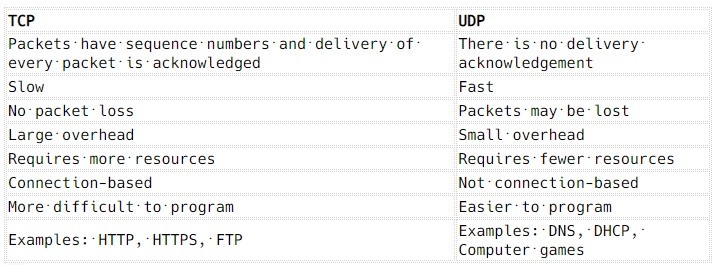
Communication over a Wi-Fi link is in the form of client and server. Sockets are used to send and receive data packets. The server-side device usually waits for a connection from the clients and once that is made, two-way communication can start. Two protocols are mainly used for sending and receiving data packets over a Wi-Fi link: UDP and TCP. TCP is a connection-based protocol that guarantees the delivery of packets. Packets are given sequence numbers and the receipt of all the packets is acknowledged to avoid them arriving in the wrong order. As a result of this confirmation, TCP is usually slow but is reliable as it guarantees the delivery of packets. UDP on the other hand is not connection-based. Packets do not have sequence numbers and as a result, there is no guarantee they will arrive at their destination. UDP has less overhead than TCP and as a result, is faster. Table 1 lists some of the differences between the TCP and UDP protocols.
TUDP Communication

Server
1. Create UDP socket.
2. Bind the socket to the server address.
3. Wait until the datagram packet arrives from the client.
4. Process the datagram packet.
5. Send a reply to the client, or close the socket.
6. Go back to Step 3 (if not closed).
Client
1. Create UDP socket.
2. Send a message to the server.
3. Wait until a response from the server is received.
4. Process reply.
5. Go back to step 2, or close the socket.
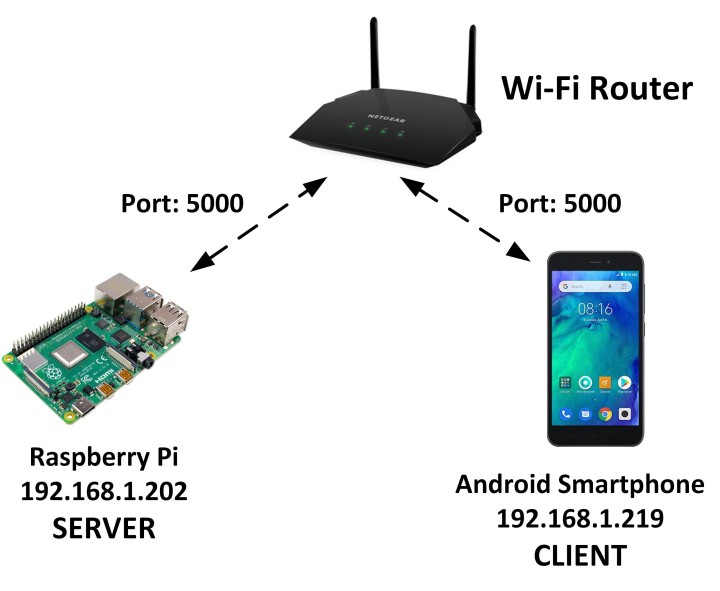
Project 1: Communicating with an Android smartphone using UDP (Raspberry Pi is the server)
In this project, UDP communication is used to receive and send data to/from an Android smartphone. In this project, Raspberry Pi is the server and the Android smartphone the client.
Aim: This project aims to show how UDP communication can be established between a Raspberry Pi and an Android smartphone.
Program listing: The Program MyServer.c is shown in Listing 1 and can be extracted from the software support package for the book. Head over to [1], scroll down to Downloads, then click on Software_C Programming on Raspberry Pi. Store the .zip file locally, then extract either all files or just MyServer.c.
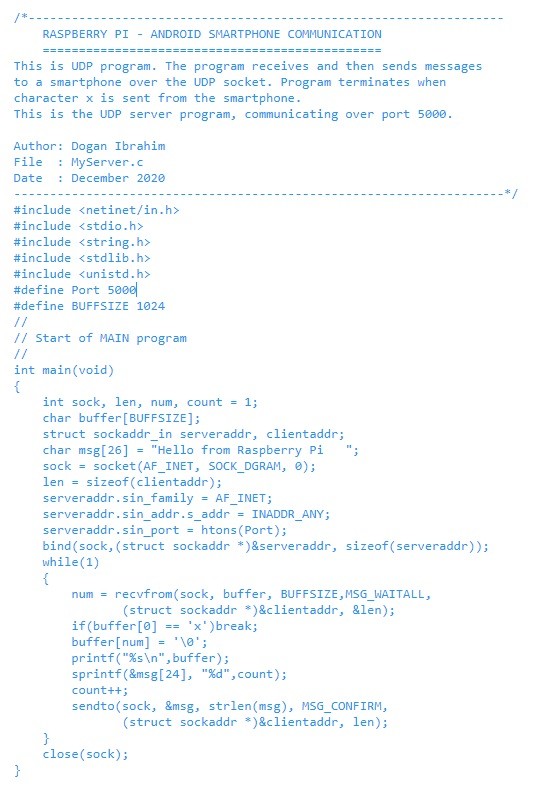
At the beginning of MyServer.c, the required header files are included in the program. The message Hello from Raspberry Pi is stored in character array msg. A UDP type socket is then created by calling the socket function and saving the handle in the sock variable. Details of the server computer (Raspberry Pi) are then given where the address is set to INADDR_ANY so any other computer on the same network with the port number set to 5000 will establish communication with the Raspberry Pi. The server computer details are then bound to the specified port by calling function bind.
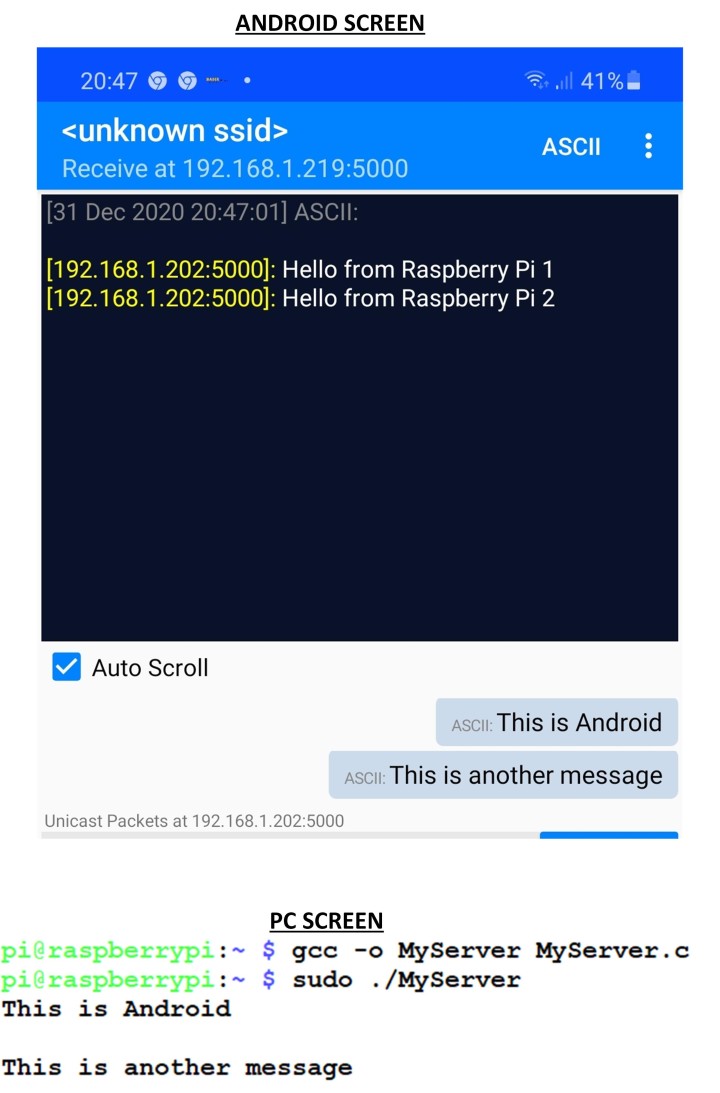
The remainder of the program runs in a loop. Inside this loop, function recvfrom is called to wait to receive a data packet from the client computer (Android smartphone). Notice this is a blocking call and the function will wait until data is received from the client. The program terminates if character x is received from the client computer. A NULL character is added to the received data and is displayed on the PC screen of the Raspberry Pi as a string using the printf function. An integer variable called count is converted into character and added to the end of character array msg. This is sent to the client computer. The first time in the loop, the client computer will display Hello from Raspberry Pi 1. The second time, the client computer will display Hello from Raspberry Pi 2, and so on. The socket is closed just before the program terminates. The program can be compiled and run as follows:
gcc –o MyServer MyServer.c
sudo ./MyServer
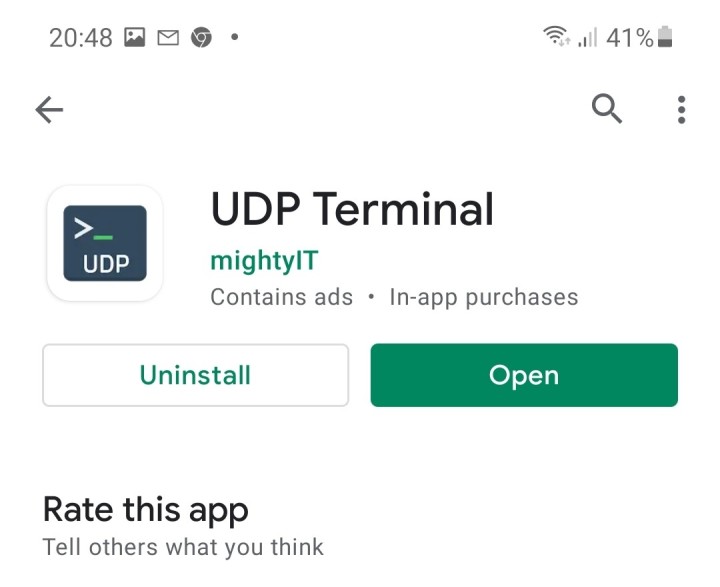
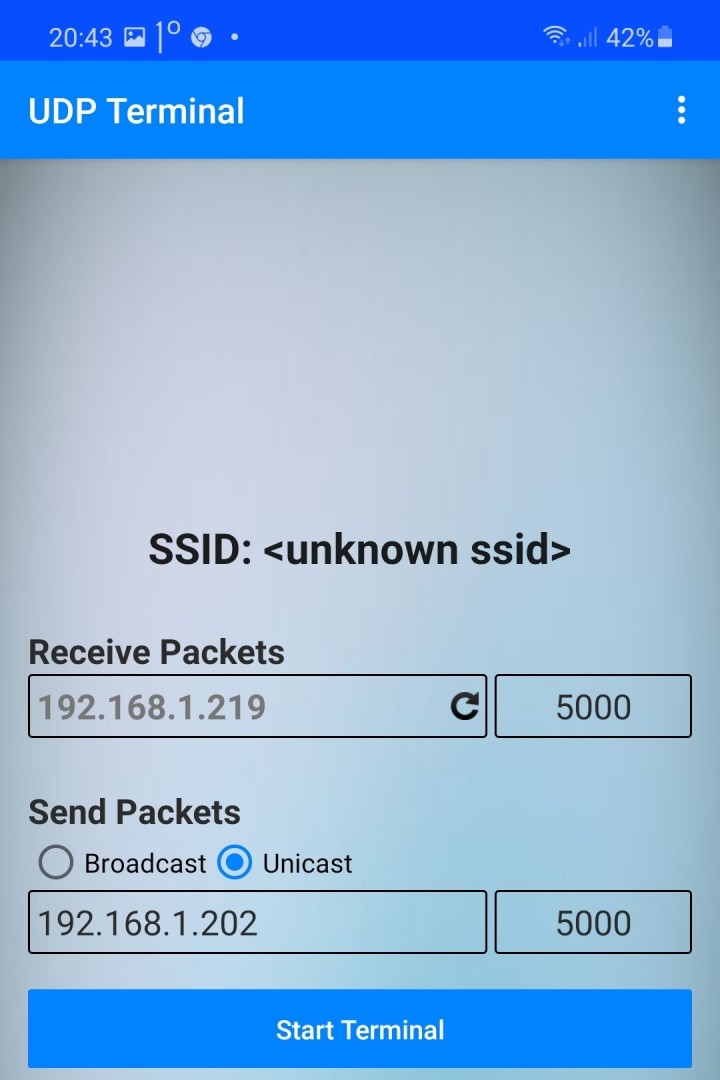
There are many UDP apps available on the Play Store free of charge. In this project, the UDP Terminal by mightyIT is used (see Figure 3). Enter the port number and IP address of your Android smartphone and click Start Terminal as shown in Figure 4. An example run of the program is shown in Figure 5, where both the smartphone and PC screen are pictured.
Note: you can find the IP address of your Raspberry Pi by using the ifconfig command.
Discussion (0 comments)