Engineering in April: ClockClock, Elektor Internet Radio, and More
Want to learn about some projects from previous April editions of Elektor? Here we highlight a few interesting articles and projects dating all the way back to 1975. You're sure to find these especially inspirational: the ClockClock, the Elektor Internet Radio, the E-Meter, and more.
Want to learn about some projects from previous April editions of Elektor? Below we highlight a few interesting articles and projects dating all the way back to 1975. We could have listed dozens of others, but we think you'll find these especially inspirational. After you hit the workbench, tell us about your engineering projects too.
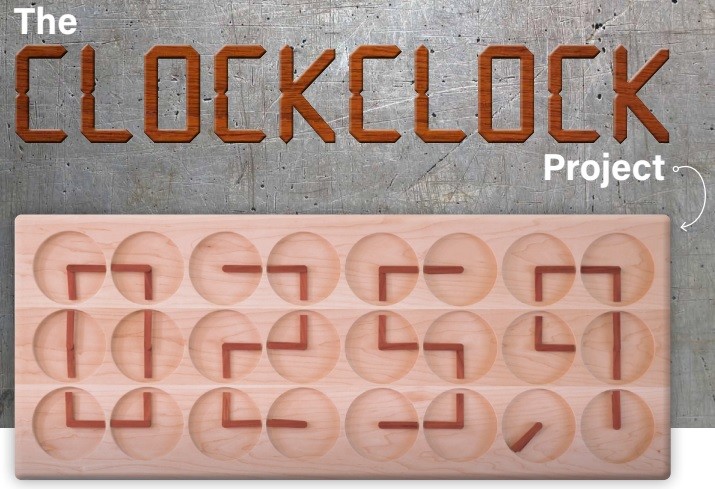
The ClockClock Project (April 2021)
Elektor has a long history of publishing innovative clock projects. In 2021, we published a project that wowed our engineering community. The ClockClock design was simply a clock made of clocks. But the design process was not that simple. Designer Justin Rajewski used many analog-style clocks together to form the digits of the time.
The ClockClock's frame was constructed out of two planks of maple.
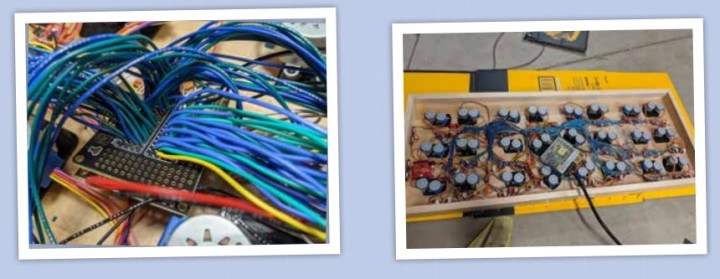
The project featured an FPGA and 48 stepper motors. "Besides showing off the massive amount of IO FPGAs are capable of, this project uses the Qwiic connector on the FPGA in a semi-unconventional way," he explained. "The FPGA in this project acts as a peripheral instead of as a controller. The Arduino is the controller and issues all the commands to the FPGA. I actually think this will be a useful paradigm for many projects."
The 102 wires going into the FPGA don’t really matter what pins they connect to.
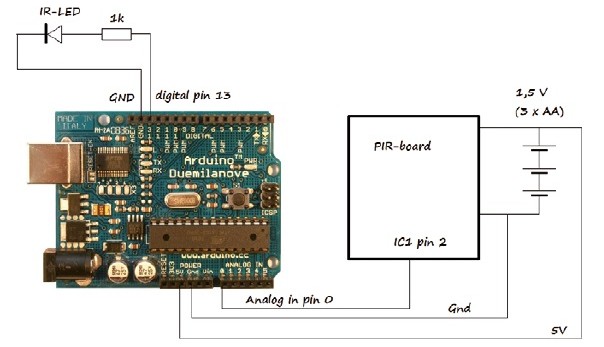
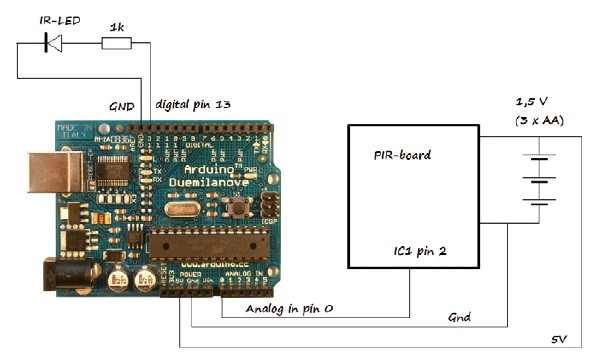
Motion-Detection Camera Trigger Using Arduino (April 2014)
Want to take pictures using motion detection? You can easily build your own motion-detection camera trigger using an Arduino, a capacitor, a few resistors, and some software.
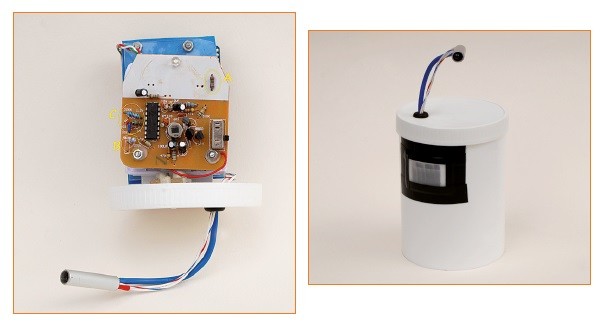
The entire circuit is housed in a splash-proof enclosure
"It turned out that connecting the PIR-board to an analog input of the Arduino was more convenient than using a digital input," Rolf Blijleven explained. "One digital output of the Arduino is used for the IR-LED with a series resistor, which is used to operate the camera. The three AA-batteries for the night light also serve as the power supply for the Arduino."
The complete circuit with Arduino, IR LED and PIR-board (formerly a night light).
Any movement a few meters from the PIR sensor will trigger the camera. This also works through glass, so you can keep your camera indoors and place the the sensor/remote control outside.
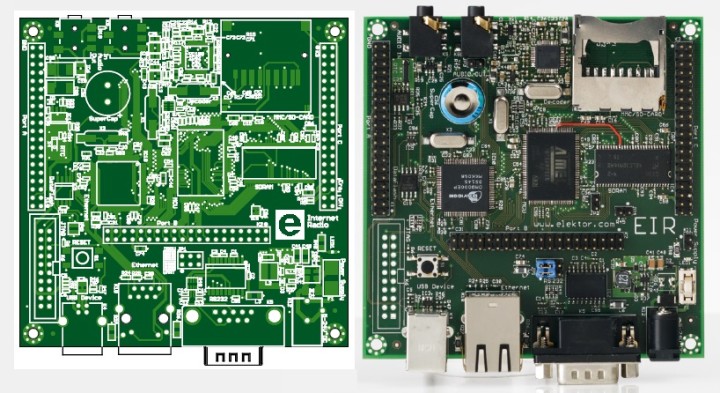
Elektor Internet Radio (April 2008)
Back in the day, you had to modulate audio signals onto an RF carrier so they could be received and demodulated to produce something audible. Today, audio signals are compressed and put into IP packets that are streamed. This means you access thousands of Internet radio programs by receiving, buffering, and decompressing the packages. The Elektor Internet Radio makes it easy.
The component layout (left) and fully assembled prototype (right).
"Before you can start listening to the radio, you have to delete the test firmware from the EIR and install the radio firmware," the designers Harald Kipp and Dr Thomas Scherer explained. "To allow new firmware to be loaded, first connect pins 34 and 36 of connector K3 with a jumper, then press Reset, and finally remove the jumper. After this, the EIR will start up again with the boot loader, and you can use SAM-BA to download the radio firmware. Now connect the EIR to your local network via the Ethernet port (using a hub, a switch, or an Internet router with several ports) and connect the audio output to a headphone or an amplifier."
Soil Moisture Tester (April 2001)
Do you have a knack for letting your plants dry out and die? If so, consider engineering a soil moisture tester. Sure, you can buy on Amazon, but wouldn't it be more fun to build one from scratch? In April 2001, Elektor presented a fairly simple dsign.
The full circuit is barely more complex than the block diagram.
Once ready, you stick two electrodes in the soil and the moisture level appears on an LED display. Green LEDs indicate damp soil, yellow LEDs let you know it’s getting a bit dry, and red LEDs let you know immediate action is needed.
"The electrodes are made from two lengths of stiff, isolated copper wire, about 10 cm long and 1 mm thick. 4 cm of insulation is removed from the ends, which are then tinned. This is to prevent the copper wire from oxidising. The connection between the electrodes and the circuit could be made with two lengths of flexible stranded cable."
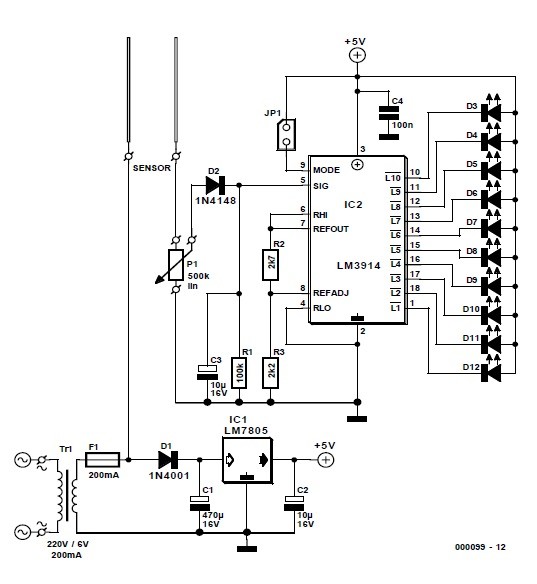
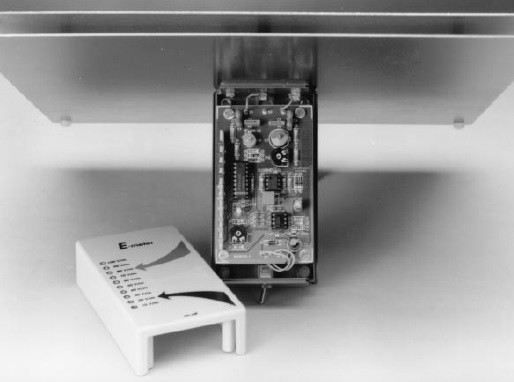
E-Meter: Check the Radiation from Your VDU (April 1998)
Wondering about whether or not you electronic components are bad your health is nothing new. Engineers have been thinking about these things for years. In fact, back in April 1998, Elektor showcased the innovative E-Meter for checking the radiation emitted by VDUs.
The E-Meter prototype
The designer H. Bonekamp explains: "The most demanding part of the circuit is the sensor, a DIY air capacitor. This is produced from two 30x30 cm sheets of aluminium ... The sheets are fastened together with four nylon screws, nuts and 10 mm long spacers: one at each corner. Nylon screws, nuts and spacers are used since these do not affect the capacitance, which is about 80 pF."
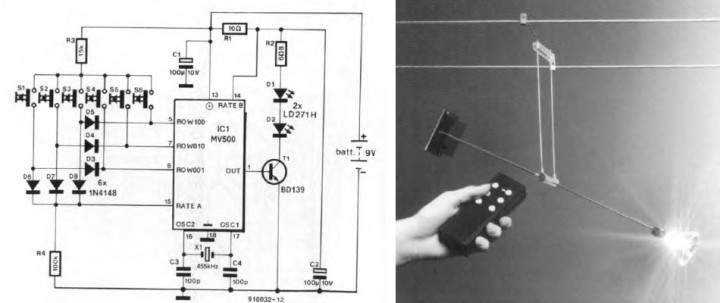
Engineering a Dimmer for Halogen Lights (April 1991)
Back in 1991, engineering enthusiasts didn't have smartphones for remotely controlling the lights in their homes and offices. But they did have other solutions, as was described in this article. The dimmer is based on the concept that each light in a two-wire system can be remotely controlled without any effect on the other lights in thesystem. A handheld infrared remote controller provides four functions: light on, light off, light brighter, and light dimmer.
Circuit diagram of the remote control transmitter.
The remote control transmitter is based on Plessey's Type MV500 JC. "Apart from a keyboard, an oscillator and a driver for the infra-red diodes, this IC contains all that is necessary for a 32-channel infra-red transmitter. Since the receiver board must of necessity be kept small (about 50x40 mm), the present transmitter is restricted to six channels."
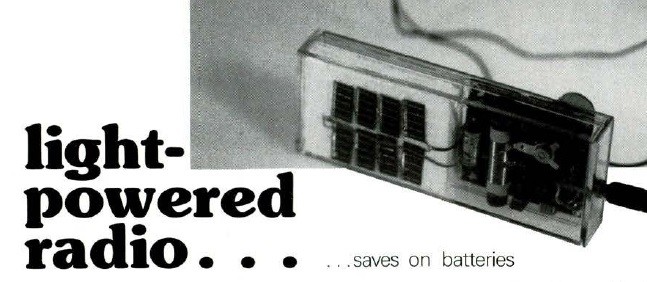
Light-Powered Radio (April 1985)
Elektor readers and engineers were way ahead of the curve when it came to solar power. For instance, in April 1985, we presented a compact radio driven by solar cells. Check out the light-powered radio design.
Save power with light.
"To keep the design simple and easy to build, we decided on a straight medium wave receiver, because this lends itself par excellence to our requirements. The circuit is based on a Ferranti ZN416. This IC is a welcome addition to the range that already includes the popular ZN414 and the ZN415 (descriptions of these appeared in the May 1982 and November 1983 issues of Elektor). The ZN416 contains a complete AM receiver with enough audio output to drive headphones direct. It covers the frequency range 150 kHz...3 MHz which includes the medium and long wave broadcast bands."
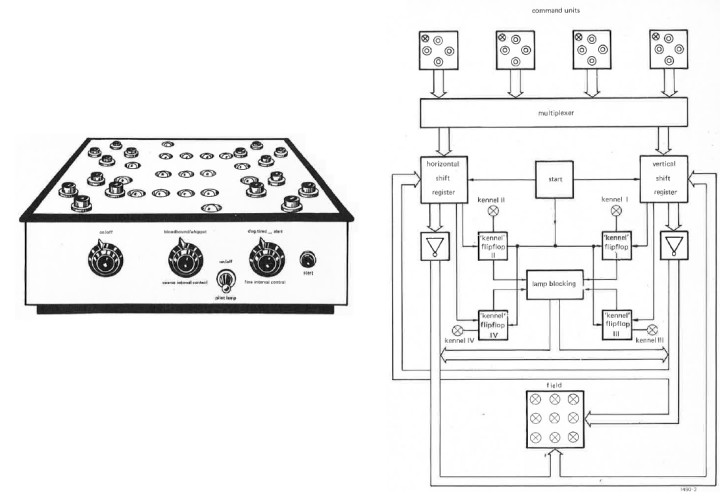
Fido (April 1975)
Fido was an electronic game introduced in 1975. How did you play? An unfortunate dog was called by four masters all at once. The "Fido come" command was generated with a pushbutton. Fido would jump in the direction of a push. "After one successful command to Fido, the would-be Fido owner who has given the order has nothing more to say for a certain time. Then the other players can go on with Fido. If one of the players succeeds in getting Fido into his kennel, the game is decided."
Artist's impression of Fido (left) and the block diagram (right).
More Engineering Coming Soon!
Join us next month when we highlight more classic Elektor articles, projects, and engineering tutorials. And don’t forget to share your thoughts in the comments section below. The engineering continues!
Read full article
Hide full article
Add a rating to this article
★★★★★
★★★★★
Page 1 / 1
Login
No account yet?Register for free!
Forgot password?
Please enter your email address. Instructions for resetting the password will be emailed to you now.

Discussion (0 comments)