
The Enviro+ Raspberry Pi HAT
on
Building a small weather station to take measurements of the main environmental variables could hardly be simpler; grab an off-the-shelf microcontroller board and plug in an expansion board with all the necessary sensors on-board. Choosing a Raspberry Pi (RPi) significantly simplifies the design, add a HAT like the Enviro+ from Pimoroni and you already have all the sensors you need to get the job done.
Getting Started
Nowadays you don't need to start from scratch with a handful of discrete components to build a unit for recording important environmental variables. Just grab a suitable µC board, add some sort of shield or expansion board with all the appropriate sensors and the only brain work left to do is to write the code to handle measurement data coming in from the sensors.
If you want extra features, such as an on-board WiFi link, etc., then a good choice for the controller board would be a Raspberry Pi which is quite cheap and has a lot of power on tap to handle almost any application you have in mind. The added benefit for any developer is that there are a range of ready-made plug-in boards in the form of HATs (Hardware Attached on Top) that bring a smorgasbord of different sensors to the setup. The popularity of this platform ensures that lots of coding examples can be found on the web and appropriate (Python) libraries are available to handle sensor interfacing.
The Enviro+
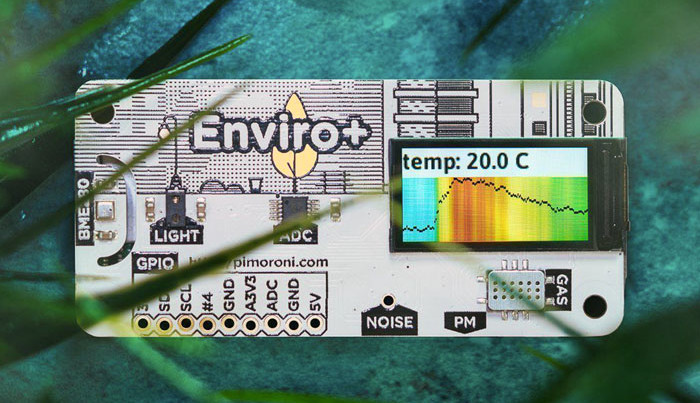
As you can see the Enviro+ is a small HAT in the same form factor as the Raspberry Pi Zero W and has all the sensors needed for the job. It uses the standard 40-pin GPIO extension header, which means it can be used with almost all of the RPi models.
The HAT board (Figure 1) comes in a small antistatic bag with a sticker surrounded with some packing material - nothing else. In an effort to cut down on wastage no paperwork is included, not even a small slip of paper. All documentation is available online but you first need to be directed to the correct address…
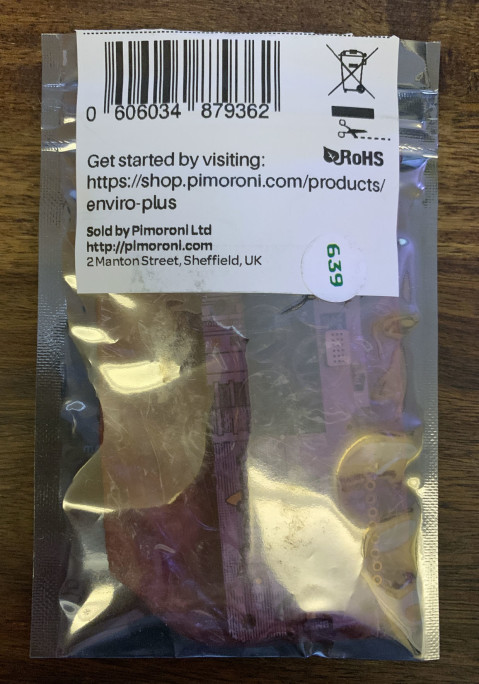
You can enter the address provided by hand but in the age of the ubiquitous smartphone, it would be more convenient if the URL pointing to the documentation could be accessed via a QR code or something similar. The barcode does not actually contain a link. It would also have been nice if the printed URL had been run through a URL shortener so that you didn't have such a long address to type. Lastly it would have been even nicer if the URL provided actually pointed to a useful website instead of provoking an ‘HTTP / 1.0 404 Not Found’ response. Sarcasm, of which I am guilty, is the lowest form of wit but this simple error should surely have been ironed out a long time before the kit hit the shelves.
Enviro+ Hat: Key Features
The Enviro+ HAT is equipped with the following electronics:
• BME280, sensor for temperature, air pressure and air humidity
• LTR-559, light and proximity sensor
• MICS6814, analogue gas sensor
• ADS1015, A/D converter
• SPH0645LM4H-B, MEMS microphone]
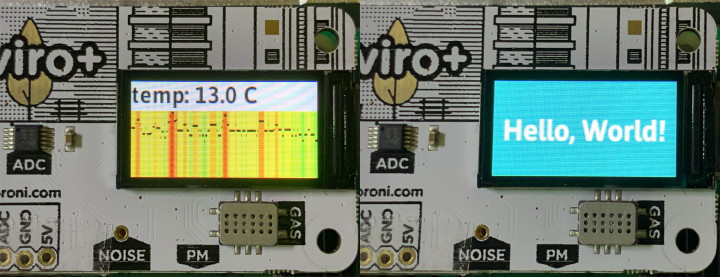
• 0.96" OLED colour 160 × 80 pixel display
• Connection for an optional particulate-matter air sensor type PMS5003
Plug In
Connecting the board to the Raspberry Pi couldn’t be simpler; take it out of the bag and plug it onto the 40-way header connector on the Raspberry Pi — done and dusted. Well almost…
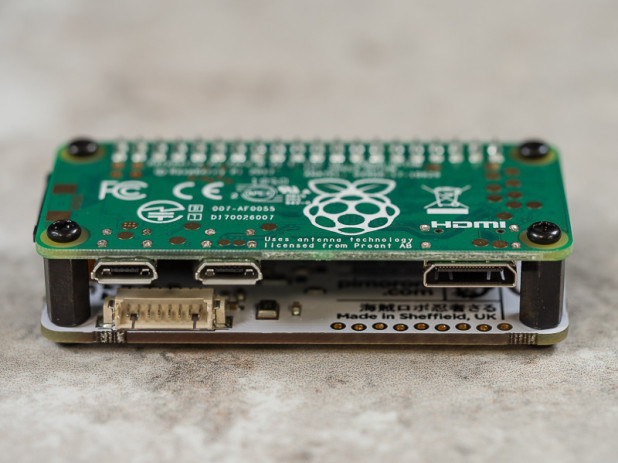
If you are using it with an Raspberry Pi Zero W, then you just need to plug it together (with suitable spacers) to produce a beautifully compact module (Figure 2). The complete assembly can then be installed in a small housing. The standard type of case is less than ideal because there needs to be provision for air circulation otherwise sensor measurements will be inaccurate. If you intend to take light level measurements a transparent or lidless housing will also be necessary.
Since Enviro+ fits on a standard Raspberry Pi, I chose to pair it up with Raspberry Pi 3B+ that just happened to be sitting around on my bench collecting dust. It quickly became obvious I would need to leave the cover of the aluminum housing open (Figure 3) so that enough air and light can get to the sensors on the Enviro+ HAT.
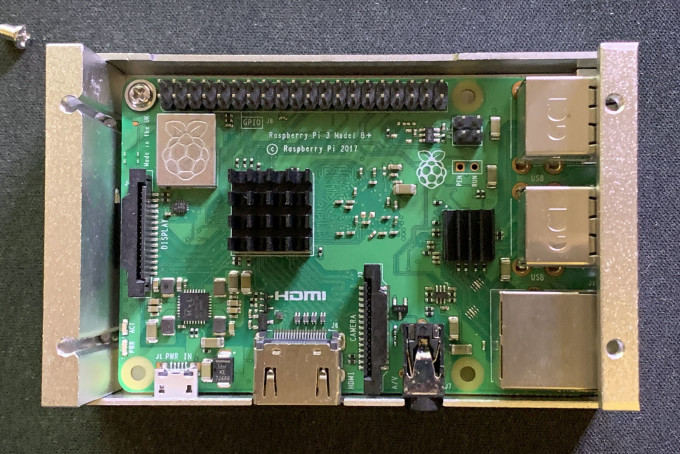
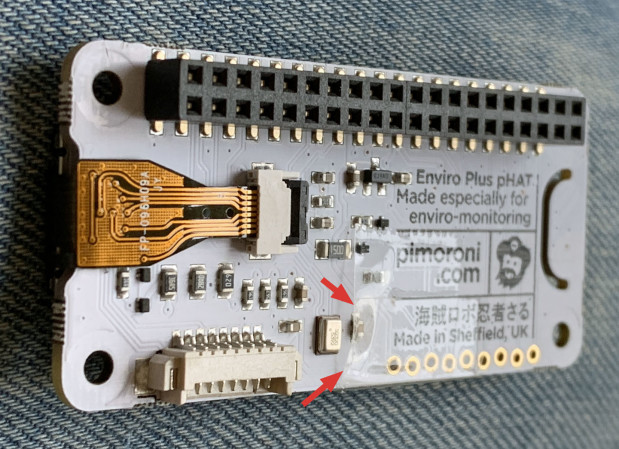
You can see that some of the chips on my Raspberry Pi 3B+ have been fitted with heat sinks. The larger one on the SoC in particular can cause issues with some types of HATs — including the Enviro+. As a precaution, you will need to insulate the small PCB with a piece of tape (Figure 4) so that no short circuits are created when you plug it on to the Raspberry Pi.
Now the Enviro+ can be plugged into the 40-pin Raspberry Pi header (Figure 5). This header is not the only way to connect to signals on the board; the front edge of the board has some labelled pads where you can access a few of the relevant signals.

Documentation and Examples
Extensive documentation for the board is available on the Pimoroni website, just ignore the faulty link printed on the bag. It is very well put together and also provides basic information about the sensors and how their values can be interpreted.
It is particularly good that there are also links to instructions explaining how to easily install the basic Raspberry Pi, which will be very helpful for many beginners. It shows how, with the help of a few terminal commands you can install the additional software for Enviro+ including the Python library and some "Examples." It's quick and easy to get the examples running. Figures 6 through 9 show the screen output from four of these examples.
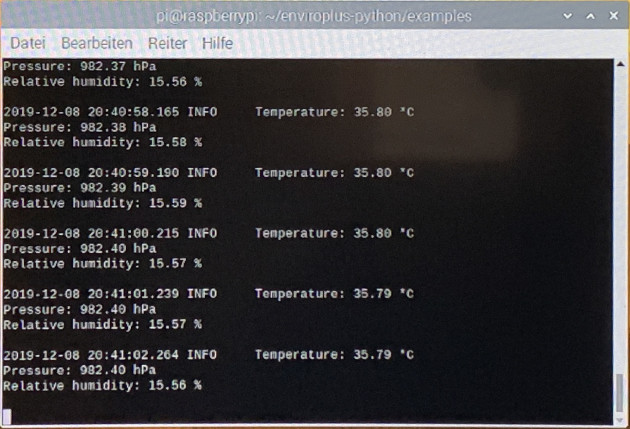
The Raspberry Pi's SoC heats up the sensor quite a bit.
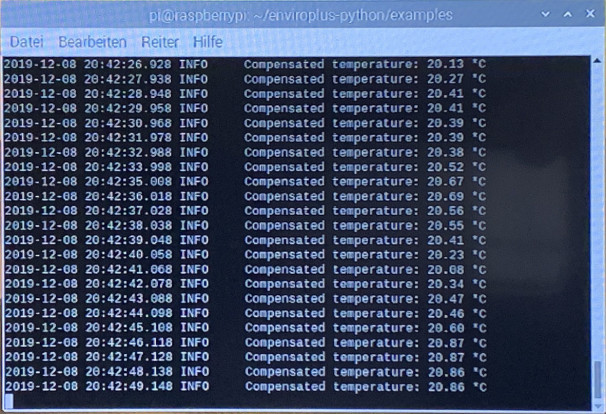
and outputs a more realistic air temperature reading.
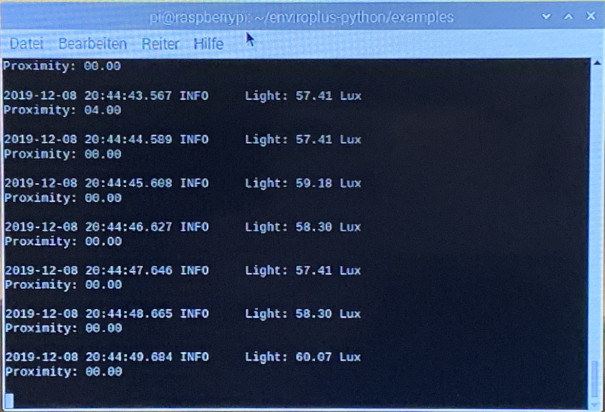
the lighting in lux. The output did not react to proximity.
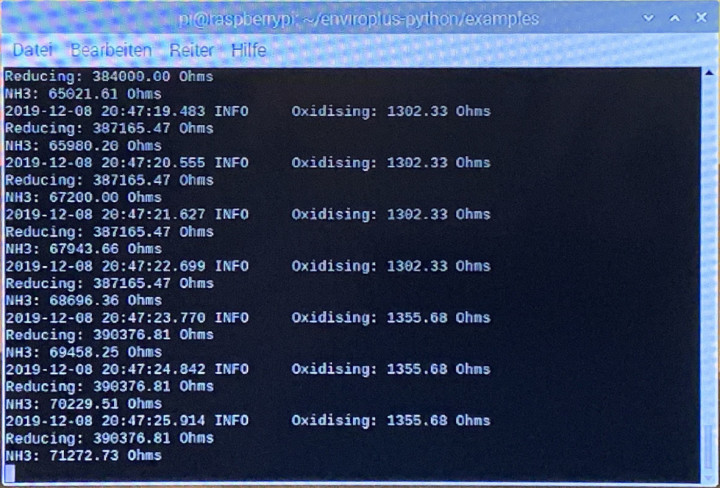
The output in Ohms is unusual and would need to be converted.
The small in-built OLED display (Figure 10) is particularly helpful if the system is deployed in the field and you want to quickly check system status or measured values on site.
To Sum Up
The Enviro+ provides all you need to build an inexpensive weather station for collecting measurements of environmental conditions. Thanks to the Python library routines, reading the sensors etc. is fairly easy. The examples provided, consisting of a few lines of code, help with this greatly so you can tinker with the code to make the system behave as you would like.
That's not all. On the Pimoroni website, you can find complete building instructions for an air-quality measurement station with connection to the cloud "luftdaten.info." It is no surprise there are so many of these stations registered to users in my country.
All in all, I would say this is a very useful bit of kit.
Discussion (2 comments)