The Phambili Newt is a battery-powered, always-on, wall-mountable display that can go online to retrieve information from the Internet and present it. The module is slightly bigger than a credit card and features 10 touchpads together with a 2.7” 240-by-400 pixel E-Ink-like display. Behind the display sits an ESP32-S2 microcontroller that you can program with Arduino, CircuitPython, MicroPython, or ESP-IDF.
The Phambili Newt is a battery-powered, always-on, wall-mountable display that can go online to retrieve information from the Internet and present it. The module is slightly bigger than a credit card and features 10 touchpads together with a 2.7” 240-by-400 pixel E-Ink-like display. Behind the display sits an ESP32-S2 microcontroller that you can program with Arduino, CircuitPython, MicroPython, or ESP-IDF.
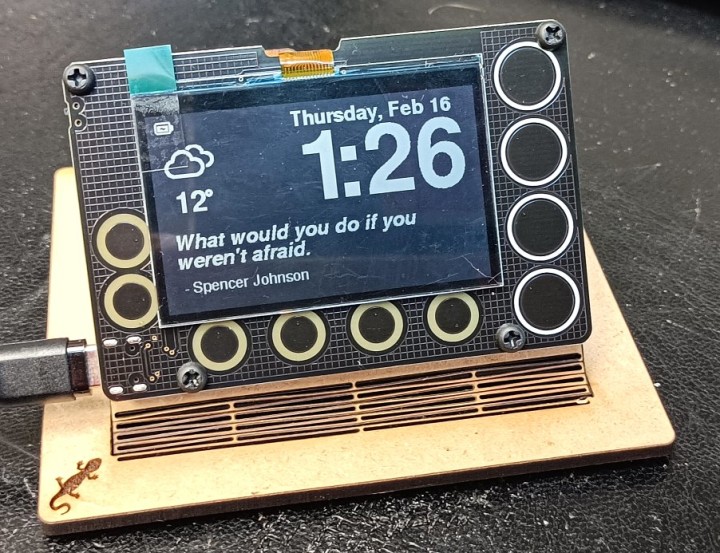
The Phambili Newt comes with a laser-cut wooden desktop stand.
Even though it is intended for always-on applications, it does have a tiny power slide switch, so it can also be off.
Battery Not Included
A battery is supposed to power the Newt, but it is not included in the kit. Luckily, you can also run it from a USB-C-type phone charger. According to the documentation, a 500 mAh (minimum capacity) Li-Po battery would allow the device to operate for up to two months between charges. The battery must have a so-called 2-way JST connector.
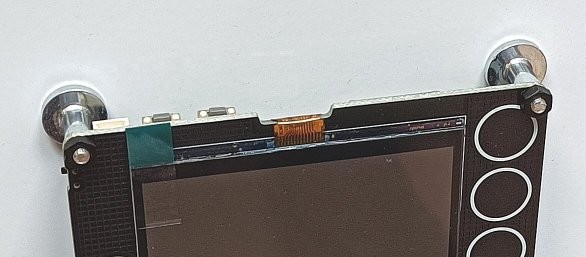
With its magnetic feet you can stick the Newt on a fridge or other metal object.
Besides the Newt module, the kit also includes a laser-cut wooden stand and some mounting material. The stand lets you place the device on, for instance, your desk, but it is a bit wobbly when touching the key pads. A more stable option is to mount the four magnetic feet and stick the Newt on a fridge or another metal surface.
What Does the Phambili Newt Do?
Out of the box, the Newt doesn’t do a whole lot as it expects you to configure a Wi-Fi connection first. After switching the module on, it gives instructions on how to connect it to your network. Doing this is easy enough, but a bit slow, and I observed several device reboots before it connected to my network. When it finally did, it displayed the date and time and then got stuck.
I had noticed that the version of the firmware loaded on my Newt was v0.0.11, and so I checked for a more recent version. After loading the latest version (v1.1.15) the Newt works as expected. Upgrading the firmware is easy: connect the Newt to a computer and copy the new firmware file to the external disk that gets created.
With the proper firmware, the Newt connects quickly to my network and then shows time, date and weather information of my location. Weather data display alternates every three minutes with a quote.
Touching the upper right key opens a menu at the bottom of the screen. There are three “pages” with alarm and timer, weather and air quality things, a calendar and other stuff that you might find useful or fun. The menu also gives you access to the settings and firmware upgrade. Unfortunately, the mounting screw is a bit in the way of the menu button (as does the screw close to the lower-left button).
Your destination after switching on the Newt for the first time.
Write Your Own Applications for the Phambili Newt
Even though the base functionality of the Newt is nice, it is probably not the reason why you would want one. Its real power lies in the fact that it is hackable, so to speak. The source code of the firmware is available on GitHub, together with instructions on how to set up the Arduino IDE for writing your own Newt applications.
An I²C connector in Qwiic (SparkFun) format lets you connect sensors and other extensions to the Newt, turning it into a real IoT device instead of just a connected clock.
Conclusion
The ESP32-S2 is a powerful microcontroller, even though it does not feature Bluetooth, but only Wi-Fi. The black-and-white display looks very nice and is fast, unlike normal E-Ink displays. Display drawing is instantaneous. The combination of the two makes for a cool module with many application possibilities, especially in the low-power IoT domain. The I²C extension connector provides even more options.
Elektor Magazine has been one of the leading sources of information on electronics for engineers, designers, start-ups and companies for 65 years. Our magazine is powered by an active community of electronics engineers – from students to professionals – who are passionate about designing and sharing innovative ideas.
For them, we publish hundreds of items a year, in formats such as articles, videos, webinars, and other learning formats. Our mission is to share knowledge in every possible way and inspire readers with the latest developments within the electrical engineering sector.
Thank you for your vote!
Leave further comments in the fields below.
Thank you for your vote!
If you wish to leave a comment with your rating, please first use the login below. If not, just close this window.


Discussion (0 comments)