The HyperPixel 2r from Pimoroni is a round 2.1” IPS capacitive touchscreen with high-speed DPI interface intended for Raspberry Pi. Actually, its size is optimized for the Raspberry Pi Zero and Zero 2W.
The HyperPixel 2r from Pimoroni is a round 2.1” IPS (In-Plane Switching) capacitive touchscreen with high-speed DPI (Display Pixel Interface). Like its square and rectangular HyperPixel 4 brothers, the 2r is intended for Raspberry Pi. Actually, the size is optimized for the Raspberry Pi Zero and Zero 2W but, as it has the standard 40-pin HAT connector, it can be plugged on any Raspberry Pi equipped with such a connector as long as you are careful about the mechanical side of things.
HyperPixel 2r Specifications
The display’s resolution is 480 by 480 pixels, but as it is round, you must, of course, subtract the corners. It has 18-bit color depth, meaning 262,144 colors, and supports up to 60 fps (frames per second). The viewing area has a 2.1” or 53.3 mm diameter and a viewing angle of 175°. Its full diameter is 72 mm (2.83”) with a height of 11 mm (0.43”). With a Pi Zero attached the total height (or depth, whatever you prefer) is 17 mm (0.67").
Q: how many pixels are lost due to the rounded corners?*
As the display uses almost every pin of the HAT (Hardware Attached on Top) connector, you cannot add other extension boards. However, the display does provide an alternate I2C port for connecting things to.
The current consumption of a HyperPixel + Raspberry Pi Zero 2W system is about 300 mA in normal desktop operating mode. When booting I observed peaks of over 500 mA, so to be on the safe side you would need a 5 W, 5 V power supply.
Driver & Libraries
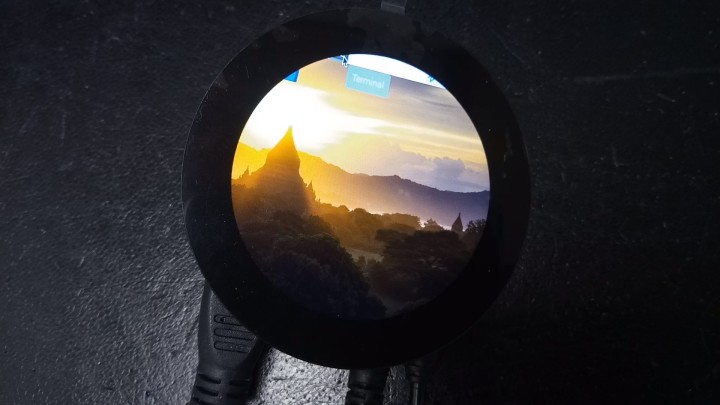
To use the HyperPixel 2r on a Raspberry Pi you must install a driver first. Detailed instructions on how to do this are given on the Pimoroni website and in their GitHub corner. The drivers are for Raspberry Pi OS Buster only, but support for Bullseye is being worked on. Even though Bullseye is not yet supported, I did give it a try. My demo program (see below) worked the same, except that the menu of the desktop got overlaid at the top of the screen. The HyperPixel 2r showing the Raspberry Pi Buster desktop.
I plugged the HyperPixel 2r on a Raspberry Pi Zero 2W running Buster and enabled SSH to make life a bit easier later on. After installing the driver and rebooting, the display showed a tiny version of the desktop, and I could open a terminal window. Now the HDMI port no longer works and the HyperPixel has become the only display. As it is rather tiny, I did most of the work over SSH on my Windows laptop computer.
To use the display in your own applications you need Pimoroni's Python3 library. It includes a few examples, but they didn’t work well for me. After some searching, I found that upgrading the pygame library to the latest version (2.1.0 when I did this) solved the problems I was having. After that all the demos worked fine. Note that they feature touch, so touch the display to change the colors.
Note that touch needs a driver to make it work as a mouse on the desktop. Unfortunately, such a driver does not seem to exist yet, but you can use the library's ‘deamon’ example uinput-touch.py instead. That works quite well.
My First Application
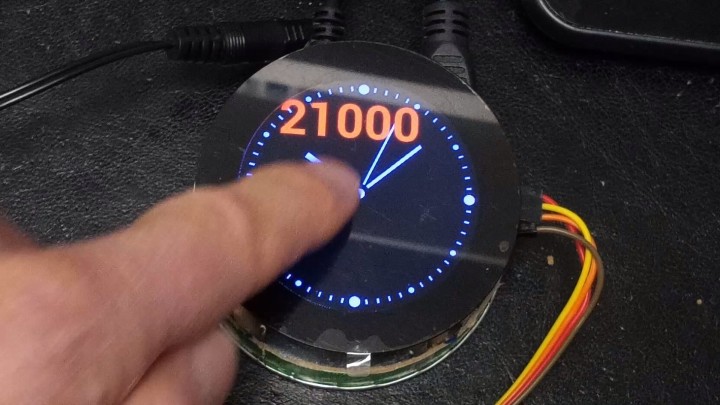
Once I had the display up and running, it was time to see if I could do something with it. My idea was to use it for my YouTube subscriber counter to replace the 7-segment display by something sexier. The clock demo seemed like a good starting point. All I had to do was add the YouTube API query part to get the subscriber count and then print the number on the screen.
First, I installed httplib2 which is required for the YouTube subscriber counter snippet. Running the program now revealed that I also needed libsdl2-ttf to print text on the screen. Keep in mind that your application must call pygame.init if you want to work with text and fonts and that you must load a font. Loading a font is rather long on a Raspberry Pi Zero, so I put that at the beginning of the program. Using the font, you render the text into an image that you copy or ‘blit’ to the screen buffer to make it visible. The YouTube subscriber counter clock allows dragging of the counter value.
Because the display has touch capability, I added a feature allowing you to position the subscriber count anywhere on the screen simply by dragging it. Like the clock, its color depends on where you touch the screen. To make it stand out, it will not use the same color as the clock unless you touch the center to make everything white.
A word about rotating the screen. I wanted the screen rotated in such a way that the Raspberry Pi Zero’s USB and HDMI connectors point upwards. This corresponds to 180° or ‘inverted’. The Pimoroni driver provides utilities to do this, but they didn’t work for me. What did work, however, was simply adding the line display_lcd_rotate=2 to the /boot/config.txt file and reboot the system.
Note that for some reason the center of the screen buffer may not exactly be the center of the screen, it can be off in the vertical direction by several pixels. You can correct this by adding an offset where the sign of the offset depends on the rotation of the screen. You can see in my code how I handled that.
Alternate I2C Port
I gave the display’s alternate I2C port only a quick try. According to the Pimoroni website, it would be I2C port 3, but I found it as port 11. You can find out what you have by issuing the command i2cdetect -l or by looking in the /dev folder for files that start with i2c.
I connected a Mabee MPU6050 accelerometer module to it to see if it would be found. The i2cdetect tool showed a device at address 68 hexadecimal, which is indeed the address printed on the module, so it seemed to work. I could also read the sensor after installing the mpu6050-raspberrypi library.
It Fits Exactly Inside a Pringles Can!
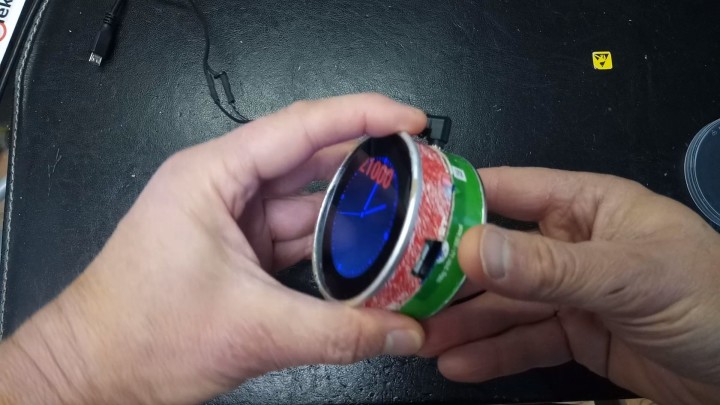
I happened to notice that the diameter of the HyperPixel 2r display is almost the same as a Pringles can, it fits exactly inside. Therefore, I decided to build my YouTube subscriber counter clock into an empty Pringles can.
I cut the top and bottom of a can and attached the display-with-Raspberry-Pi assembly to the bottom part with stand-offs so that the display came flush with the inside of the ring on the top part. Now the display is protected when the lid is on while touch keeps working. The HyperPixel 2r has the same diameter as the inside of a Pringles can.
Summarizing
Summarizing, I think the HyperPixel 2r is a really nice add-on for a Raspberry Pi Zero 2W. It also works on a Zero. The image quality is very good, and touch works fine in your own applications. It would be a pretty cool addition to a home automation system.
Officially there is only support for Buster, but I did try it on Bullseye. My program worked the same, except that the menu of the desktop got overlaid at the top of the screen.
Elektor Magazine has been one of the leading sources of information on electronics for engineers, designers, start-ups and companies for 65 years. Our magazine is powered by an active community of electronics engineers – from students to professionals – who are passionate about designing and sharing innovative ideas.
For them, we publish hundreds of items a year, in formats such as articles, videos, webinars, and other learning formats. Our mission is to share knowledge in every possible way and inspire readers with the latest developments within the electrical engineering sector.
Thank you for your vote!
Leave further comments in the fields below.
Thank you for your vote!
If you wish to leave a comment with your rating, please first use the login below. If not, just close this window.

Discussion (0 comments)