
MakerFabs DIY ESP32 SmartClock Kit with Weather Forecasting
on
Where’s the SmartClock Kit’s Manual?
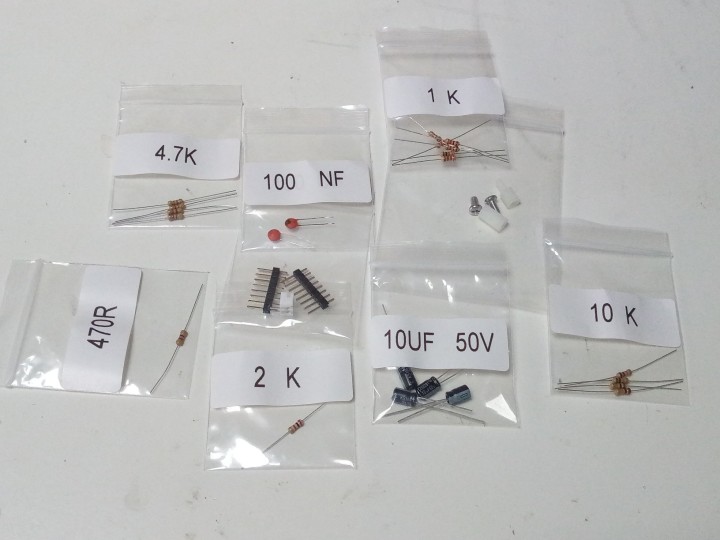
The DIY ESP32 SmartClock Kit with Weather Forecasting comes as a small brown cardboard box with a dozen plastic bags. The bags containing parts that might be confusing are all clearly labeled. However, there is nothing inside or on the box telling you how to use the parts. That they must be soldered on the included circuit board is clear, of course, but which part should go where? The only clue is a URL printed on the PCB, but it only takes you to the MakerFabs website.
Searching their website, I found the user manual. Although rather extensive, with schematic and detailed instructions on how to solder, the only help to assemble the board is the Part List in Chapter 4. Note that all the SMT parts are already mounted. Also note that R17 is not to be mounted.
Lots of Spare Parts
After assembling the board, a lot of unused parts remained. Probably out of generosity all the electronic parts come in double the quantity needed, enough to populate a second board.
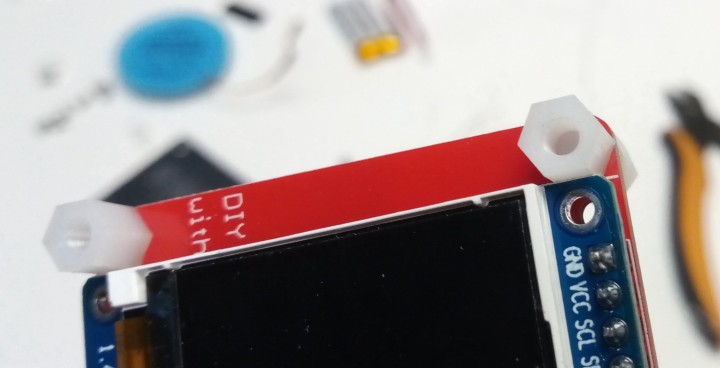
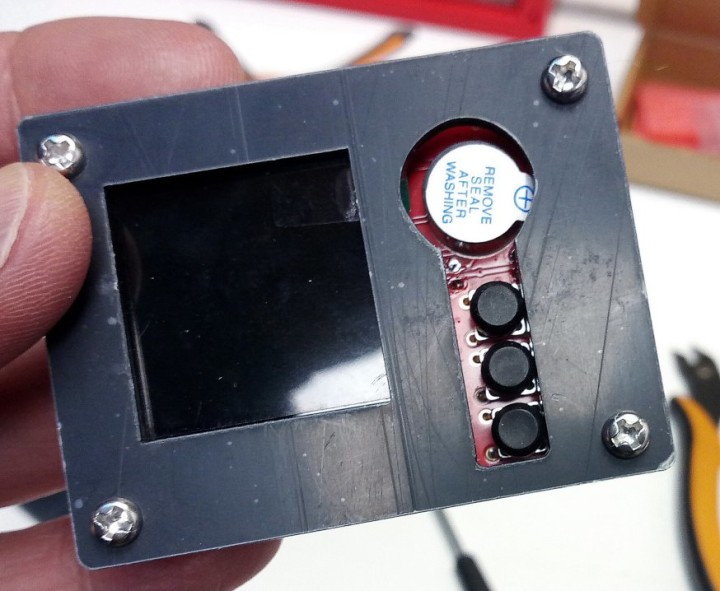
The display in my kit already had a pinheader on it, making the included male headers (and not female as indicated in the Part List) useless. BTW, I highly recommend mounting the nylon standoffs on both sides of the board before soldering the display, as things are a bit tight on space there. Also take care to mount the push buttons and buzzer on the side opposite to the ESP32 module.
The Firmware Is Preloaded
I could now power the SmartClock. For this, I used a USB phone charger as the Lipo battery (included, 450 mAh) was not fully charged yet.
The ESP32 module is preprogrammed and all you have to do is connect it to your Wi-Fi network. This uses the now-classic Espressif 192.168.4.1 Access Point (AP) method, so no surprises here? Well, it doesn’t support whitespace characters in the SSID and password, and so it couldn’t connect to my network. The only way out for me was modifying the firmware to kludge around this obstacle.
Once connected, the SmartClock displays the time and date and an alarm time. The alarm time and time zone are set by pressing S1. These values are stored in flash memory and survive reboots. When time is shown, pressing S3 will toggle the alarm on (yellow square visible) and off (no yellow square).
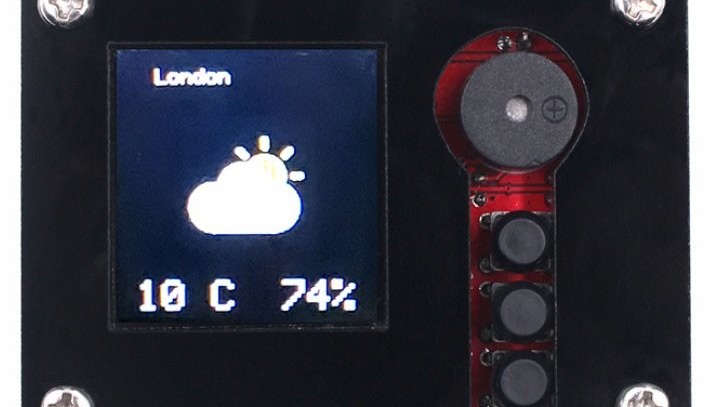
New York, London, Beijing, and Paris Only
Pressing S1 three times opens the weather forecast page. With S3 you can choose the location of interest. By default, the SmartClock only knows of New York, London, Beijing, and Paris. To change the location, you must modify the firmware. How to do this is described in the user manual. Before setting it to your location, you should query the weather server first to see if it knows it. As it probably does, it did for me, the firmware modification is limited to replacing “Newyork” by the name of your city, town, or village.
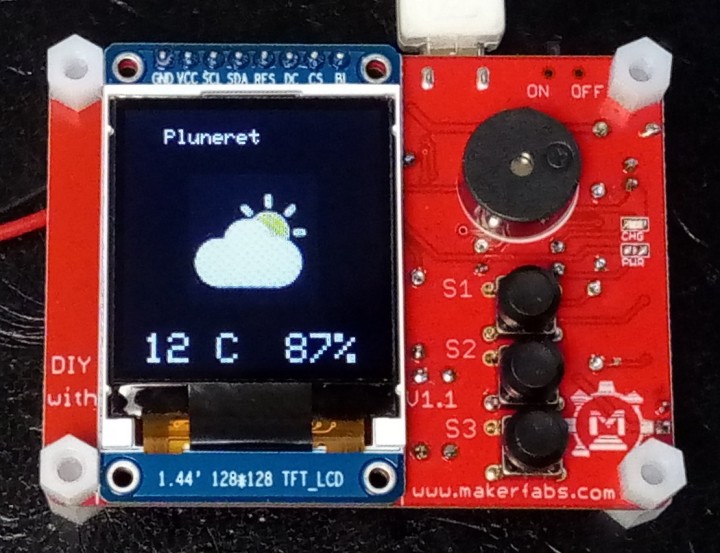
Note that the protective plastic shells are not mounted.
The weather forecast shows an icon for the weather type, for instance a sun partly hidden by a cloud, but it has only four icons: sun, cloudy, rain, and snow. The weather server provides the number of the icon to show (out of more than 200…) and when the SmartClock doesn’t support it, it will display “No Icon” instead.
Room for Improvement
To finalize the SmartClock you must mount the plastic front and rear shells. They have protective film on them that you may want to remove to turn the dull gray into a shiny black. In my case, the shells didn’t fit well. With the front mounted, the push buttons got stuck. I had to enlarge the holes to get things right.
The SmartClock is a Great Starting Point
Summarizing, the DIY ESP32 SmartClock Kit with Weather Forecasting from MakerFabs is a nice and inexpensive kit to build a practical and usable connected device with. Battery powered (the device can charge it) or not, its three tactile switches, buzzer, display, and On/Off switch make it a good base for all sorts of applications.
The weather forecasting & clock firmware should be seen as a gimmick and great starting point for your own projects, it is not a weather station. The mechanical side of things too has room for improvement. But, as the SmartClock is open hard- and software, the design files and source code are available at GitHub so all you have to do is download it and get to work.
Enjoy!
Discussion (0 comments)