
Review: Eurocircuits Marking Editor
UL marking
If you need Underwriters Laboratory marking, better known as UL marking, you must tick the ‘PCB is UL certified’ box. This will place a UL logo in a default location, but you can, of course, move it. You can also add a flame class and file number. UL marking is often required for boards that may end up in the USA. You may want to read this page for more information about UL marking.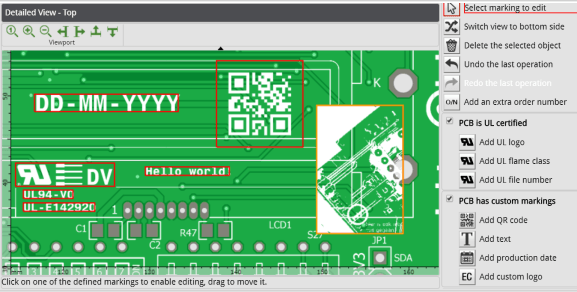
Save your work
When done you can check if you added everything you wanted in the ‘Legend’ pane on the bottom left of the screen. If this is the case, click ‘Apply’ to return to the PCB Configurator where you can see your work in the ‘Bird’s Eye View’. If you added UL markings you will notice that the ‘UL marking’ checkbox is now ticked, similar for the ‘Specific marking’ checkbox that corresponds to your custom marks. Unchecking these boxes will remove the marks, rechecking them will make them reappear.Click the ‘Save changes’ button in the ‘Summary’ pane on the right to make the edits final.
Conclusion
The Eurocircuits Marking Editor is a nice and flexible tool allowing the user to add and place marks where they want them. Adding text and/or a manufacturing date is as easy as placing a logo or an image. Personally, I like the QR code editor which makes life somewhat easier for those who do not have access to high-end PCB design tools.Although using the editor is easy and intuitive, I still recommend integrating as much as possible into the board design files instead of adding things “just in time” that will be forgotten when the next revision of the board has to be done.
Of course, the Marking Editor is a great tool for cases where the PCB design files are not accessible for some reason.
Read full article
Hide full article
Discussion (0 comments)