
Review: Build a smart-looking GUI in minutes with Workshop4 IDE
The ViSi Genie gives you visual programming
Because ViSi Genie is the fastest way to get a feel for what is possible with a 4D Systems display module, click the blue arrow under the ViSi Genie box.
In the Home tab select the GUI elements you want and place them on the virtual display in the form view either by drag-and-dropping them or by selecting one and then clicking somewhere on the virtual display. In the ‘Object Inspector’ window set their properties like size, position, and colour.
Events
Many elements produce events when their status has changed (like an LED or a button) or when they are being updated (e.g. a sliding slider). You can route these events to other GUI elements or they can send them to the host. In return, the host can send messages to the GUI elements, and it can query them to obtain their current values.Building a simple GUI
A good first experiment is to place for instance a slider and a gauge on the display, and connect the slider’s ‘OnChanging’ event to the gauge. This will make the gauge follow the slider’s value. For best results both controls should have identical minimum and maximum values; set them on their respective properties tabs.In a practical ViSi Genie GUI there will be input and output controls. Most or all output controls (LEDs, gauges, digits, etc.) will be set by the host. Similarly, most or all input controls (like buttons, sliders, knobs, etc.) will report to the host. Output controls do not require any set up to make this work; input controls optionally can set one or more of their events to ‘Report Message’ so the host doesn’t have to query them periodically.
Loading a GUI on the display
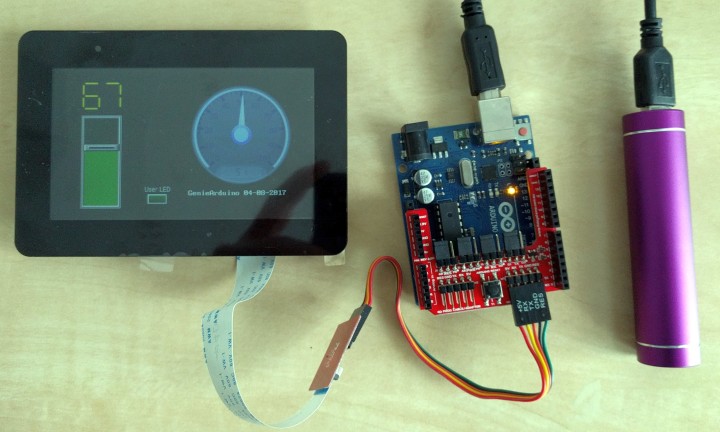
When the GUI is ready, it can be loaded on the module. For this you will need the programming adapter board with the micro USB connector on it. Insert the flat cable with the contacts up into the FPC sockets.Because in Workshop4 IDE programming is a two-stage process where some files are written on the microSD card and others into the processor, it can be a bit long. If you did not make important changes to the GUI, you can skip the SD-card-update step.
Read full article
Hide full article
Discussion (0 comments)