
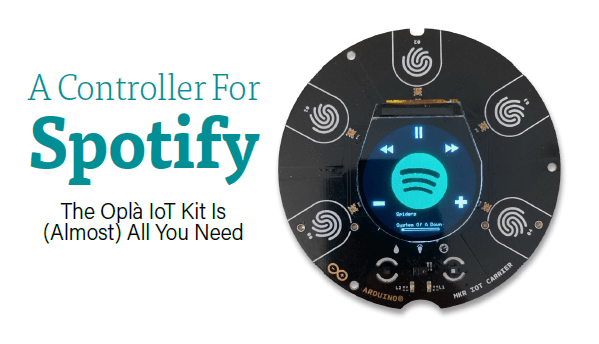
A Controller For Spotify: The Oplà IoT Kit Is (Almost) All You Need
on
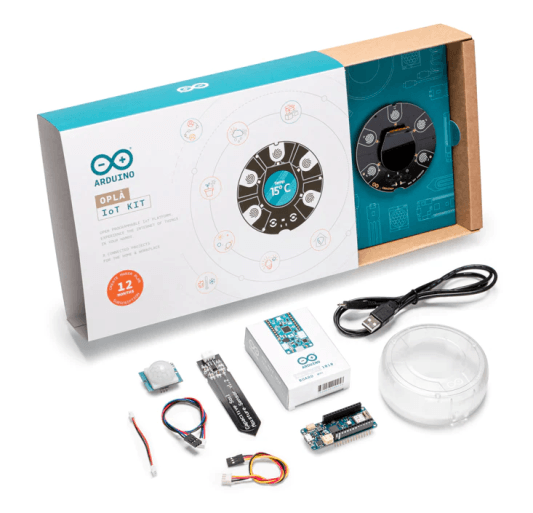
The Arduino MKR WiFi 1010 Maker Board is — thanks to its Wi-Fi capabilities — a perfect brain for your next IoT project. You are even better equipped with the Arduino Oplà IoT kit, which contains this Maker Board and a carrier board (Figure 1). The latter integrates relays, a round shaped OLED display and capacitive touch buttons. Also in the kit is a moisture and a PIR sensor (Figure 2). Projects such as home security alarms and automatic plant watering are therefore easy to implement.
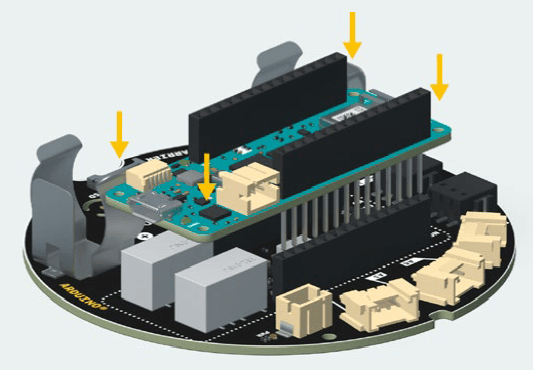
which integrates relays and other useful peripherals.
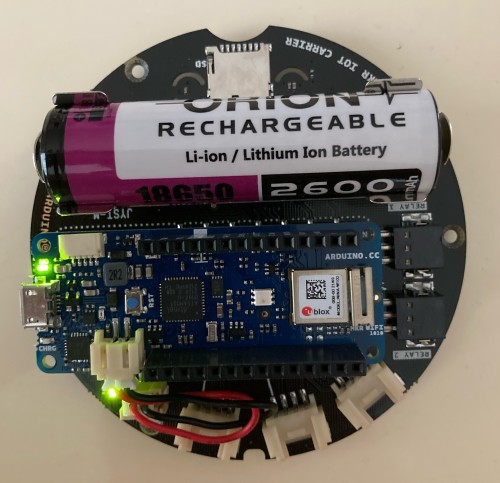
The Wi-Fi feature also allows you to control programs running on your PC, if they have a network interface. The touch buttons, the display, the battery socket, and a housing make it easy to design a portable controller for different kinds of PC software — as an addition to a mouse and keyboard (Figure 3).
I am a fan of the music player Spotify, and so I used the Oplà kit to build my own wireless Spotify controller. You can press buttons to skip to the next and previous song, play/pause a song, and increase and decrease the volume. To do so, it goes without saying that the Spotify player must be started on your PC or smartphone.
Secure Communication
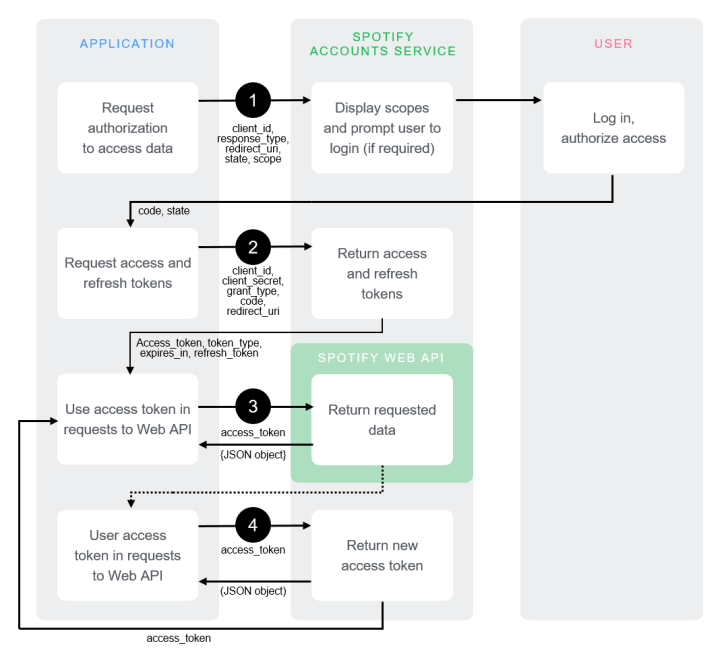
Spotify comes with an easy-to-handle programming interface to control your Spotify player via the network; however, you will need the Spotify Plus license for it. Of course, some security is needed. To use the Spotify web API, which is based on REST, you have to authenticate first at the Spotify Accounts Server with your Spotify login username and password. Once authenticated, your software has to send a Client ID and a Client Secret. The Spotify server will return an access token, which you have to send with each call of the Web API to control your Spotify player. This two-step authentication flow is based on the popular OAuth2 process (see Figure 4).
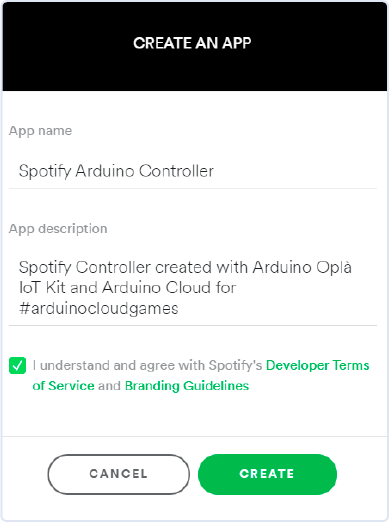
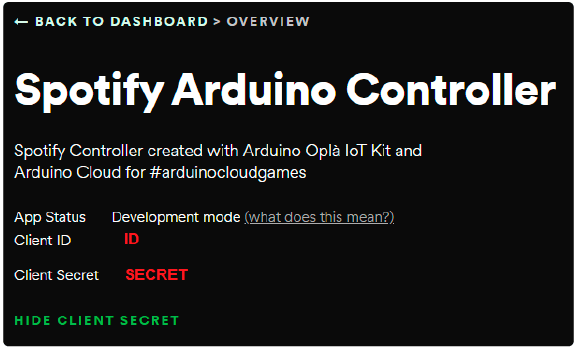
How do you get your Client ID and Secret? Just use the Spotify App Builder, which you can use to design your own PC software or mobile App to control Spotify (Figure 5). However, we don’t do this here; we just want the credentials (see Figure 6). Client ID and Secret must be stored on our Arduino MKR Board. Of course, you could do this hardcoded in the Arduino sketch, but there is a more comfortable and more secure way to do so. The Arduino Web Editor provides a Secrets tab, where you can set environmental variables to be later used in your code (Figure 7). Just enter the Spotify Client ID and the Secret as well as your Wi-Fi network name and password in the fields of the tab. If you compile and upload the software to the controller, your individual secret values will be also uploaded to be used by the project’s code. In your sketch you have to replace the strings containing sensitive data by writing a SECRET_xxx expression — so, for example: SECRET_SPOTIFY_CLIENT.
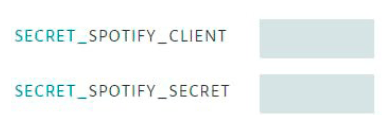
Arduino Web Editor, before compiling and uploading the code.
Authentication
To start the OAuth2 flow, you have to authenticate at Spotify. When starting the Spotify controller described here, it will log in the specified (home) Wi-Fi network and show the IP address it got by the router on the OLED display. I wanted to give the user a chance to easily authenticate at Spotify, so I created the following approach. The Arduino Controller generates a small webpage which will be shown in a web browser, when you enter the IP address of your controller there (Figure 8).
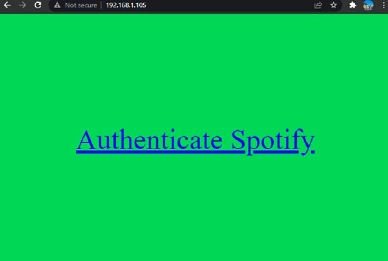
This small webpage contains a weblink. (Refer to Listing 1 to see how the webpage is generated in the Arduino code.)
Listing 1: Webpage to authenticate at Spotify, offered by the Spotify controller.String webpage = "<!DOCTYPE html>\n";
webpage += "<html><body>";
webpage += getStyle();
webpage += "<a href=\"https://accounts.spotify.com/authorize?client_id=";
webpage += SPOTIFY_CLIENT;
webpage += "&response_type=code&redirect_uri=http://";
webpage += ip_address;
webpage += "/redirect/&scope=user-read-playback-state "
"user-modify-playback-state\">Authenticate Spotify</a>\n";
webpage += "</body></html>";
wifiClient.print(webpage);
If pressed, the browser goes to the authentication page at Spotify, where you easily can log in. You will then be asked if you give the controller permission to control Spotify (Figure 9). Please note: To get all this working, you also have to enter the IP address of the controller as a “Redirect URI” in the Spotify App editor (Figure 10).
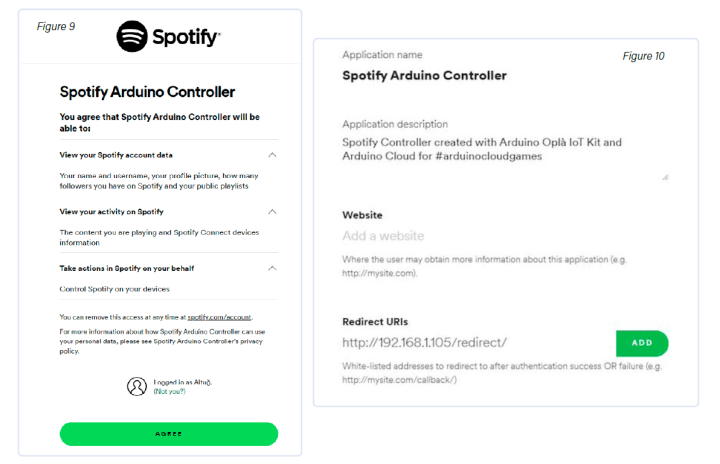
Figure 10: Redirect URL: The address of the controller in your home network.
From now on the Arduino Controller can get the API access token with sending the Client ID and Secret to Spotify (Listing 2).
// Get the user authorization token
bool getAccessToken(String userCode) {
String postData = "grant_type=authorization_code&code=" + userCode + "&redirect_uri="
"http://" + ip_address + "/redirect/";
authClient.beginRequest();
authClient.post("/api/token");
authClient.sendHeader("Content-Type", "application/x-www-form-urlencoded");
authClient.sendHeader("Content-Length", postData.length());
authClient.sendBasicAuth(SPOTIFY_CLIENT, SPOTIFY_SECRET);
// send the client id and secret for authentication
authClient.beginBody();
authClient.print(postData);
authClient.endRequest();
// If successful
if (authClient.responseStatusCode() == 200) {
lastTokenTime = millis();
DynamicJsonDocument json(512);
deserializeJson(json, authClient.responseBody());
accessToken = json["access_token"].as<String>();
refreshToken = json["refresh_token"].as<String>();
return true;
}
return false;
}
The access token must be regularly refreshed during operation. This is also done by a function in the sketch (Listing 3), which is called every 3000 seconds.
Listing 3: Function to refresh the token.// Refresh the user authentication token
void refreshAccessToken() {
String postData = "grant_type=refresh_token&refresh_token=" + refreshToken;
authClient.beginRequest();
authClient.post("/api/token");
authClient.sendHeader("Content-Type", "application/x-www-form-urlencoded");
authClient.sendHeader("Content-Length", postData.length());
authClient.sendBasicAuth(SPOTIFY_CLIENT, SPOTIFY_SECRET);
// send the client id and secret for authentication
authClient.beginBody();
authClient.print(postData);
authClient.endRequest();
// If successful
if (authClient.responseStatusCode() == 200) {
lastTokenTime = millis();
DynamicJsonDocument json(256);
deserializeJson(json, authClient.responseBody());
accessToken = json["access_token"].as<String>();
}
}
Operation
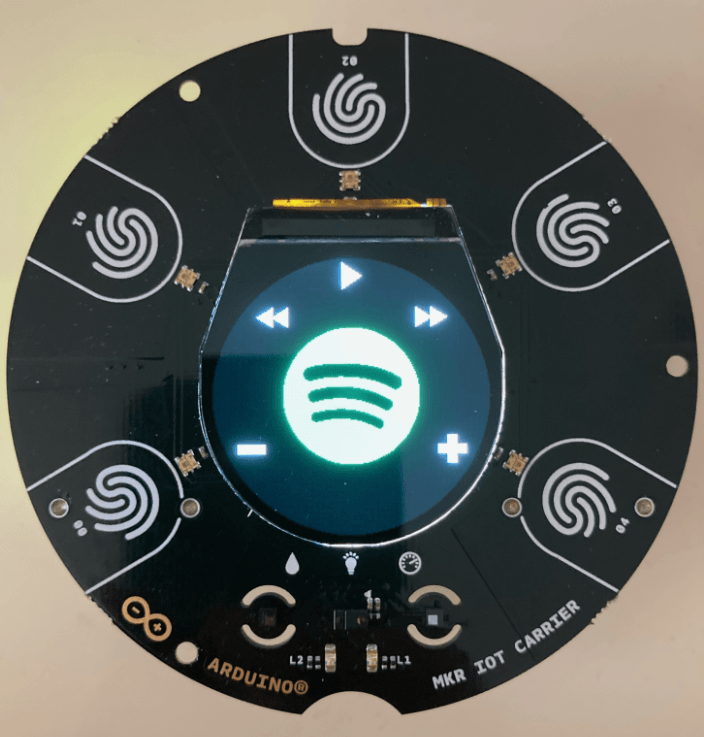
The rest of the code is less complex. The device will show the Spotify logo and the function of the buttons on the OLED display (Figure 11). If the user touches a button, the corresponding API function is called. Refer to Listing 4 to see how this is done for skipping a song to the previous or next one.
Listing 4: Example for using the API (next and previous song).// Skip a song towards a given direction
void skipSong(String direction) {
apiClient.beginRequest();
apiClient.post("/v1/me/player/" + direction);
apiClient.sendHeader("Content-Length", 0);
apiClient.sendHeader("Authorization", "Bearer " + accessToken);
apiClient.endRequest();
}
There is also a function in the code which requests the status of the player from the Spotify API. The answer is a JSON string. I am using the ArduinoJson.h library and some of my own functions to process JSON strings more easily.
To get the status of the buttons, to control the LEDs, and to show graphics on the OLED, I am using the Arduino_MKRIoTCarrier.h library. You can dive into my code to get inspiration for your own projects you can do with the Oplà Kit. My software can be downloaded here.
where they are visible on your personal dashboard.
Cloud Connection
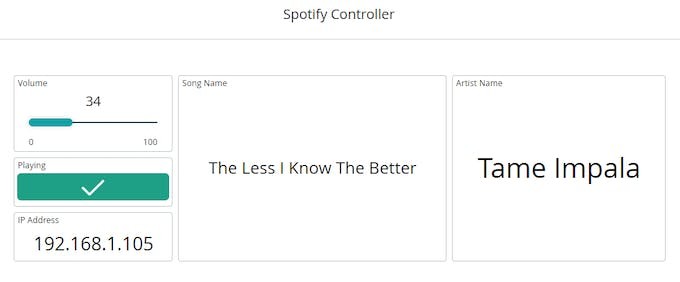
I also set up a connection to the Arduino Cloud and created a dashboard that shows the current song and artist name next to the volume of the device (Figure 12). Of course you can create your own personal dashboard, with the data you want.
My project won the 3rd place award in the Arduino Cloud Games 2022!
(220407-01)
Editor's note: This article first appeared in the 2022 Declassified Bonus Edition of Elektor Mag, which was guest-edited by Arduino.
Questions or Comments?
If you have technical questions feel free to e-mail the author at mail@alt.ug or the Elektor editorial team at editor@elektor.com.
About the Author
Altuğ Bakan has been working as an electronics engineer, mostly with embedded systems. He loves to use Arduino in his work for rapid prototyping and ease-of-use. His favorite electronics subjects are bare-metal embedded programming and Internet of Things (IoT).


Discussion (0 comments)