
Not for Sissies: Makerfabs 6-DOF Robot Arm Kit With Raspberry Pi Pico
on
What is it?
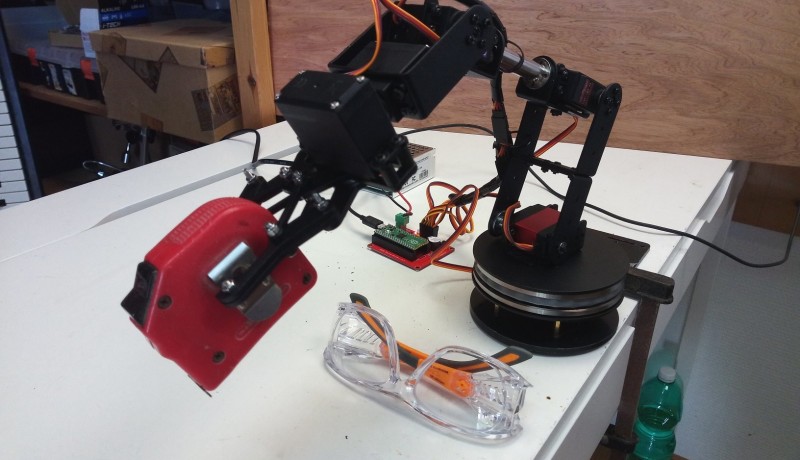
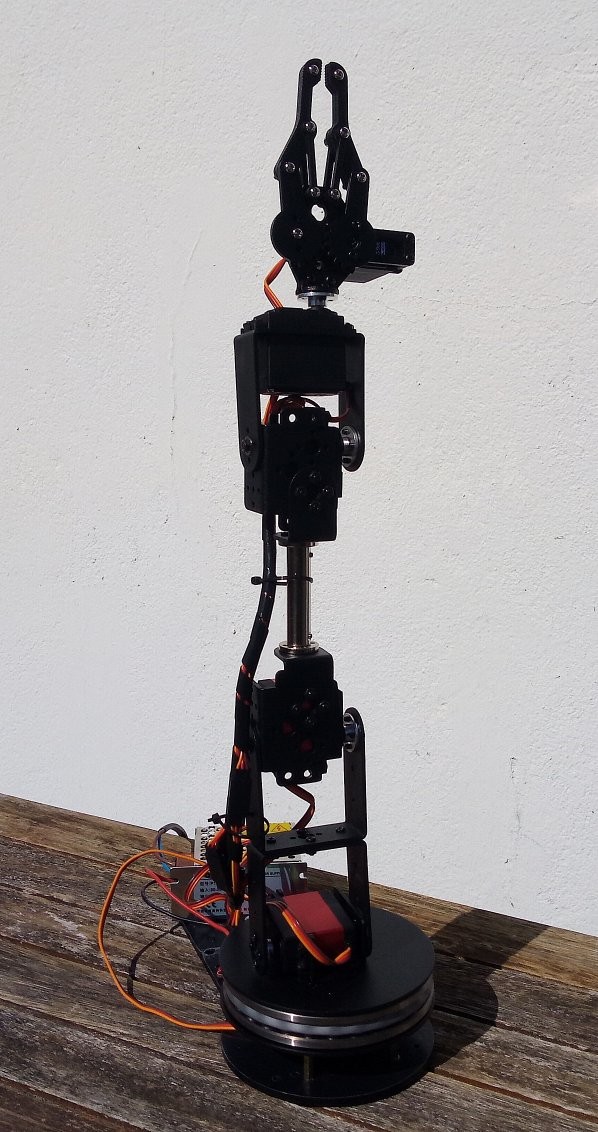
The 6 DOF Robot Arm with Raspberry Pi Pico is a robot arm controlled by a Raspberry Pi Pico microcontroller board. DOF is short for Degree(s) of Freedom, which, in the case of a robot arm, relates to an articulation. The arm reviewed here has six of them allowing it to move in six different places independently of the others. Each DOF translates to a servo.
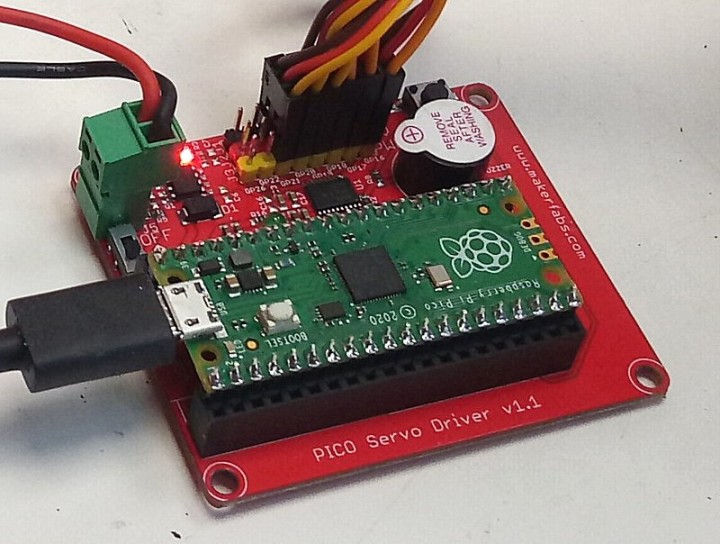
The arm is controlled by a Raspberry Pi Pico board mounted on a small extension board that provides the connections to the servos, the power supply, a buzzer, and a push button. The Pico, or rather the RP2040 MCU on it, is intended to be programmed in MicroPython, but this is, of course, not an obligation. However, the driver and examples are written in MicroPython.
Everything is Included
The robot arm comes as a self-contained kit of parts. Besides a computer to do the programming on and a micro-USB cable, nothing else is required. A 5 VDC, 6 A power supply is included. A power chord is included too, but with an American-style plug, so, depending on where you live, you may need to replace it or add an adapter (as I did). There is even a little screwdriver, but I preferred to use my own tools for assembling the arm.
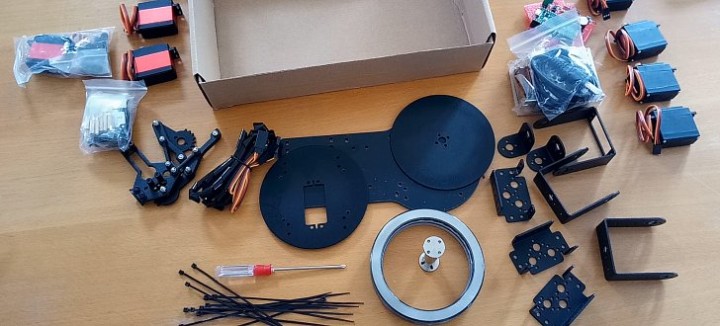
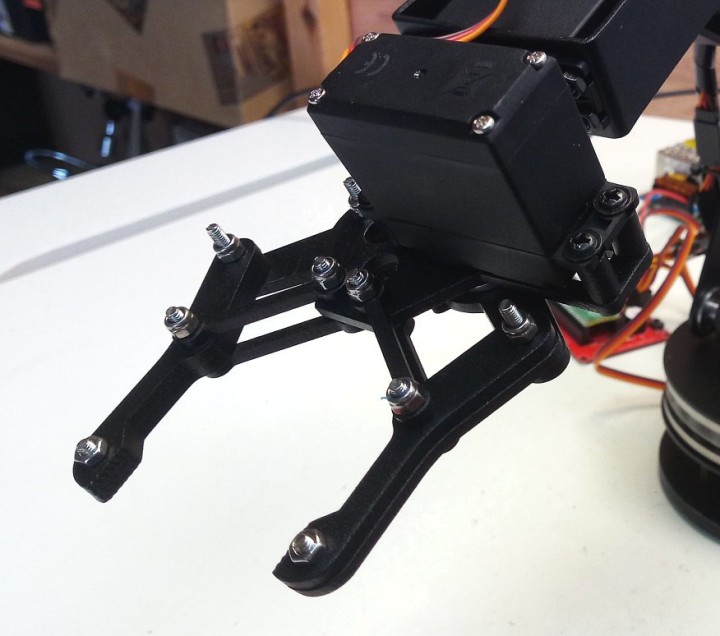
There are quite a few parts and even more nuts and bolts, but not all are consumed. Except for the acrylic baseplate, and the steel arm bone, all the parts are made from aluminum. Put together properly you don’t end up with a wiggly plastic toy but a with strong, solid metal arm. Even though everything is from aluminum, the assembled arm weighs 1.3 kg (without the power supply).
Educational Tool
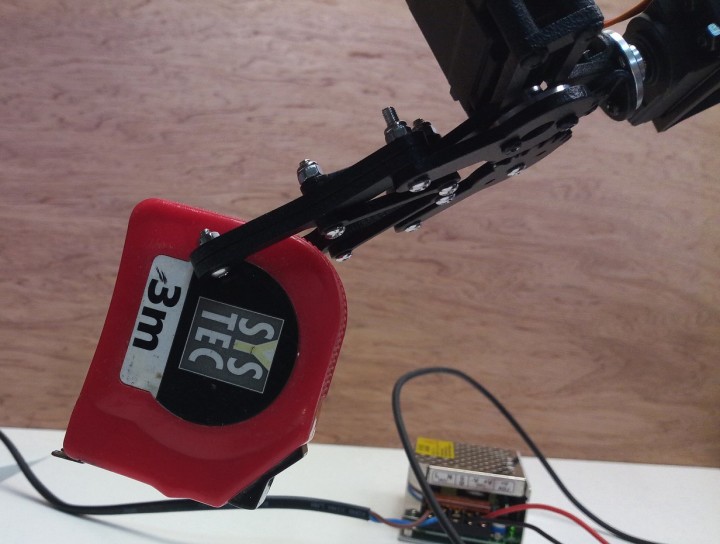
The 6-DOF robot arm is mainly an educational tool to teach programming in MicroPyhton. It is a fun object that can move in many ways, and it can pick up small items like its own power supply (approx. 6 cm × 4 cm × 8.5 cm). As a demo video sort of shows, you can for instance use it to play the Tower of Hanoi game. It is not suited for industrial applications or high precision tasks. It does have a grip, but I wouldn’t trust it with a tool in it.
Things You Might Want to Know First
Assembling the robot arm is not for quitters. The manual (not included, up to you to find it) is in Chinese only, and, on top of that, unclear and incomplete. There is also a short assembly animation video, but it is incomplete as well. Yet it can be done with a bit of patience and common sense as it is not a very complicated design. The only complex part, the grip, is pre-assembled. However, there are a few things that you need to know in advance (and that I found out the hard way):
- Be prepared to take things apart so you can assemble them again in the right way. Building it twice will probably give the best results.
- Start at the bottom, i.e. the baseplate with the rotating platform and work your way up.
- The large bearing of the rotating base is in three parts. I noticed a slight difference in spinning quality between the two possible assembly configurations, but in the end, it doesn’t seem to matter at all as it functions merely as a deadweight.
- Use the two red YF-6125MG servos first. My kit included three of them (one spare), but the manual and video use them everywhere. These servos are the strongest and can carry the most weight and therefore should go on the bottom part of the arm.
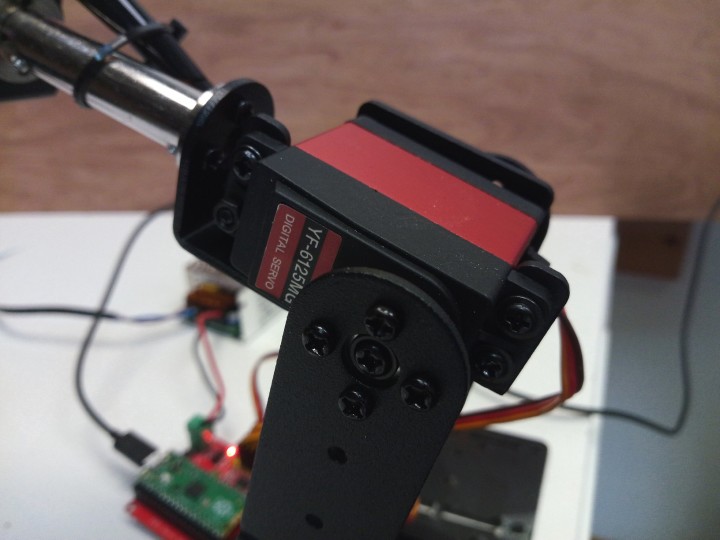
- Make sure all the servos are in their mid-position before mounting them. For the black MG 996R servos, you can do this manually/visually with a kind of servo pointer/arm (included in the kit). The red YF-6125MG servos, however, do not have end stops so you can’t see when they are in their middle position. I therefore ended up using the Pico for zeroing the servos on the fly, i.e. while assembling the arm. This may sound complicated but is actually rather easy to do. I would even suggest starting the assembly by setting up the MicroPython development environment and trying to run the demos with unmounted servos. Once you understand how to control the servos from MicroPython you can zero them and mount them in the arm.
- In all subassemblies the servo goes in last. They are generally to be fixed with the screws with the gasket (the Mexican hat type).
- Make sure to tighten everything well as it is difficult to do once the arm is assembled.
- The grip is pre-assembled and wiggly and so I tightened the self-locking nuts a bit. The result was that the servo controlling the grip burnt out as the grip had apparently become too tight to move (even though I could move it manually). Luckily, the kit includes two spare servos.
- There is no wiring diagram, there are six servos, and the servo connection header has eight positions. Fortunately, it is color coded, so getting the polarity right is easy. Connect the servos starting at the bottom. The lowest servo (the rotating base, ‘0’ or ‘A’ in the software) connects to GPIO16, the highest (the grip, ‘5’ or ‘F’ in the software) goes on GPIO21. The software allows remapping of the GPIO pins, and the spinning direction of each servo can be defined too, so you have some freedom here to correct things.
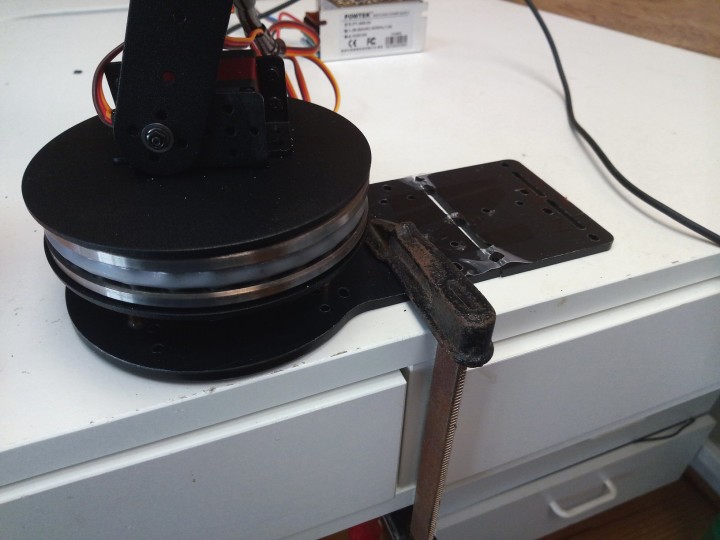
- The baseplate has many holes but not for attaching the Pico board or the power supply.
- Make sure the power supply outputs 5 V before connecting it to the arm. The output voltage can be adjusted from approximately 4.5 V to 6.5 V.
Be Careful!
Do not naively assemble the robot arm and run the demo without having tested every servo first. The arm may spin around and move wildly, swiping things from the bench or hitting you in the face. Its servos are powerful! I managed to make the arm snap its own 4-mm-thick baseboard due to a servo pushing down on hte bench instead of going up. Especially the red YF-6125MG servos move pretty fast, so watch out. I therefore strongly recommend fixing the arm to the bench or to a heavy plate and keep the space around it clear.
Also note that the red YF-6125MG servos do not have end stops and may go the wrong way around to reach their target position. This may happen when the arm folded down and then powered up. I therefore also highly recommend stretching the arm to its upright position before switching on the power.
Not For Sissies
The 6 DOF Robot Arm with Raspberry Pi Pico from Makerfabs is not a kit for sissies. Assembling it properly requires patience and perseverance. Even though the arm is quite easy to use thanks to its driver and demo written in MicroPython, it should be tamed step by step or accidents may happen. Its servos are fast and strong, and the arm is 44 cm long when fully extended (50 cm including the rotating base). Bolting it down to the floor in the center of a square meter void of any objects is highly recommended. You don’t want it to smash your laptop or swipe your coffee mug off the table, do you?
Discussion (0 comments)