
Review: JOY-iT DPS5005 Programmable Lab Power Supply
Switching on the first time
Connect a lab power supply and set this to (for example) 15 V and 1 A. As soon as the power supply voltage is present, the noise from the fan becomes immediately apparent; the module shows, after an intro, the main menu on its display. By default, 5.0 V and 5.1 A current limit are set. The voltage can be turned on by pushing the ON/OFF button. Settings can be changed with the buttons V/↑ and A/↓ and also with the SET button, with which the data settings menu appears. With a push on the rotary button the individual digits can be selected, one after the other, and changed with a twist of the button. The input voltage has to be at least 1.1 times the maximum desired output voltage, so for a 50 V output voltage, 55 V is required. The is also the absolute maximum allowable input voltage; this may not be exceeded! I noticed quite quickly that when the output voltage (“inadvertently”) was set higher than should be possible, a weird value sometimes suddenly appears. The voltage then has to be corrected. Fortunately, the input voltage is displayed on the main menu. If the input voltage disappears briefly (or after switching off and on) the previous settings are present. The current settings are always in data group M0 and are then retrieved again once the input power supply voltage returns.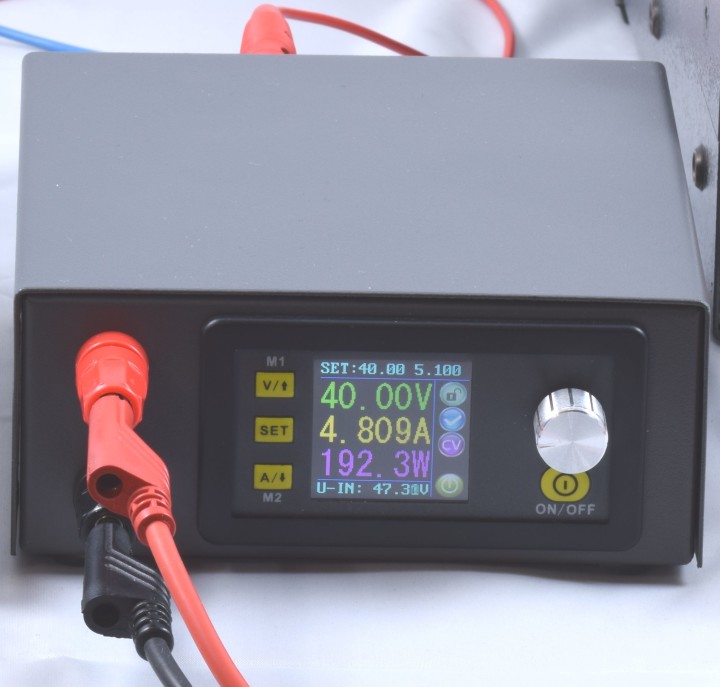
Menus and settings
I'm not going to repeat the manual and only mention the features and characteristics. The first line of the main menu shows the output voltage and current limit that are set. The three lines below that, in larger digits, show the current values after switching the output on (voltage, current and power are all 0 when switched off). The bottom line shows the input voltage. This is very convenient; you have an indication of the state of the power supply that supplies the input voltage. Keep in mind the 1.1 factor! On the right are respectively, lock/unlock keyboard, normal/abnormal status, constant voltage/constant current (CV/CC), data group (M0...M9, by default these are empty) and output active/inactive.
With a push on the SET button you enter the data setting menu.
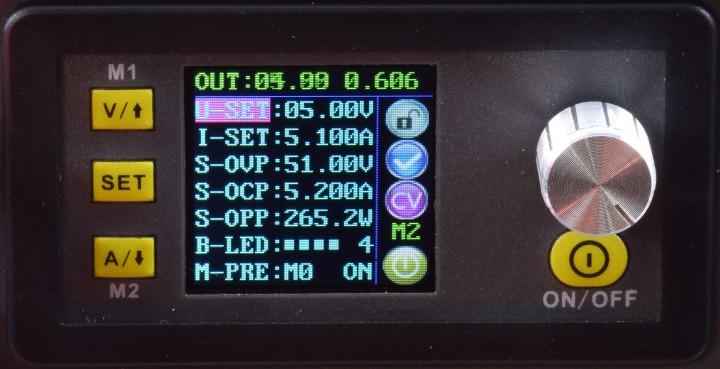
- setting of the output voltage U-SET and current limit I-SET;
- setting of safeties Over-Voltage-Protection S-OVP, Over-Current-Protection S-OCP and Over-Power-Power-Protection S-OPP;
- also the brightness of the display can be set with B-LED;
- by default you set data group M0; with M-PRE the other data groups M1…M9 can be set and stored.
A data group can be selected in the main menu using the rotary button (first press the SET button for 3 seconds and then push the SET button again the select that group). M1 and M2 can be selected directly by pushing V/↑ and A/↓, respectively, for 3 seconds. The setting of the data groups is not really all that convenient: push the SET button too quickly and you have to start all over again.
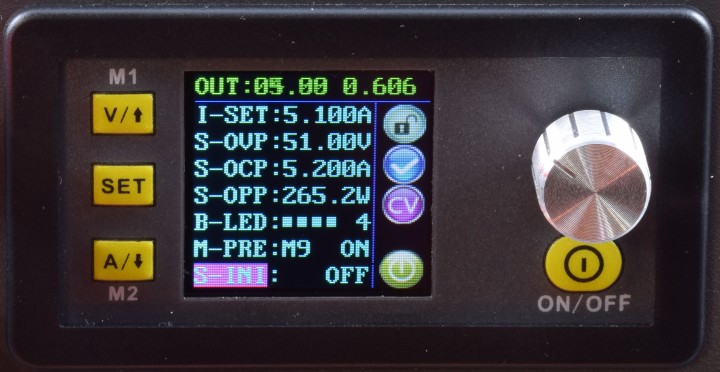
Using the last menu item, S-INI, the output can be switched on immediately at power on, without first pushing the ON/OFF button first (read more about this in the manual).
Read full article
Hide full article
Discussion (0 comments)