
Review & Raffle: pi-top 3 turns Raspberry Pi into STEAM engine
Assembling the pi-top laptop
The people that designed the pi-top did a great job of making its assembly as simple as possible. This video shows just how easy it is (saving me a lot of typing in the process ;-).However, I do want to highlight an important step here which has become necessary with the appearance of the RPi 3 model B+, and this concerns the thermal pad stuck on the heat sink.
Thermal pads
The CPU on the RPi 3 model B+ is taller than the ones on the older boards and therefore needs a thinner thermal pad than the other RPis. Thermals pads for both board types are included in the kit but it is up to the user to stick the correct one on the heat sink before completing the pi-top assembly.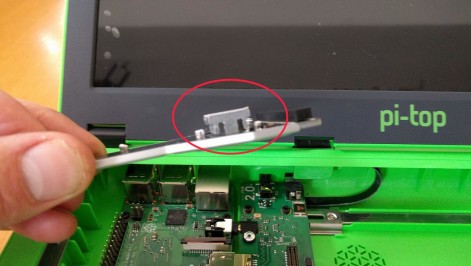
Accept the licence
When the pi-top is assembled, it is time to fire it up for the first time. The battery of my pi-top was precharged so all I had to do was press the power button. The pi-top boots into a graphical user interface (GUI) and lets you set some localization parameters (keyboard layout is US). When done you are presented with a software licence agreement that must be accepted in order to continue.The licence states that the pi-topOS may only be run on a pi-top or a pi-topCEED and only on one, i.e. a single hardware device. This means that it is not allowed to create an application on the pi-top and then simply copy the SD card contents to another card to run it on another RPi.
MicroSD card removal tool
This brings me to a related subject: the microSD card that holds pi-topOS. Once the RPi with its microSD card inserted in the pi-top it is no longer possible to remove the microSD card. Or is it?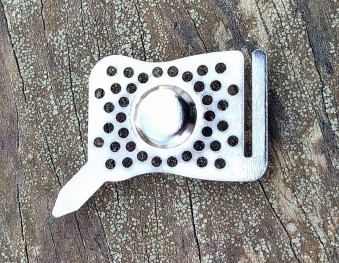
Actually it is as long as you didn’t lose the pi-top Multi-tool, that strange-looking little metal object stuck on the Modular Rail. Pretty useless as a screwdriver — try to use it on the RPi fixing screw in the top-left corner, or any other screw for that matter — it works fine for sliding the microSD card in or out.
After accepting the licence, connecting to the internet, installing upgrades and watching the walk-through the user is requested to create a pi-top account (yes, yet another account). This account is required to use pi-topCODER without losing all your work.
Conclusion
The pi-top laptop is one of the most fun products I have ever had the chance to review. The hardware is very well designed and the build quality is great. This is definitely not some cheap plastic laptop surrogate; the assembled pi-top is a real Raspberry Pi computer with a large screen, a perfectly fine keyboard, and a battery.Assembling the hardware is as easy as can be, and so is the software installation — just insert the microSD card and away you go.
Since the main objective of the pi-top is STEAM education the OS comes preconfigured with several educational tools, mainly targeted at programming. Besides playing with for instance Scratch and Minecraft the user can connect to a pi-top account and gain access to a large collection of online coding exercises. To make coding less abstract, the included Inventor Kit offers the opportunity to construct simple electronic circuits to interact with the user programs.
Finally, pi-top is not just a tool for people wanting to learn programming; thanks to pi-topCLASSROOM it is also an excellent tool for computer science teachers.
Of course, not everything is perfect. The thing I am missing is a slot in the back to pass breadboard wires through. There are some quirks in the software, some mistakes in the exercises, and documentation may be lagging behind here and there but overall the pi-top is an excellent product.
The registration period is over.
By completing this form you enter a prize giveway of a pi-top.
Read full article
Hide full article
Discussion (0 comments)