
Review: Walabot Creator - an extraordinary 3D-sensor
Threshold & Resolution

In practice you will quickly realise that the Threshold setting is perhaps the most important parameter for obtaining meaningful measurement results. With this, you set the threshold such that 'noise' is taken out of consideration. A threshold that is too low gives all kinds of 'false triggers' – the sensor is then too sensitive and various artefacts fill the screen. Set the threshold too high and objects are filtered out and overlooked.
The parameter Resolution mainly affects the refresh rate of the image. The smaller the number, the smaller are the pixel sizes in the z direction and therefore more pixels need to be calculated and drawn in the z-axis direction, which influences the measuring rate. And of course, the other way around too, the bigger the number, the larger the pixel size and the fewer pixels fit in the view.
Breathing?
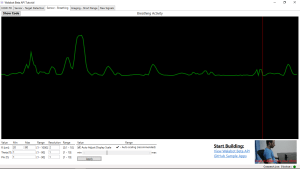
The next tab page in the software is ‘Sensor – Breathing’. Here the designers have created a configuration for sensing the breathing of a person who is in front of the sensor. Here too, the R, Theta, Phi and Resolution parameters can be adjusted. However, the default values are considerably different from those in the previous tab page, which already indicates that an entirely different measurement is being made. Two new parameters for ‘Value’ and ‘Range’ have been added and default to 'Auto' (and the Threshold and Moving Target Indicator have been omitted).
We have to admit that this application sounds very interesting for the medical world and perhaps we haven't experimented sufficiently with the parameters, but detecting our own breathing proved to be very difficult. Every movement of our upper body towards the sensor and away from the sensor was detected with quite high sensitivity, but when we remained motionless the device told us we were breathing just as much as a sack of potatoes. A bit disappointing. A mitigating consideration could be that such a measurement depends on a lot variables, but that will likely be no less in a practical (medical) application.
Even more tab pages
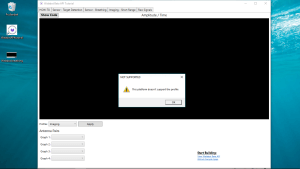
There are two more tab pages in the program that we have not discussed. The two functions that are behind these are however not available for the Walabot Creator.
Conclusion
Observant readers will have noted that one dimension is not found in the Area; when the sensor is positioned horizontally, the vertical position is not indicated in the software. At least, we have not been able to discover it in the software. Probably this information is available 'behind the screen' somewhere and for this you may have to dig (deep?) in the code, but it is unfortunate that this is not just shown in the user interface.
To be honest, it looks to me that integrating the Walabot into a system will be a considerable challenge, also because of the complexity of the entire setup and the 3D capability of the sensor. Perhaps a bridge too far for the sporadic weekend-hobbyist-electronics-enthusiast, but potential it certainly has.
Further background information about the operation of the sensor and the various implementations you can find here.

You will receive a good first impression from the short video clip below. From there you can then continue to the Walabot Youtube channel, where there is a respectable amount of video material about the sensor to be seen.
Discussion (2 comments)