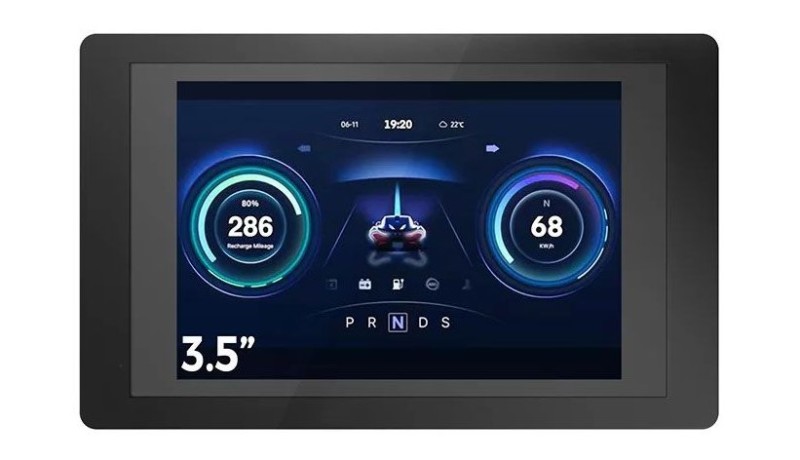
The Elecrow ESP32 Terminal is an ESP32-S3 driven handheld device with a 3.5″ 480 × 320 TFT capacitive touch display and a multitude of possibilities. The device can be a nice addition to your projects if you need a touch-capable display with interfacing possibilities.
The Elecrow ESP32 Terminal is an ESP32-S3 driven handheld device with a 3.5″ 480 × 320 TFT capacitive touch display and a multitude of possibilities. The device can be a nice addition to your projects if you need a touch-capable display with interfacing possibilities. The display based on an ILI9488 display driver has a 16-bit color depth; its touch capabilities are handled by an FT6236. Both chips are well-supported by the Arduino community.
ESP32 Terminal Enclosure
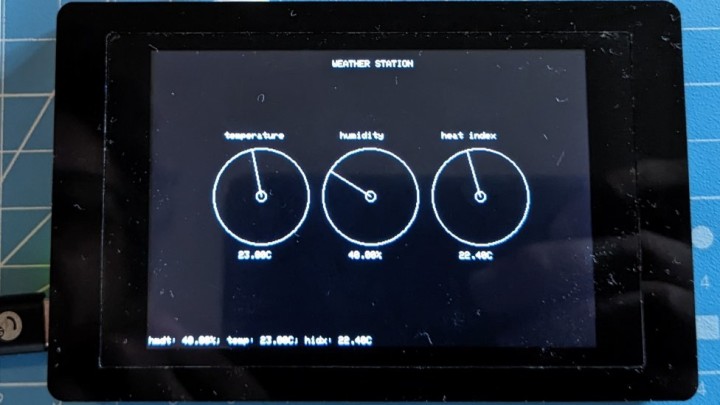
The ESP32 Terminal is housed in a black acrylic shell, which makes it feel robust, certainly not a fiddly plastic housing. A battery connector is present, with LiPo charging circuitry, but it would be more portable if there was a battery present in the device. If you want to make your project portable, you’ll need to add a battery pack to the back. There are two M3 mounting holes at the back that you can use to attach a backpack or mount it to a wall. The ESP32 Terminal in its black enclosure showing weather data.
ESP32-S3 MCU
Looking at what powers the device, I’m always amazed by the incredible amount of computing power packed in modern MCUs. The ESP Terminal is powered by an Espressif ESP32-S3, which houses a 32-bit dual-core XTensa LX7 MCU running at 240 MHz. Compare that to the original Arduino UNO with its 8-bit Microchip ATMega328 running at 16 MHz!
The MCU has 512 KB of SRAM on board, together with 8 MB PSRAM. PSRAM stands for pseudo-static RAM, a kind of external static RAM, which in the case of the ESP32-S3 is connected via an SPI interface to the MCU.
As wireless connectivity goes, we have 2.4 GHz Wi-Fi (2.4 GHz 802.11 b/g/n) and Bluetooth 5 LE. I wasn’t aware of this, but Bluetooth 5 has long-range capabilities, and this module claims to support it. Long-range mode extends the range from 10–30 meters to more than one kilometer.
Subscribe
Tag alert: Subscribe to the tag ESP32 and you will receive an e-mail as soon as a new item about it is published on our website!
Connecting to the Physical World
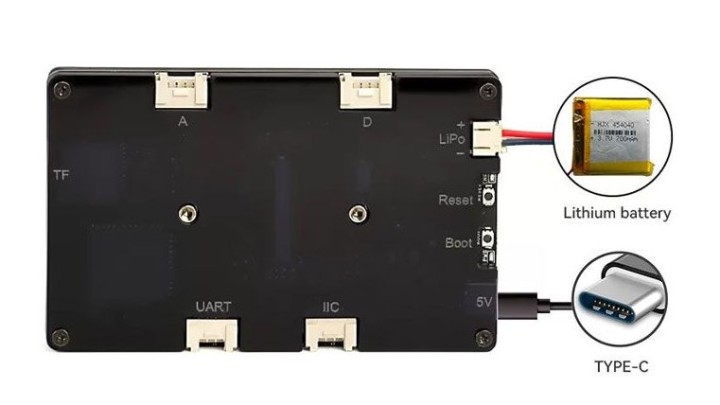
The ESP32 Terminal has a battery connector and an on-board LiPo charger. You can use the USB-C connector to power the device, but also to charge the LiPo battery.
There’s also a micro-SD card slot, handy if you want to store a few images or other (graphical) assets like webpages for your application.
The module's sides have a total of four ‘Crowtail’ ports. These are all 4-wire interfaces compatible with Grove from Seeed Studio. There’s one digital, one analog, one serial (UART) and one I²C connector, enough for simple projects. If you need more, you can use the I²C port as a breakout. The four 'Crowtail' ports are visible on the rear side.
Programming the ESP32 Terminal
Uploading firmware happens through the USB-C cable, over a serial connection exposed by a CH340 USB-to-serial converter. I had no luck trying to get this to work with my MacBook, for which I tried to install the official driver. Luckily, I still have my old Linux laptop, which runs Ubuntu and that works perfectly!
The first thing I wanted to try out was running some flavor of Python on the device. That turned out to be difficult. Although the documentation says it can be programmed with Python and MicroPython, I could not find a ready-made downloadable firmware.
Reading through their website, there are numerous examples and a tutorial for Arduino, so that’s what I started to use for my demo applications.
UI Design
According to the webpage of the ESP32 Terminal, the device is LVGL certified. LVGL stands for Light and Versatile Graphics Library, which is an open-source embedded graphics library for creating UIs for various MCUs and display types. Although the library itself is open source, a closed source drag-and-drop layout editor, Squareline Studio, is available as well.
I installed the trial version and although it is a bit overwhelming at first sight, I quickly managed to draw up a simple UI for the servo project below. If creating UIs for embedded devices is your goal, then it is worthwhile to invest some time to learn this product.
Two Small Projects
I decided to create two example projects. The first project is a small weather station, where we draw our own user interface using line and circle primitives. The second project is an example where we control a servo from a user interface designed with Squareline Studio.
Weather Station
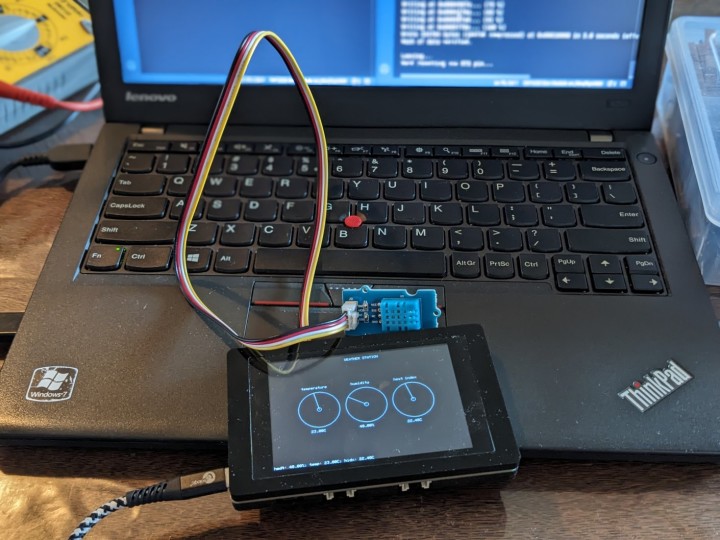
For the weather station, we use a DHT-11 sensor, which can sense temperature and humidity. It has a digital one-wire interface and is well-supported by Arduino. For this project, I chose the Adafruit DHT library. It is part of a set of sensor libraries sharing common code, and therefore we also need to install the Adafruit Unified Sensor Driver library. Add a DHT-11 sensor and some code and you have a simple weather station.
In this project, I decided to create my own UI from scratch, using primitives to print text and create some line graphics. For this, I used the LovyanGFX LCD and e-Ink graphics library, another open-source graphics library.
After initializing the screen, for which I just copied one of the examples from the ESP32 Terminal website, we read the DHT-11 sensor. This gives us three values: temperature, humidity, and the heat index. The heat index is a temperature adjusted by the actual humidity. These three values are displayed in a simple dial, drawn using two circles and a line as the pointer. We update the screen every two seconds with a new reading.
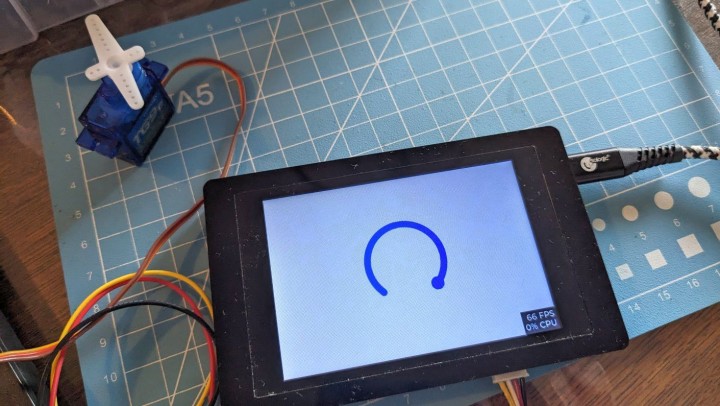
Servo Controller
For the servo controller, I wanted to try the Squareline Studio tool to create the UI. A slider in the form of an arc is the only widget used. The range of the slider is set from 0 to 180, corresponding to the angle of the servo.
When you design a UI for the ESP32 using this tool, you’ll need to start from the ‘Arduino with TFT_eSPI’ template and set the color depth to 16 bits and the resolution to 480 × 320. After exporting the generated code, you’ll need to unzip it into a directory named ‘ui’ in your Arduino ‘libraries’ folder. Normally, you find this ‘libraries’ directory in the same directory as where your Arduino sketches live… I took me some time to figure this out.
The servo is driven by the ESP32Servo library. The standard Arduino servo library does not work with the ESP32.
The code is elementary as in the ‘loop’ function we read the angle of the arc slider, which returns a number between 0 and 180, and then send that value to the ‘servo.write’ function. The circular slider controls the position of the servo.
You can find the source code of both projects in the download section of this article. I did not include the ‘libraries’ folder in the download, as it is (far) too big. Installing the dependencies yourself is not complicated.
Conclusion
The ESP32 Terminal from Elecrow is not that easy to tame as I hoped, but it has a lot of potential. If you want to invest the time to learn the LVGL library or another UI library, and you are comfortable with Arduino, then with the ESP32 Terminal you can add a user interface with touch control to your next project.
It would have been easier if MicroPython firmware had been available for download on the product site. I searched around a bit on the Internet, but could not find anything. It is certainly doable to compile your own, and maybe that’s a nice idea for your next project?
Elektor Magazine has been one of the leading sources of information on electronics for engineers, designers, start-ups and companies for 65 years. Our magazine is powered by an active community of electronics engineers – from students to professionals – who are passionate about designing and sharing innovative ideas.
For them, we publish hundreds of items a year, in formats such as articles, videos, webinars, and other learning formats. Our mission is to share knowledge in every possible way and inspire readers with the latest developments within the electrical engineering sector.
Thank you for your vote!
Leave further comments in the fields below.
Thank you for your vote!
If you wish to leave a comment with your rating, please first use the login below. If not, just close this window.

Discussion (2 comments)