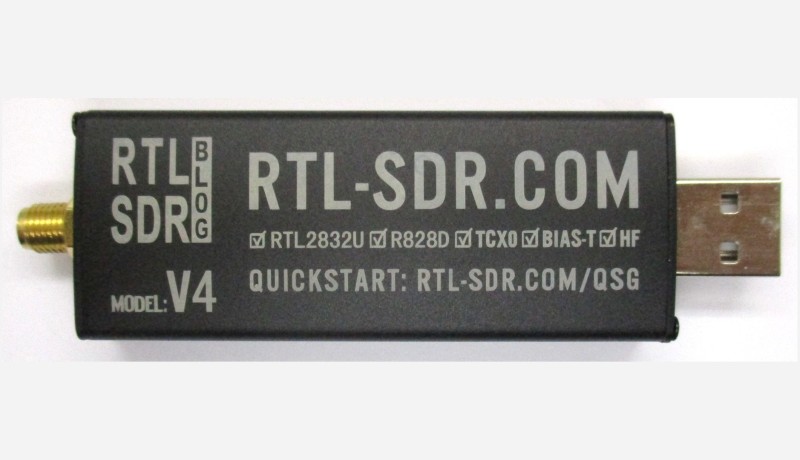
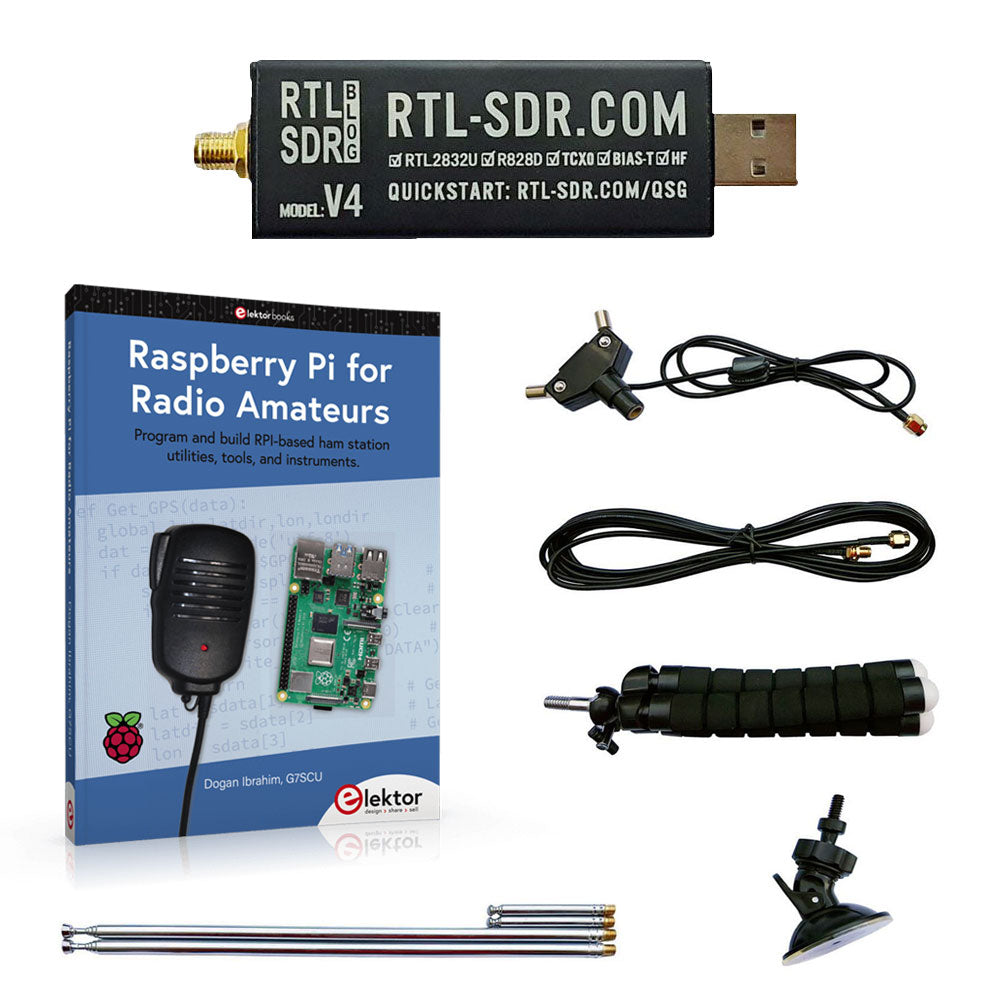
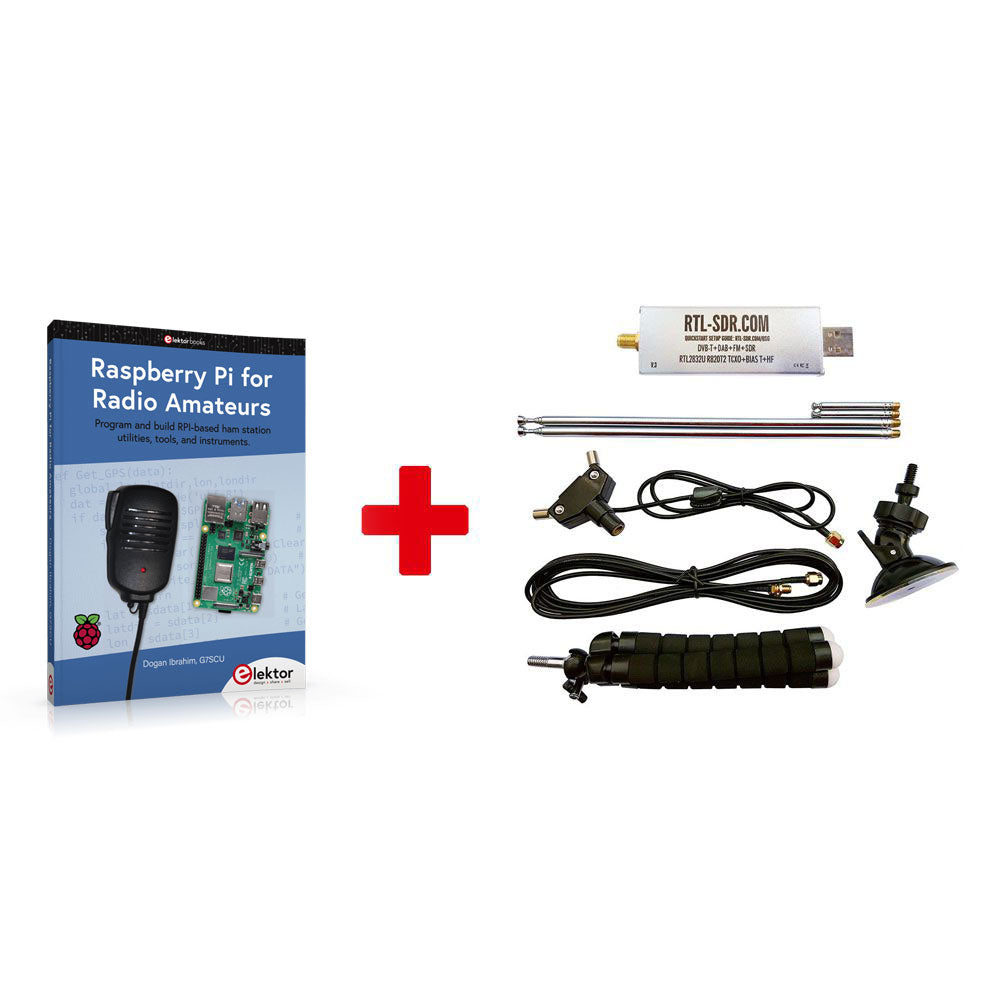
RTL-SDR Blog sticks have been around for a while. They can receive HF signals up to 1,000 MHz or higher. The RTL-SDR Blog V4 is the fourth generation. In this review, we’ll take a closer look at it and see how it differs from its predecessor V3.
RTL-SDR Blog sticks have been around for a while. They can receive HF signals up to 1,000 MHz or higher. The RTL-SDR Blog V4 is the fourth generation. In this review, we’ll take a closer look at it and see how it differs from its predecessor RTL-SDR Blog V3.
Preferred Software
The preferred software for the RTS-SDR stick is SDR-Sharp. After the initial installation, a frequency in the FM band is usually displayed first. There are always enough strong stations for testing. The reception is smooth and provides good sound.
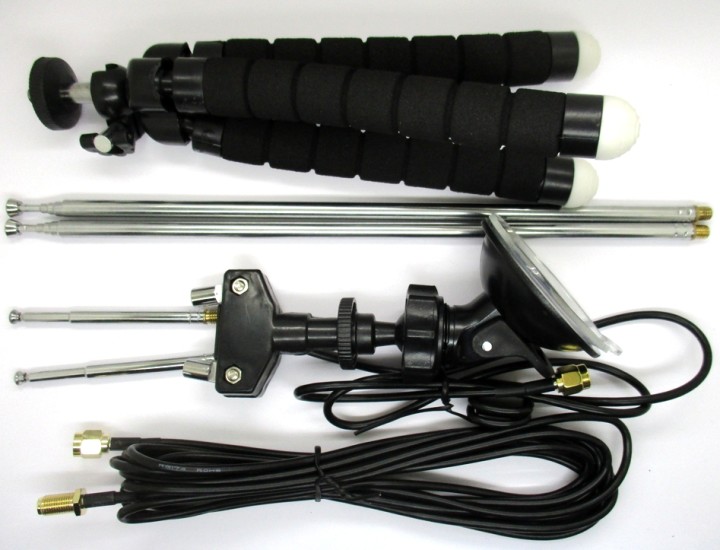
As a next step, you might search for amateur radio stations in the 2-meter band or the 70-cm band using narrowband FM, or perhaps listen to AM aviation communication or track the signals of a radio thermometer. There are so many signals that it's challenging to keep track. Dipole Antenna Kit for the RTL-SDR Blog V4.
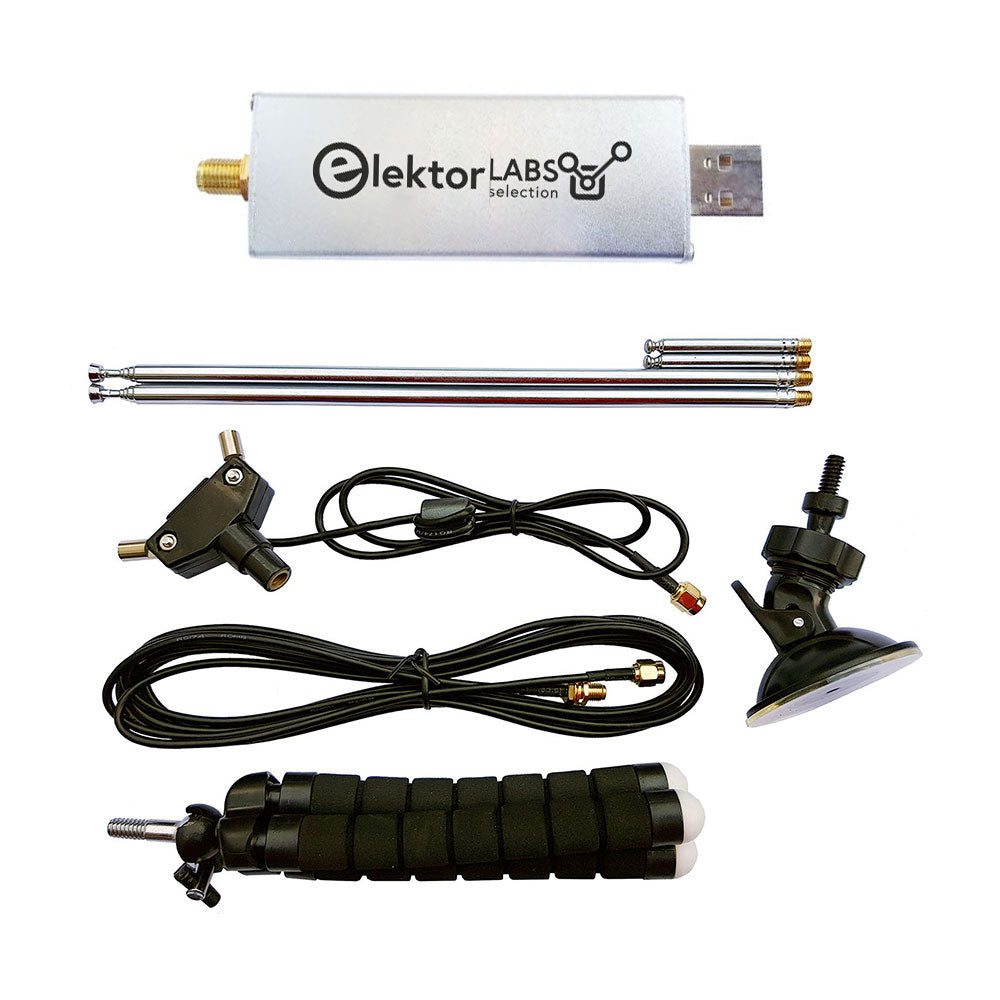
RTL-SDR Blog V4 Dipole Antenna Kit
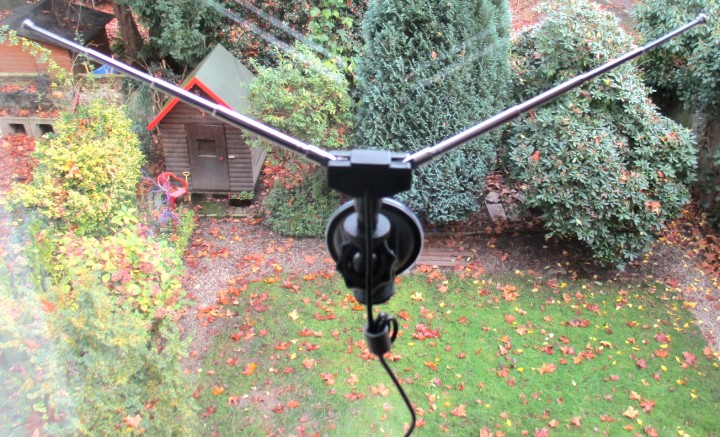
The RTL-SDR Dipole Antenna Kit is a good way to get started if you don’t already have one or more suitable antennas. It contains various cables and antennas. There are 14 cm short and 1 m long telescopic antennas, each of which can be combined into a dipole. A holder with a rubber suction cup can be used for attachment to the window. The antenna can be stuck on e.g. a window.
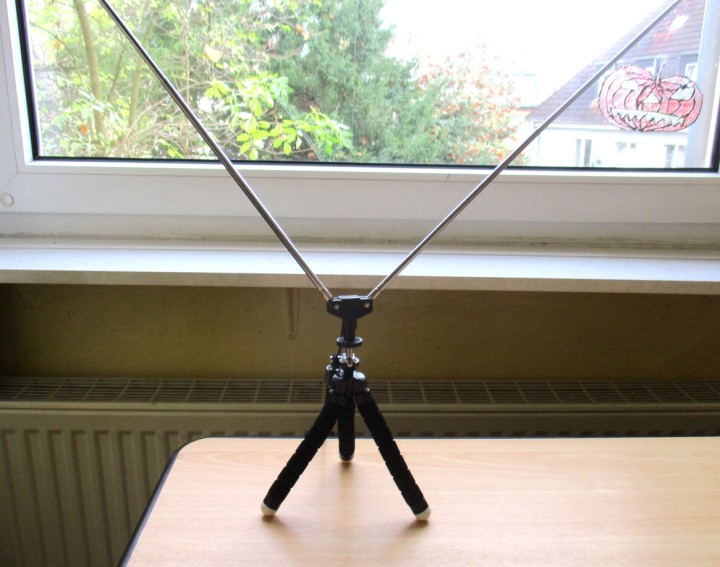
The connection cable has a ferrite core with two turns of the antenna cable. This common-mode choke near the base of the dipole antenna serves both to balance the dipole connection and to help attenuate interference signals from the PC to the antenna. The dipole antenna on a tripod.
The tripod is better suited for the long antenna rods. An optimal dipole size can be set for each frequency up to a wavelength of 4 m.
Shortwave Reception
My personal interest is more focused on even longer wavelengths, especially in the shortwave range. With the first SDR sticks, there was a clear lower limit to the frequency. I then built a converter with a ring mixer and quartz oscillator to convert shortwave to higher frequencies. It worked, but was not perfect. There were too many RF signals coming from the device itself and the PC. Often, amidst all the phantom signals, the actual antenna signals were no longer found.
Subscribe
Tag alert: Subscribe to the tag RF and you will receive an e-mail as soon as a new item about it is published on our website!
Use Direct Sampling
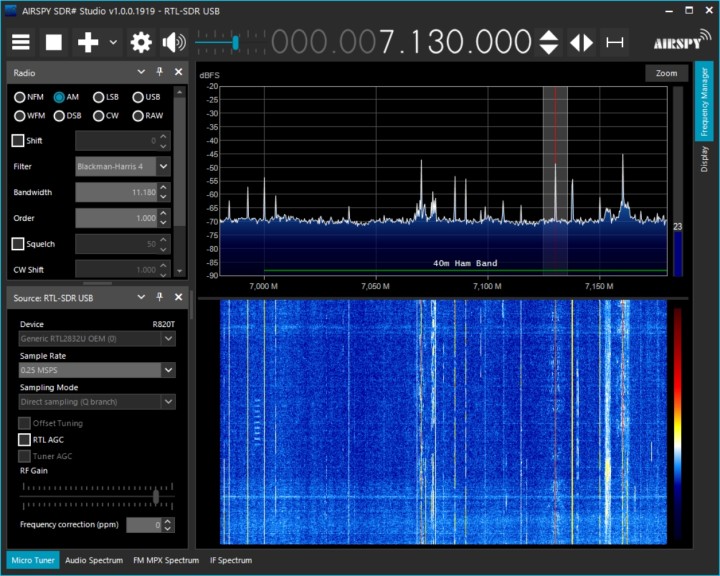
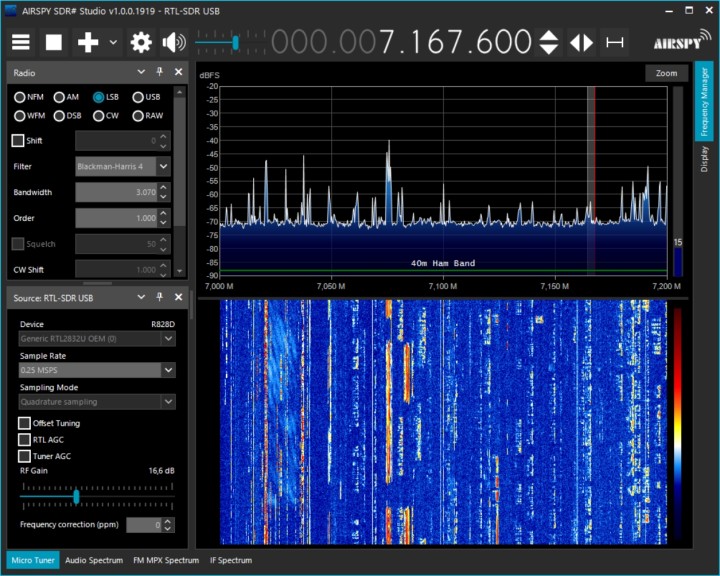
Later, there was the RTL-SDR Blog V3, which had a setting specifically for the lower ranges. The first mixer in the device was bypassed, and the antenna signal was processed directly by the AD converter. In SDR-Sharp, you have to open the stick settings with the gear symbol and choose Direct Sampling (Q-Branch) as the sampling mode for the lower frequencies, while Quadrature Sampling applies to the higher frequencies. The 40m Band with the RTL-SDR Blog V3
Too Many Phantom Signals
Direct sampling sounds perfect, but there were still too many phantom signals, overload, and intermodulation products even with version 3. When connecting a long antenna, I could find signals in all areas that didn't belong there. The spectrum shows the reception of alleged AM stations in the 40m amateur radio band, which result from overload. Admittedly, the antenna was very long, spanning 20 m and suspended up to a height of 15 m. However, the reception time was around noon, where overly strong signals are not expected. Probably, you can improve it a bit with a preselector and an adjustable attenuator.
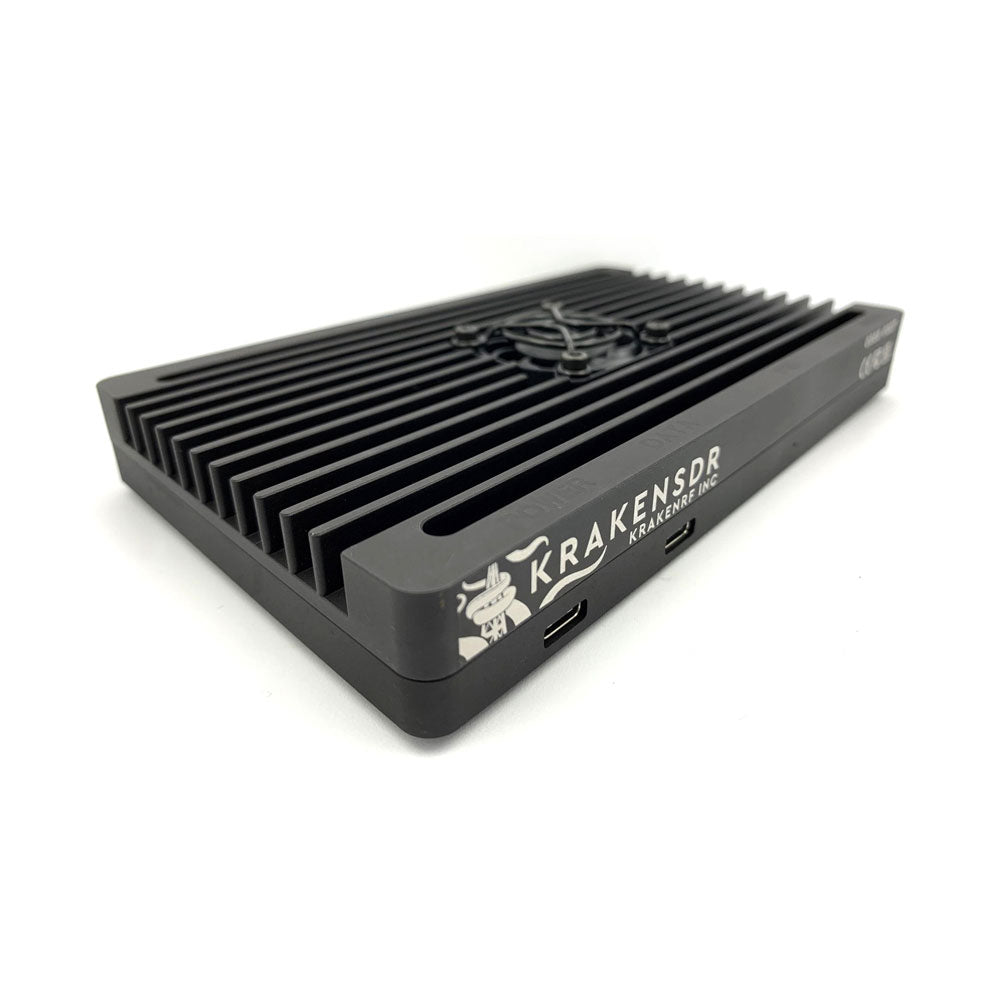
Enter RTL-SDR Blog V4
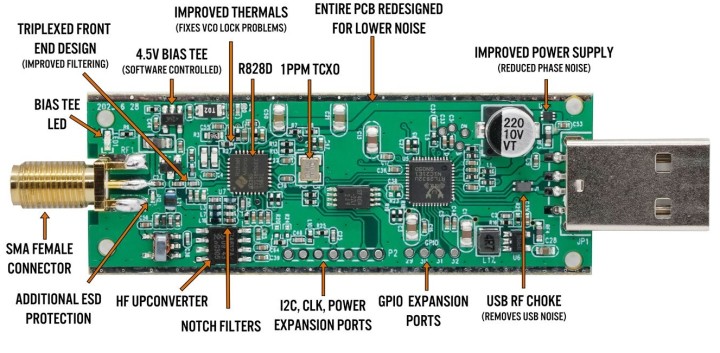
Now, with the announcement of RTL-SDR Blog V4, I was naturally interested in the changes. The manufacturer provides a photo of its insides. And what immediately catches the eye is the HF upconverter. You can even see that the well-known mixer SA612 is being used. My first thought was that this IC is not infinitely overload-resistant either. On the other hand, they wouldn't have installed it if improvements couldn't be achieved. And at other points on the board, you can clearly see efforts to minimize interference signals. I was all the more curious about the test under real conditions. Functional blocks of the RTL-SDR Blog V4
Subscribe
Tag alert: Subscribe to the tag RTL-SDR and you will receive an e-mail as soon as a new item about it is published on our website!
Cleaner Reception up to 1 GHz
The first test was very positive. First, I tried it on FM and achieved the usual good results. There are numerous settings for the sampling rate, from 0.25 MSPS to 3.2 MSPS. The higher the sampling rate, the larger the simultaneously visible spectrum in the spectrum display. On the other hand, it is easier to tune in a station precisely if you choose a slightly narrower range. And some settings cause more interference, which usually appears in the form of numerous spikes. So, you should test which settings provide the cleanest reception. This also applies to higher frequencies, such as the upper amateur radio bands. Overall, reception up to 1 GHz has become significantly cleaner than with V3.
Shortwave with the RTL-SDR Blog V4
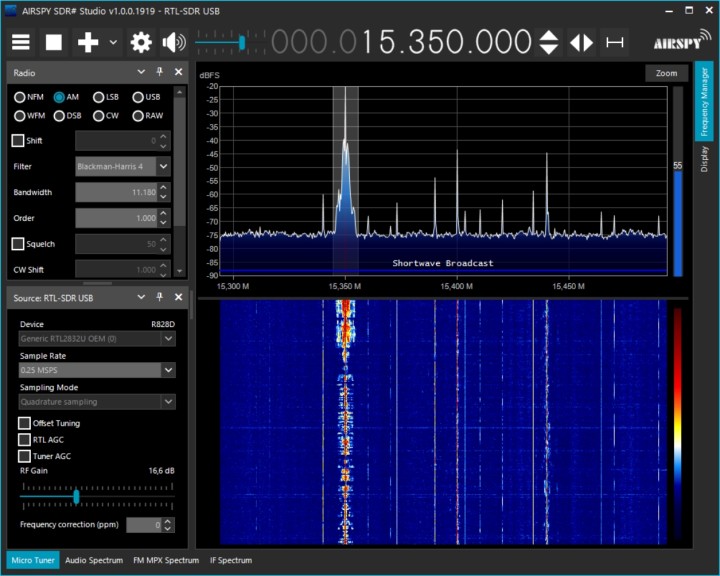
And now comes the test on shortwave: Unlike V3, the sampling mode remains unchanged at Quadrature Sampling. The receiver automatically recognizes when it needs to enable the upconverter. For the user, this means that they can tune continuously from zero to 1000 MHz. AM stations in the 19-meter band.
A first attempt in the 19m broadcast band shows a crystal-clear reception of a station from Turkey at 15350 kHz. Numerous weaker stations are also visible, but no interference signals. Apparently, there is no overload and no phantom signals. If I push RF Gain up, the background noise increases just like the useful signals, but no new signals are added. This proves that the RTL-SDR Blog V4 is overload-resistant. 7 MHz SSB at noon.
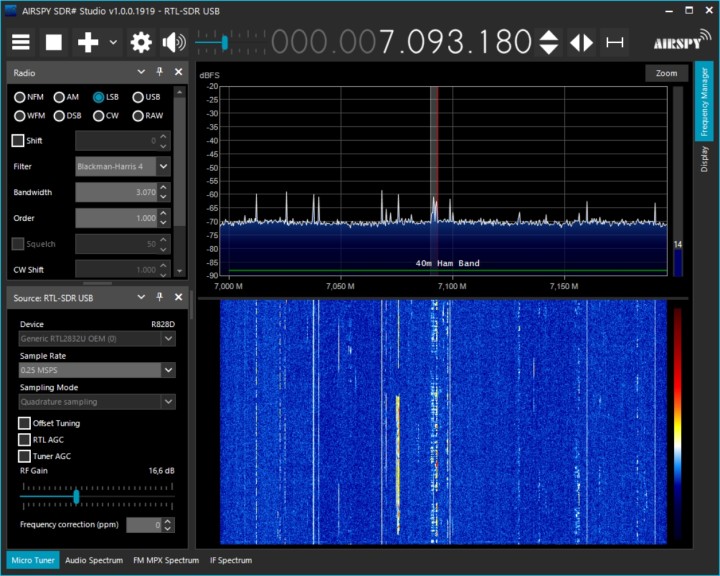
The 40m Band
A test in the 40m amateur radio band shows the weak signals typical for noon, but no signals that don't belong there. An SSB station from Italy could be received clearly. In the waterfall diagram, you can also see many CW stations and the FT8 area. The reception quality is comparable to typical amateur radio devices or the Elektor SDR Shield. The 40m band is much busier around 6 p.m. In this situation as well, the RTL-SDR Blog V4 shows no signs of overload. The 7 MHz band in the evening.
FT8 Stations
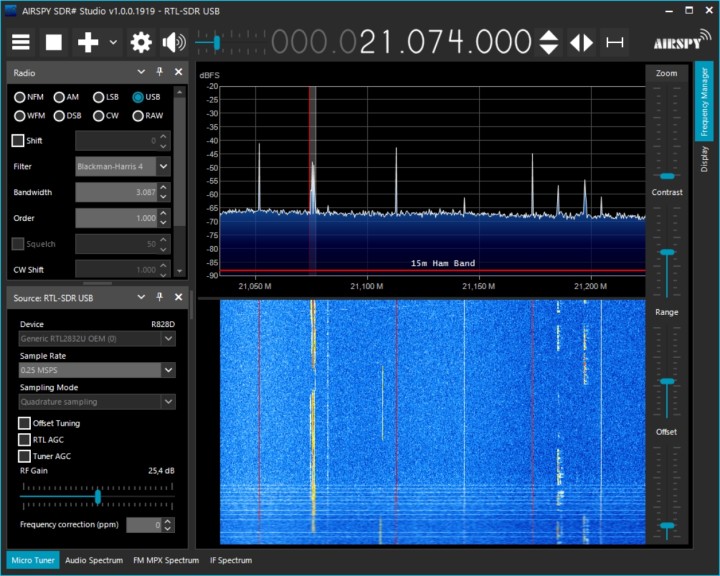
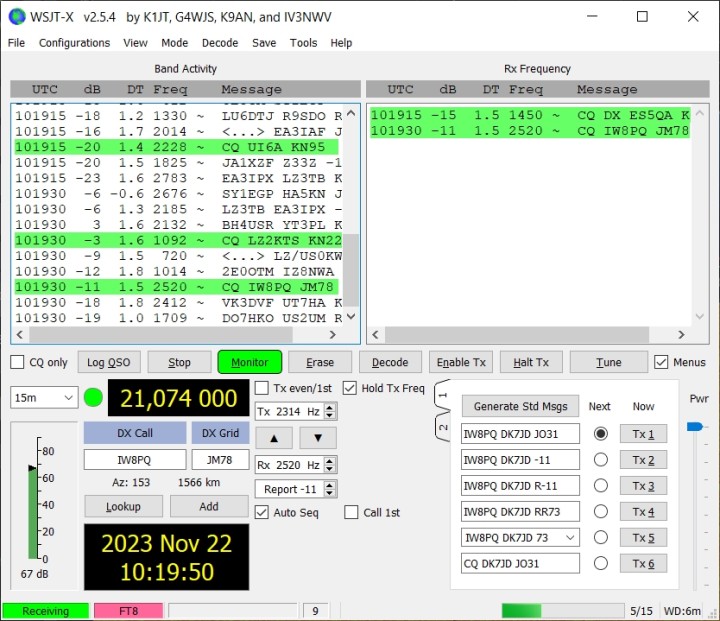
Higher shortwave bands, where my other receivers struggle, are also interesting. On 10m, some CW stations were audible. And for the first time, I was able to scan the 50 MHz band. In the 20m band, radio beacons were received at 14100 kHz, and in the 15m band, I could follow numerous FT8 contacts at 21074 kHz. FT8 signals at 21074 MHz.
WSJT-X was used to receive FT8 signals. The audio signal must be redirected from the speaker to a virtual audio cable, whose output ends up at WSJT-X. Receiving FT8 stations.
DRM
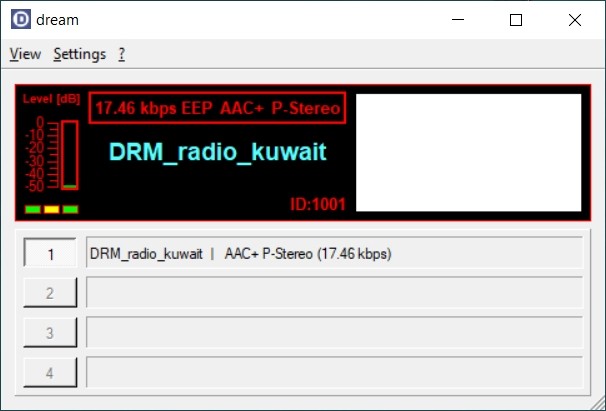
By chance, while scanning shortwave, I found one of the last remaining DRM transmitters, recognizable by a 10 kHz wide apparent noise band. It was Radio Kuwait. Here, too, the virtual audio cable helped to pass the signal to the DRM decoder DREAM.
Receiving a DRM transmitter.
Medium Wave
Later in the evening, I also tested medium wave, simply with the shortwave antenna directly at the input. In fact, I could clearly receive numerous European stations. The fact that it works so well even without a preselector is another indication of the receiver's resistance to large signals. The RTL-SDR Blog V4 actually brings a significant improvement here!


Discussion (3 comments)