
Review: add photographs to your PCB with Eurocircuits’ PCB PIXture
Any image can be a PIXture
You must first upload at least one image before you can place a new object on the board. Click one of the three types and a dialog will open asking you to select an image file (supported formats are JPEG, PNG, TIFF, GIF and BMP). When the image is loaded, it is stored in what you can call a temporary library from where it is accessible again and again until you finish the project.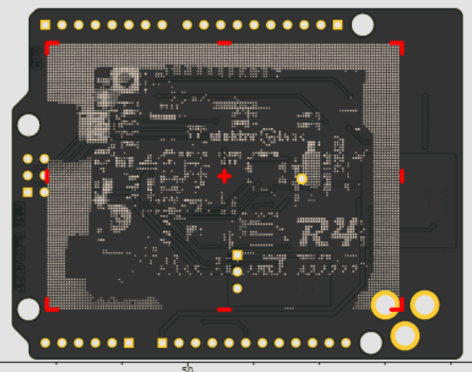
To use an image click once again the PIXture type of your choice to open the properties of the object you are about to place. The height and width can be adjusted (note that the aspect ratio is fixed) and the object can be rotated in steps of 90 degrees. Move the mouse cursor over the board to drop the object. After placing the object its size can be adjusted simply by dragging a corner or a side, and repositioning it is possible too.
According to a warning message printed under the object’s properties, objects must fit entirely inside the board’s outline otherwise they will not be placed. However, the demo video shows two objects that clearly do not fit the board, so what the effect will be may be uncertain. When in doubt, ask Eurocircuits.
Manipulating PIXtures
PIXture objects can be placed on both sides of the board (use the ‘Switch view to … side’ button) and all types can be mixed. There does not seem to be a limit to the number of objects you are allowed to place, so eat your heart out.PIXtures can be deleted too, of course. To do so, first select the object by clicking inside it and then click ‘Delete the selected object’. A selected object will have a red outline; an unselected object is a goldish yellow.
Read full article
Hide full article
Discussion (0 comments)