The RC-RICK-868 is a radio modem with a UART interface using LoRa modulation, designed for easy point-to-point communication. Let's take a look.
In this review, we'll take a look at the RC-RICK-868-EV, which is a kit made by Radiocontrolli for evaluating one of their many radio modules. In this case, the RC-RICK-868 is a radio modem with a UART interface using LoRa modulation. It's designed for long-distance communication in a point-to-point configuration, rather than for connecting to LoRaWAN networks.
Unboxing and First Impressions
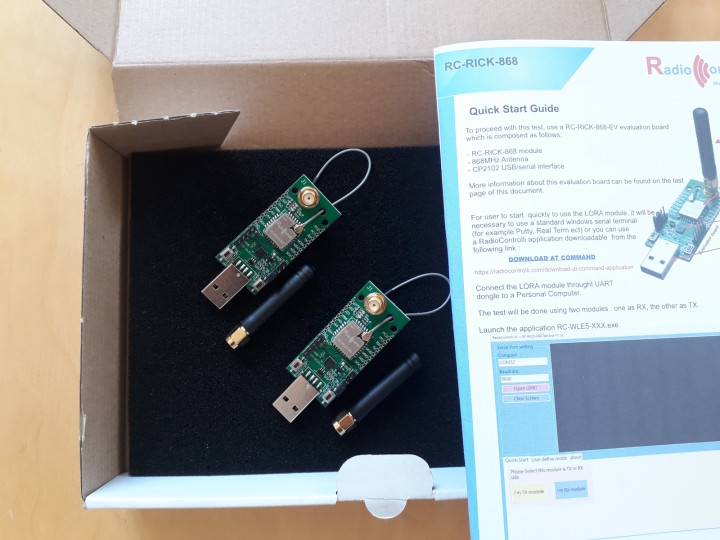
The RC-RICK-868-EV evaluation kit includes two USB dongles, two antennas, and a quick start guide.
The contents of the kit.
RC-RICK-868 USB dongle.
The setup with a UFL connector, an SMA antenna bolted through the PCB, and a UFL-to-SMA pigtail looks a bit unusual. Since the RF output of the module is also connected to pin 16 (castellated hole) of the module, it would have been neater to route a PCB trace to a vertical SMA connector soldered to the PCB.
Be cautious when using a laptop. You might want to lift it from the desk or use a USB extension cable or hub. Otherwise, there's a risk of damaging the laptop's USB port, as the bent part of the pigtail beneath the dongle prevents the connector from being inserted straight.
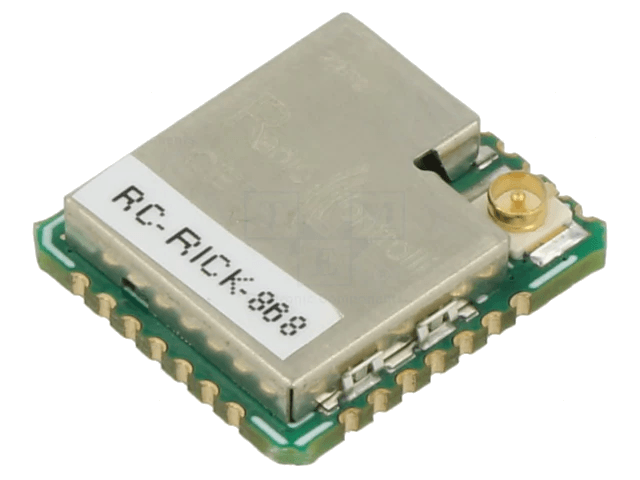
The RF module can also be purchased separately, without the USB connector, for integration into any project. This allows for a much more compact PCB. You simply need to connect the RX and TX pins of the module to the UART pins requiring wireless transmission. In this scenario, you'd need to provide your own antenna and a separate USB-to-serial integrated circuit if necessary.
RC-RICK-868 bare module. (Source: TME)
The modules are based on the STM32WLE5JC integrated circuit, which is a collaboration between STMicroelectronics and Semtech. This IC contains an ARM Cortex-M4 microcontroller and an RF transceiver on the same silicon die. The RC-RICK-868 module comes pre-programmed by Radiocontrolli as a wireless serial link.
First Test of the RC-RICK-868
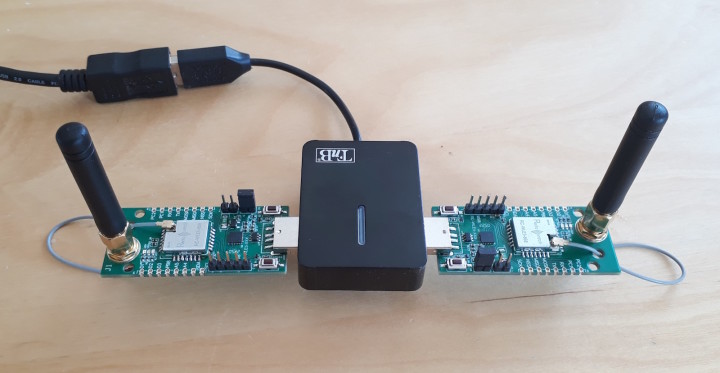
Let's connect the two dongles to separate ports on a USB hub, as shown below:
The modules plugged in for a quick test.
On my Windows 11 laptop, I had to install the CP2102 USB-to-serial drivers from the Silicon Labs (a.k.a. Silabs) website, which was to be expected. This requirement is also mentioned in Radiocontrolli's documentation.
Configuring the modules is straightforward by sending so-called "AT commands" using any terminal software. We opted for RealTerm. You can find a list of all the AT commands in the module's datasheet.
Upon the first power-up, the quick start guide recommends setting the values of several parameters. These values are stored in Flash memory to survive power cycles, unless the module is explicitly configured otherwise (using the AT+AutoSave command). The parameters include: LoRa frequency, bandwidth, spreading factor, coding rate, and preamble length. For the purpose of this review, we will stick with the suggested default values.
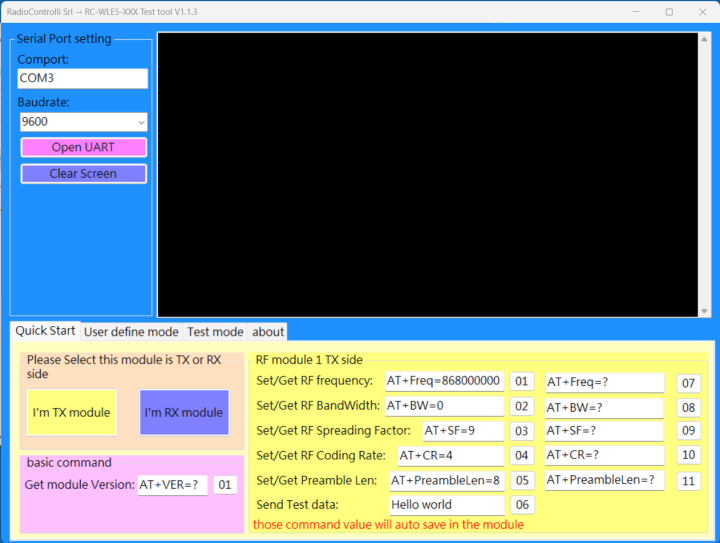
Using any terminal emulator makes this process straightforward. Radiocontrolli also offers a small tool with the most useful AT commands pre-entered, which makes the process even more seamless:
A little tool supplied by Radiocontrolli to ease configuration.
We need to execute this procedure twice: once for the transmitter and once for the receiver.
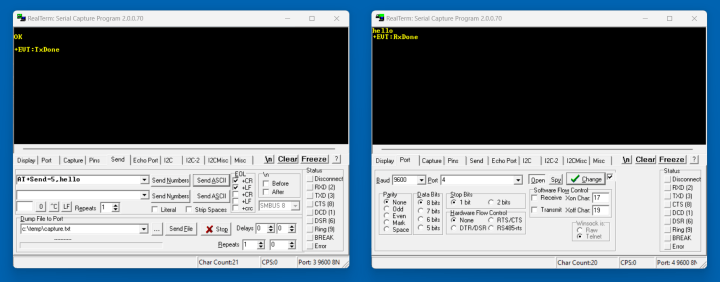
The units always boot up in "TX" mode. I decided arbitrarily that COM3 will be the transmitter and COM4 will be the receiver. It's necessary to send the "AT+RX" command to COM4 before we can test the transmission. Then, using the terminal emulator (in this case, RealTerm), we can send our first wireless message:
Success!
And indeed, our "hello" is transmitted wirelessly between the two USB serial ports. While this is satisfactory, it's not extraordinary, considering there was only a 15-centimeter distance between the two antennas. Now, let's try the transmission range with more realistic distances between the TX and RX units!
Range Testing
For range testing, one of the modules (acting as the transmitter) remains connected to a PC. Using a Python script, data is continuously transmitted with a 1-second delay between each transmission. This delay is essential because continuous transmission is strictly prohibited in most countries. In Europe, the maximum allowable duty cycle (transmit time divided by total time) for 868 MHz is 1%. It's crucial to verify the local regulations in your specific location.
For the sake of simplicity and to align with the nature of LoRa, designed for transmitting small data amounts, we've opted to send a single ASCII character in an alternating pattern: 0, 1, 0, 1...
The receiver module is then connected to a USB port on a laptop. Using a terminal emulator, we open the corresponding serial port and observe the received characters: 0, 1, 0, 1...
Subsequently, we take the laptop out on the street and gradually move away from the transmitter until the data stream stops. This indicates the point at which the connection is lost.
With the default settings and the antenna provided by Radiocontrolli, we were able to achieve a usable range of over 800 meters! This was done in an urban environment, with the transmitter located inside a concrete building. In a more rural setting with an unobstructed line of sight (LOS) between the transmitter and receiver, a range of several kilometers should be possible. For experienced users, there's the option to fine-tune the LoRa RF parameters, and using a larger antenna with higher gain could further extend the range.
Subscribe
Tag alert: Subscribe to the tag Wireless & Communication and you will receive an e-mail as soon as a new item about it is published on our website!
Building a Remote Sensor with the RC-RICK-868
One of my friends has an underground wine cellar beneath his home. Being the dedicated nerd he is, he wished to monitor the temperature and humidity within the cellar over extended periods, spanning from days to months. However, establishing a reliable wireless connection between the cellar and the house was a significant challenge. This is a perfect opportunity to try LoRa technology, known for its immunity against interference and strong attenuation.
To simulate a more realistic scenario, we connected the transmitter module to a laptop stationed within the wine cellar beneath the house. Meanwhile, the RX module was plugged to another laptop that we moved around the house.
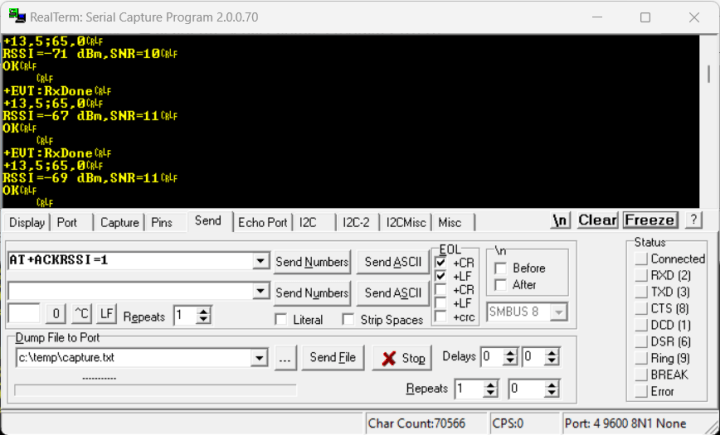
In typical cases, users of such a system would want to transmit more than just a single character. To mimic this, we modified the Python script on the transmitter side to send simulated temperature and humidity values: +13.5°C and 65.0% RH.
The RX module can be configured to show the received signal strength after each packet using the AT+ACKRSSI=1 command. This feature can be particularly useful for validating antenna performance or fine-tuning LoRa RF parameters with the appropriate commands.
Once more, the default settings produced good results. We failed to locate a spot within the house where the RX module couldn't receive the message sent by the TX module. In the most challenging instance, the recorded Received Signal Strength Indicator (RSSI) was −71 dBm, still allowing the RX module to decode the signal without issues. As per the datasheet, the receiver’s maximum sensitivity is −140 dBm, so there was always enough margin.
Checking transmission and signal strength.
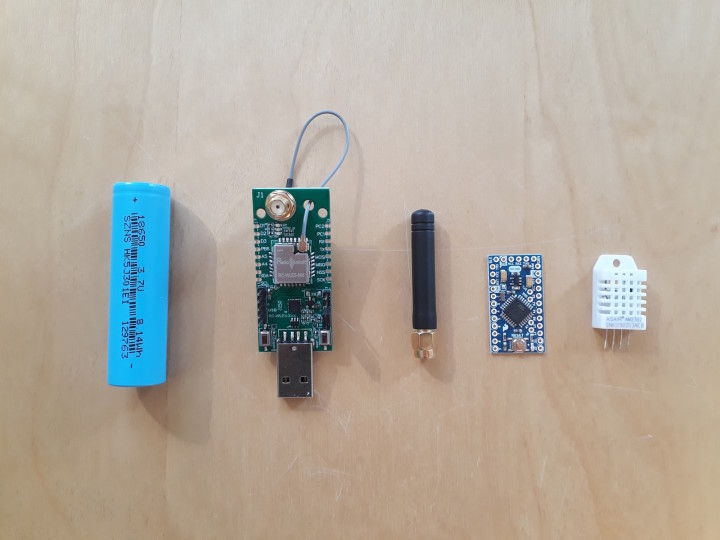
With the RC-RICK-868, an Arduino Pro Mini, a 18650-type Li-ion cell, the popular DHT22/AM2302 temperature/humidity sensor, and a compact electrical enclosure, making a custom wireless IoT sensor becomes a straightforward process. Transmitting data every 10 minutes and implementing power-saving modes should result in a battery life spanning several years.
Components needed for the build.
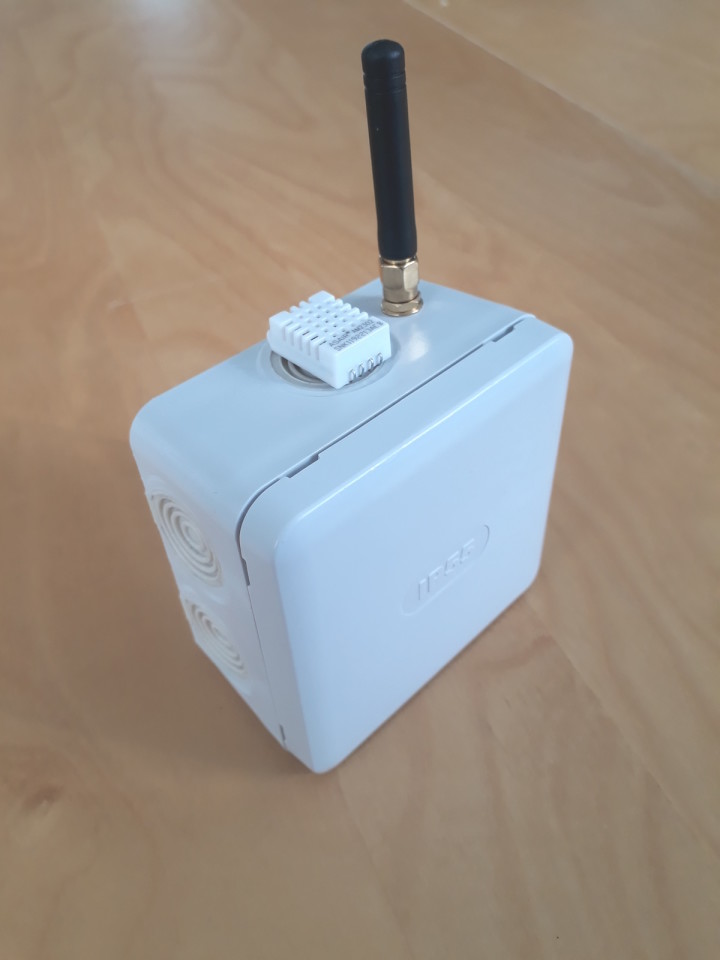
The end result: our wireless temperature and humidity sensor.
At the time of writing, my friend is working on the Arduino code. He’s having a lot of fun fine-tuning his code to read data from the AM2302 sensor and optimize the use of low-power modes in both the Arduino and the RC-RICK-868. I'm sure he'll succeed, now that we've tested the radio link!
Applications of the RC-RICK-868
In the previous example, we made a connection between a sensor “in the field” and a base station to transfer measured values from the sensor. Another potential use case would be building a remote control. The distance between these two nodes can span from a few meters to several kilometers.
The RC-RICK-868 also has the capability to encrypt the radio transmission using AES. While encryption wasn't necessary for our tests, this could be a great feature for some applications.
Future Developments and Other Applications
The RC-RICK-868 modules, pre-programmed by Radiocontrolli, are built upon another module offered by the same manufacturer: the RC-WLE5-868. Unlike the RC-RICK-868, the RC-WLE5-868 requires custom programming. For instance, it can be used to create a LoRaWAN device connected to The Things Network (TTN). Radiocontrolli informed us of their ongoing efforts to develop software examples that will be accessible on their website.
Additionally, they will be introducing 433MHz versions (RC-WLE5-433 and RC-RICK-433). This will give more possibilities for the user, depending on which ISM bands are available in different regions.
It's important to note that while these modules have the appropriate hardware onboard to be configured as LoRaWAN devices, they are not designed to be used as LoRaWAN gateways.
Subscribe
Tag alert: Subscribe to the tag Review and you will receive an e-mail as soon as a new item about it is published on our website!
Conclusion
Overall, this LoRa evaluation kit presents a compelling addition to your toolkit. The standout feature is that the two modules are pre-programmed for seamless point-to-point serial communication, which significantly streamlines the design process. While it comes at a cost of € 78 + VAT for the two USB dongles and antennas, it might not be the most budget-friendly LoRa kit available. Nevertheless, the convenience of getting all the essential components in a single package is certainly valuable.
The RC-RICK-868 modules can also be purchased individually, priced at around € 16 + VAT each. Opting for separate purchases and sourcing your own USB-to-serial converters and antennas could potentially offer a more economical alternative.


Discussion (0 comments)